Craving a sweet twist on a classic treat? Homemade Choco Tacos are your answer! This delightful dessert combines a crispy shell with creamy ice cream, making for a perfect summer snack or party favorite. In this post, I’ll share simple ingredients, easy steps, and fun tips to create your own delicious Choco Tacos. Get ready to impress your friends and family with this fun recipe! Let’s dive in!
Ingredients
Essential Ingredients for Homemade Choco Tacos
To craft these delightful treats, you need the following essential ingredients:
- 1 cup all-purpose flour
- 1/4 cup cocoa powder
- 1/4 cup unsalted butter, softened
- 1/4 cup sugar
- 1/4 teaspoon salt
- 1 large egg
- 1/2 teaspoon vanilla extract
- 1/2 cup chocolate ice cream
- 1/2 cup whipped cream
- 1/4 cup crushed nuts (almonds or walnuts)
- 1/4 cup chocolate chips (for drizzling)
These ingredients come together to create a rich and delicious dessert. The cocoa powder gives the taco shells a deep chocolate flavor. Butter adds a nice softness to the dough. You can easily find these items at any grocery store.
Optional Toppings and Substitutions
Adding toppings can make your Choco Tacos even more fun. Here are some optional ideas:
- Caramel sauce for extra sweetness
- Sprinkles for a pop of color
- Fresh fruit, like strawberries or bananas
- Different nuts, like pecans or peanuts
If you want to change things up, swap chocolate ice cream with vanilla or coffee. You can use dairy-free ice cream if you need a vegan option. The choices are endless, so feel free to let your creativity flow!
Recommended Ice Cream Flavors
Choosing the right ice cream is key. Here are my top picks:
- Classic chocolate for a rich experience
- Mint chocolate chip for a refreshing twist
- Cookies and cream for a crunchy bite
- Strawberry for a fruity flavor
Each flavor pairs well with the chocolate taco shell. You can mix and match to find your favorite combo. Experimenting with flavors makes cooking fun and personal.Enjoy your delicious homemade Choco Tacos!
Step-by-Step Instructions
Making the Taco Shells
To start, gather your ingredients. You will need:
- 1 cup all-purpose flour
- 1/4 cup cocoa powder
- 1/4 cup unsalted butter, softened
- 1/4 cup sugar
- 1/4 teaspoon salt
- 1 large egg
- 1/2 teaspoon vanilla extract
In a mixing bowl, combine the flour, cocoa powder, sugar, and salt. Mix them well to ensure even flavor. In another bowl, cream the softened butter with sugar until it is light and fluffy. This step is key for a nice texture. Add the egg and vanilla extract to the butter mixture. Mix until everything is combined. Slowly add the dry ingredients to the wet mixture. Stir until a smooth dough forms. Wrap the dough in plastic wrap and put it in the fridge for about 30 minutes. This helps the dough firm up, making it easier to shape later.
Shaping and Baking the Tacos
Preheat your oven to 350°F (175°C). Roll out the chilled dough on a floured surface. Aim for about 1/4 inch thick. Cut out circles, about 5 inches in diameter. Lay each circle over the edges of an upside-down muffin tin. This will create the taco shape. Bake the shells for about 8-10 minutes. They should be firm but not too hard. Once baked, let the taco shells cool completely before filling them.
Assembling Your Homemade Choco Tacos
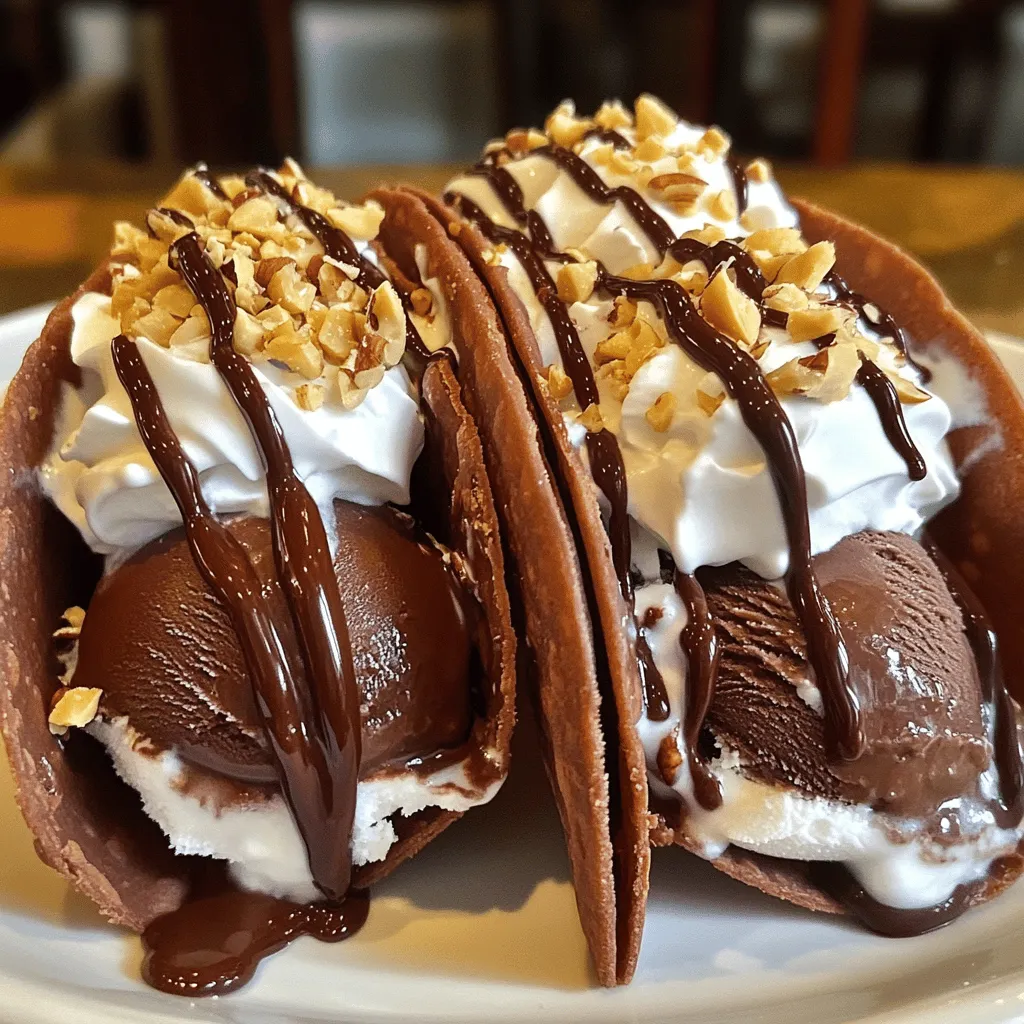
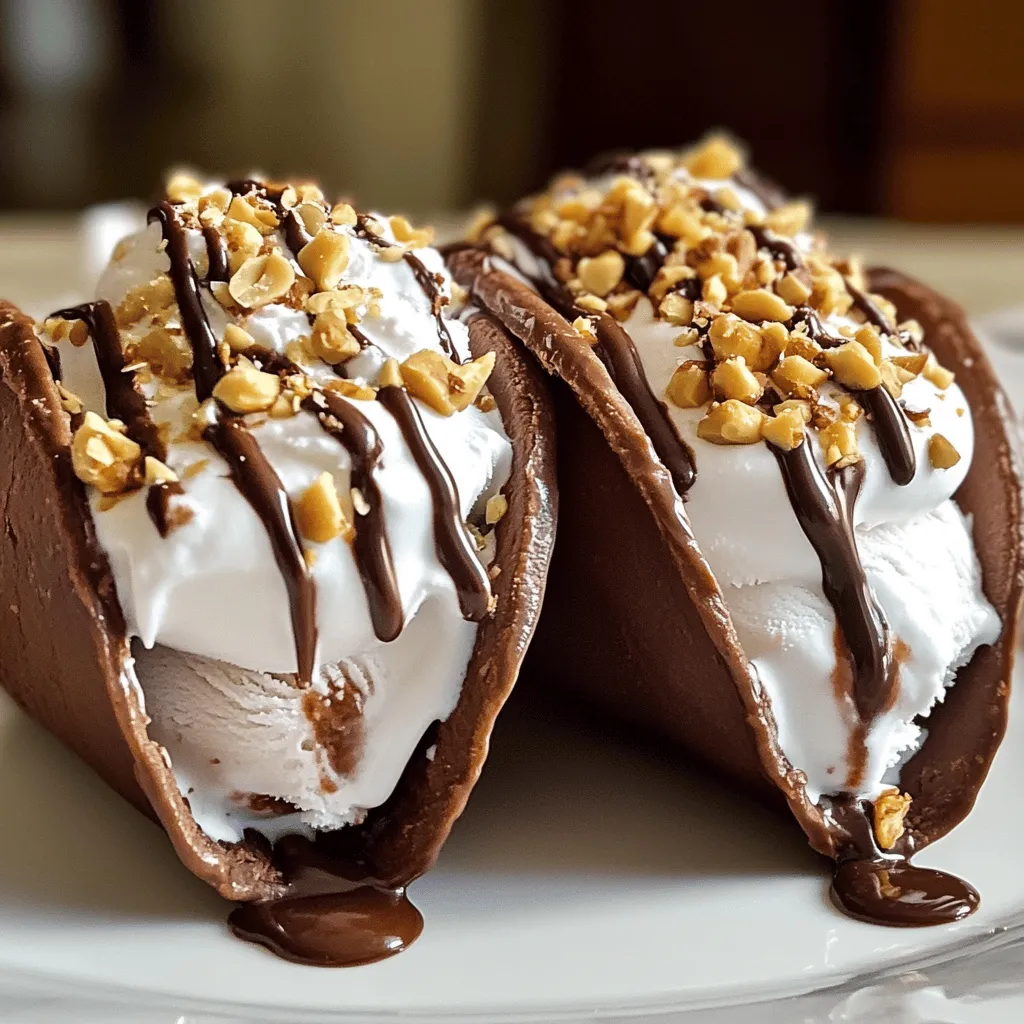
Now it’s time for the fun part! Fill each taco shell with a scoop of chocolate ice cream. Make sure to pack it in well. Top it with whipped cream and a sprinkle of crushed nuts for some crunch. You can use almonds or walnuts, whichever you prefer. For the final touch, melt the chocolate chips in the microwave. Use 15-second increments to avoid burning. Drizzle the melted chocolate over the filled tacos. Now, your homemade choco tacos are ready to enjoy!
Tips & Tricks
Achieving the Perfect Taco Shell Texture
To make a great taco shell, you need the right dough. Use a mix of flour and cocoa powder. This gives the shell a rich taste. Roll the dough to 1/4 inch thick. Thin shells may break, while thick ones can be chewy. Bake the shells until they are firm but not hard. Let them cool completely before filling. This helps keep them crunchy.
Customization Ideas for Filling and Toppings
You can change your fillings and toppings. Try different ice cream flavors like vanilla or mint. You could also add fresh fruit, like strawberries or bananas. For toppings, use whipped cream, crushed nuts, or sprinkles. You can even drizzle caramel or peanut butter for a twist. This lets you create your own fun flavor combinations.
How to Store and Keep Fresh
To keep your Choco Tacos fresh, store them in an airtight container. This helps prevent them from getting soggy. If you want to save them for later, freeze the taco shells. Just fill them right before serving. This keeps the shells crispy and the ice cream cold. Enjoy your Homemade Choco Tacos anytime!
Variations
Different Flavor Combinations
You can mix up the flavors in your Choco Tacos. Try using different ice creams, like vanilla or mint. Want something fruity? Use strawberry ice cream instead. You can even add a swirl of peanut butter for a nutty twist. The taco shell can also change. Add cinnamon to the dough for a warm spice. Or, use almond flour for a nutty flavor. Each choice creates a new dessert!
Vegan and Dairy-Free Alternatives
Making Choco Tacos vegan is easy. Swap the egg for a flaxseed mixture. Just blend one tablespoon of ground flaxseed with three tablespoons of water. For the ice cream, choose a coconut or almond-based option. Use plant-based butter in the shell for a dairy-free treat. With these swaps, you can enjoy Choco Tacos without any animal products!
Creative Serving Suggestions
Serve your Choco Tacos in fun ways! Place them on a colorful plate for a party. You can stack them for a fun dessert tower. Drizzle sauces like caramel or strawberry on the plate. Add fresh fruit beside the tacos for a pop of color. You can even sprinkle edible glitter on top for a festive touch. There are no rules—let your creativity shine!
Storage Info
Best Practices for Storing Choco Tacos
To keep your choco tacos fresh, store them in an airtight container. This helps prevent them from getting soggy. You can place parchment paper between layers to keep them nice. Keep the tacos in the fridge if you plan to eat them within a few days. If you want them to last longer, freezing is a great option.
Freezing Instructions for Long-Term Storage
If you want to enjoy choco tacos later, you can freeze them. First, let the taco shells cool completely. Wrap each shell in plastic wrap to protect it. Then, place the wrapped shells in a freezer-safe bag. They can stay frozen for up to three months. When you want to eat them, just thaw in the fridge overnight.
Reheating Tips for Taco Shells
To reheat taco shells, preheat your oven to 350°F (175°C). Place the shells on a baking sheet for about 5 minutes. This helps make them crispy again. Avoid using a microwave, as it can make the shells chewy. Enjoy your choco tacos warm and crunchy!
FAQs
How to Make Choco Tacos without an Oven?
You can make Choco Tacos without an oven by using a stovetop method. Instead of baking, heat a skillet over medium heat. Roll out your dough as normal. Then, cook each taco shell in the skillet for about 2-3 minutes on each side. This method gives you a nice, warm taco shell without baking.
Can I use another type of ice cream for Choco Tacos?
Yes, you can use any flavor of ice cream you like. Vanilla, strawberry, or even mint chocolate chip work great. Just remember to keep the texture creamy. This will help your Choco Tacos stay delicious and easy to eat.
How long do homemade Choco Tacos last?
Homemade Choco Tacos can last in the freezer for up to two weeks. Store them in an airtight container to keep them fresh. If you leave them out at room temperature, eat them within a few hours. Enjoy them fresh for the best taste!
Homemade Choco Tacos are fun and easy to make. We covered the basic ingredients, step-by-step instructions, and tips for success. You learned about different flavors and how to store them properly.
As you try this recipe, remember you can switch ingredients to match your taste. Enjoy experimenting with toppings and fillings. These treats are sure to impress!

