Southern Pickled Okra Simple and Flavorful Recipe

WANT TO SAVE THIS RECIPE?

Are you ready to dive into a tangy delight? In this blog post, I’ll show you how to make Southern Pickled Okra that’s simple and bursting with flavor. Whether you’re a novice cook or a kitchen pro, you can create this tasty treat at home. I’ll guide you through each step—from choosing the freshest okra to packing jars with your special pickling mix. Let’s get started on this delicious journey!

Ingredients for Southern Pickled Okra

Fresh Okra

For the best pickled okra, start with fresh okra. You need 1 pound of okra. Look for firm, bright green pods. Avoid any that are soft or blemished. Fresh okra brings a crisp texture and great flavor to the dish.

Pickling Liquid Components

The pickling liquid is key to good flavor. Here’s what you need:

– 2 cups distilled white vinegar

– 1 cup water

– 3 tablespoons kosher salt

– 2 tablespoons granulated sugar

The vinegar gives that tangy taste, while the salt and sugar balance the flavors. Mixing these in a pot and heating until dissolved creates a tasty brine.

Spices and Flavorings

Adding spices makes the okra pop. Use these ingredients:

– 4 cloves garlic, peeled

– 1 tablespoon mustard seeds

– 1 tablespoon coriander seeds

– 1 teaspoon red pepper flakes (adjust for spice level)

– 1 teaspoon black peppercorns

– Fresh dill sprigs (optional)

These spices add depth and warmth to your pickled okra. Feel free to adjust the red pepper flakes based on your spice preference. If you love dill, toss in a few sprigs for extra flavor! These ingredients will make your Southern Pickled Okra truly shine. For the full recipe, check out the complete guide.

Step-by-Step Instructions

How to Sterilize Jars

To start, you need clean jars. First, boil water in a large pot. Then, place your jars and lids in the boiling water. Let them sit for 10 minutes. This kills any germs. After that, take them out and let them cool. Make sure they are dry before using.

Preparing the Pickling Liquid

Next, make the pickling liquid. In a medium saucepan, mix 2 cups of distilled white vinegar, 1 cup of water, 3 tablespoons of kosher salt, and 2 tablespoons of sugar. Heat it over medium heat. Stir until the salt and sugar dissolve. Once it boils, remove it from the heat. Let it sit and cool for a moment.

Packing the Jars with Okra

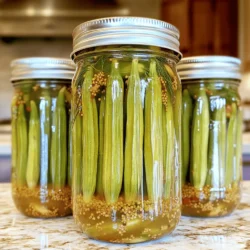
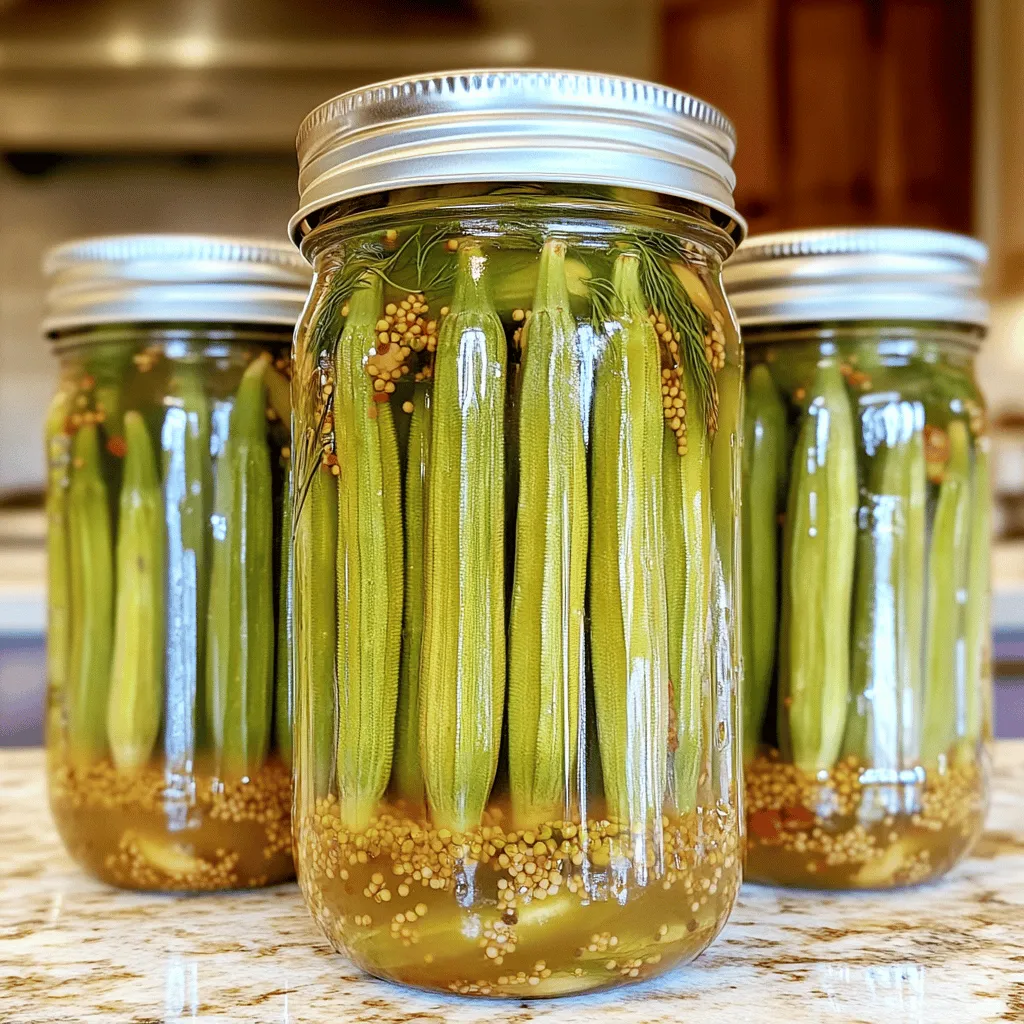
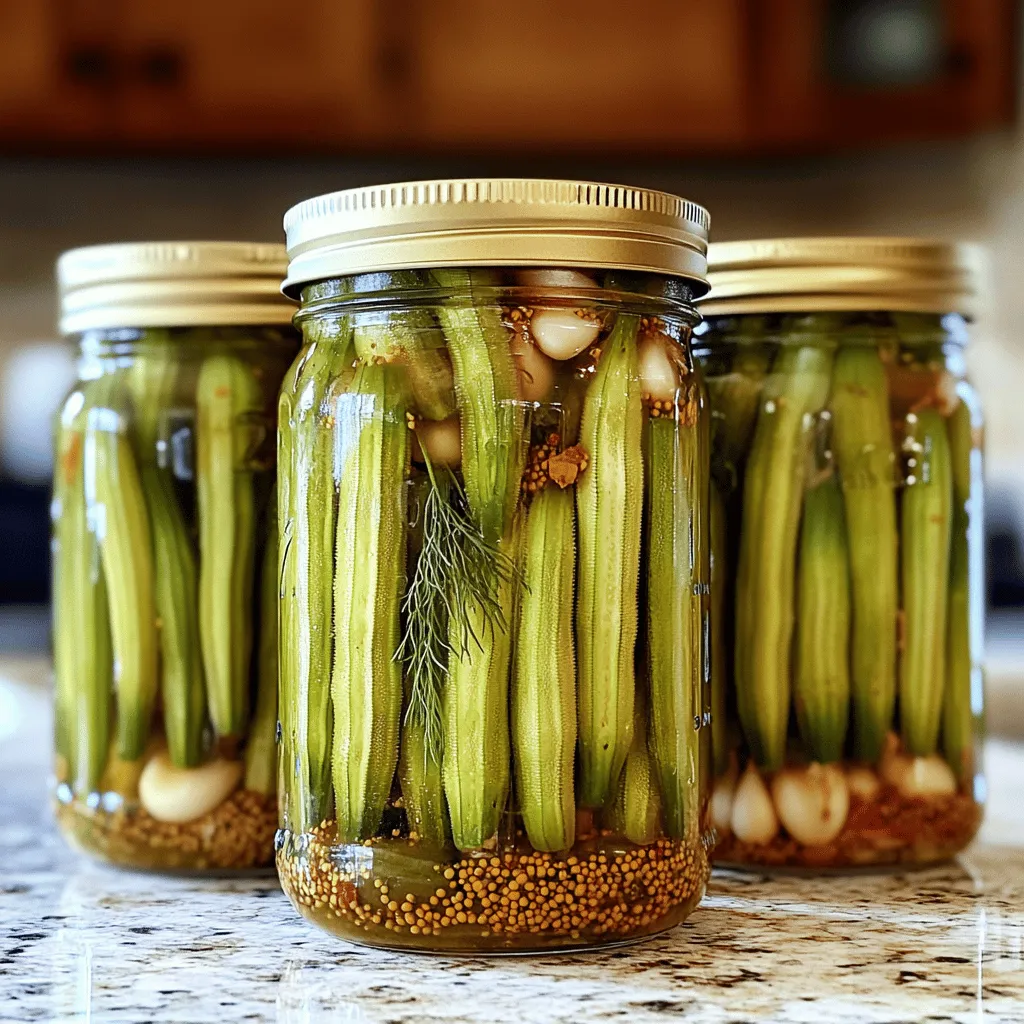
Now, it’s time to pack the jars. In each sterilized jar, place 1 clove of garlic and 1 tablespoon of mustard seeds. Add ¼ tablespoon of coriander seeds, ¼ teaspoon of red pepper flakes, and ¼ teaspoon of black peppercorns. You can add fresh dill for more flavor if you like. Next, pack the okra vertically into the jar. Leave about half an inch at the top. Finally, pour the hot pickling liquid over the okra. Make sure the okra is fully submerged. Wipe the jar rims clean and seal them tightly. Let the jars cool to room temperature. For the best taste, wait at least 5 days before you try them.

For the complete recipe, check the Full Recipe section.

Tips & Tricks for Perfect Southern Pickled Okra

Adjusting Spice Levels

You control the spice! If you like heat, add more red pepper flakes. Start with one teaspoon for a kick. Taste the pickling liquid before you pour it over the okra. If it’s too spicy, dilute it with more water or vinegar. You can always add more, but it’s tough to take it out.

Best Practices for Storage

Store your pickled okra in a cool, dark place. A pantry or cupboard works well. Once opened, keep the jars in the fridge for the best taste. Make sure to keep the okra submerged in the liquid. This keeps them fresh and tasty for longer.

Achieving the Best Flavor

Time is your friend! Let the okra sit for at least five days before tasting. This allows the flavors to blend and grow. Use fresh ingredients for the best taste. Herbs like dill add a nice touch. For the full recipe, check out the details above. Enjoy your pickled okra as a snack or in salads!

Variations of Southern Pickled Okra

Adding Different Spices

You can change the flavor of your pickled okra by adding different spices. Try using dill seeds or fennel seeds for a new twist. You can also add allspice berries or cloves for a warm, aromatic flavor. Each spice brings its own unique taste. It’s fun to experiment with what you have on hand. Just remember to keep the balance, so the okra still shines through.

Using Alternative Vinegars

The vinegar you choose can change the taste of your pickled okra. While distilled white vinegar is a classic, you can try apple cider vinegar for a fruity hint. Rice vinegar offers a milder flavor. If you like tanginess, use red wine vinegar. Each vinegar will give your okra a different character. You can mix vinegars too, just keep the ratio balanced.

Incorporating Fresh Herbs

Adding fresh herbs is a great way to boost flavor. Dill is a classic choice, but you can also use thyme or basil. Fresh oregano adds a nice earthy note. Simply tuck in a few sprigs when you pack your jars. The herbs will infuse their flavor into the okra as they pickle. This results in a fresh, vibrant taste that makes your pickled okra shine.

For the full recipe, check out the detailed instructions above.

Storage Info for Southern Pickled Okra

How to Store Pickled Okra

Store your pickled okra in the refrigerator. Keep it in a clean jar with a tight lid. Make sure the okra stays submerged in the pickling juice. This helps maintain its crispness and flavor. If you open a jar, always use a clean spoon to avoid contamination.

Shelf Life Guidelines

Homemade pickled okra lasts about 3 months in the fridge. After opening, consume it within 2 weeks for the best taste. If you notice any off smell or mold, discard it. Proper storage helps keep your okra safe and tasty.

Freezing Options

You can freeze pickled okra, but it may change texture. To do this, remove the okra from the jar. Place it in a freezer-safe bag or container. Make sure to remove as much air as possible. Frozen pickled okra can last up to 6 months, but it’s best used in cooked dishes.

Remember, you want to enjoy that crunch and tang! For the full recipe, check out the instructions above.

FAQs About Southern Pickled Okra

How Long Does It Take for Pickled Okra to Be Ready?

Pickled okra needs at least five days to fully develop its flavor. During this time, the okra absorbs the tangy brine. The longer you wait, the better the flavor gets. After about a week, the pickled okra reaches its peak taste. You can try it at five days, but it’s often best to wait longer.

Can I Use Frozen Okra for Pickling?

Using frozen okra for pickling is not the best choice. Frozen okra tends to lose its crisp texture. The freezing process breaks down the cell walls. This makes the okra mushy when pickled. For the best results, always use fresh okra. Fresh okra will give you that perfect crunch and flavor.

Where Can I Buy Quality Southern Pickled Okra?

You can find quality Southern pickled okra at local farmers’ markets. Many specialty stores also carry it. Look for brands that focus on small-batch or homemade products. You can also buy it online from reputable sellers. If you prefer, try making your own with the full recipe.

Southern pickled okra is easy to make with fresh ingredients and simple steps. You learned how to prepare the jars, mix the pickling liquid, and pack the okra. I shared tips to adjust spice levels and storage best practices. You can also explore variations using different spices and vinegars. Remember to store your pickled okra properly, as this affects its shelf life. With this guide, you can enjoy tasty, homemade pickled okra whenever you like. Dive in and make your own batch today!

For the best pickled okra, start with fresh okra. You need 1 pound of okra. Look for firm, bright green pods. Avoid any that are soft or blemished. Fresh okra brings a crisp texture and great flavor to the dish. The pickling liquid is key to good flavor. Here’s what you need: - 2 cups distilled white vinegar - 1 cup water - 3 tablespoons kosher salt - 2 tablespoons granulated sugar The vinegar gives that tangy taste, while the salt and sugar balance the flavors. Mixing these in a pot and heating until dissolved creates a tasty brine. Adding spices makes the okra pop. Use these ingredients: - 4 cloves garlic, peeled - 1 tablespoon mustard seeds - 1 tablespoon coriander seeds - 1 teaspoon red pepper flakes (adjust for spice level) - 1 teaspoon black peppercorns - Fresh dill sprigs (optional) These spices add depth and warmth to your pickled okra. Feel free to adjust the red pepper flakes based on your spice preference. If you love dill, toss in a few sprigs for extra flavor! These ingredients will make your Southern Pickled Okra truly shine. For the full recipe, check out the complete guide. To start, you need clean jars. First, boil water in a large pot. Then, place your jars and lids in the boiling water. Let them sit for 10 minutes. This kills any germs. After that, take them out and let them cool. Make sure they are dry before using. Next, make the pickling liquid. In a medium saucepan, mix 2 cups of distilled white vinegar, 1 cup of water, 3 tablespoons of kosher salt, and 2 tablespoons of sugar. Heat it over medium heat. Stir until the salt and sugar dissolve. Once it boils, remove it from the heat. Let it sit and cool for a moment. Now, it's time to pack the jars. In each sterilized jar, place 1 clove of garlic and 1 tablespoon of mustard seeds. Add ¼ tablespoon of coriander seeds, ¼ teaspoon of red pepper flakes, and ¼ teaspoon of black peppercorns. You can add fresh dill for more flavor if you like. Next, pack the okra vertically into the jar. Leave about half an inch at the top. Finally, pour the hot pickling liquid over the okra. Make sure the okra is fully submerged. Wipe the jar rims clean and seal them tightly. Let the jars cool to room temperature. For the best taste, wait at least 5 days before you try them. For the complete recipe, check the Full Recipe section. You control the spice! If you like heat, add more red pepper flakes. Start with one teaspoon for a kick. Taste the pickling liquid before you pour it over the okra. If it’s too spicy, dilute it with more water or vinegar. You can always add more, but it’s tough to take it out. Store your pickled okra in a cool, dark place. A pantry or cupboard works well. Once opened, keep the jars in the fridge for the best taste. Make sure to keep the okra submerged in the liquid. This keeps them fresh and tasty for longer. Time is your friend! Let the okra sit for at least five days before tasting. This allows the flavors to blend and grow. Use fresh ingredients for the best taste. Herbs like dill add a nice touch. For the full recipe, check out the details above. Enjoy your pickled okra as a snack or in salads! {{image_2}} You can change the flavor of your pickled okra by adding different spices. Try using dill seeds or fennel seeds for a new twist. You can also add allspice berries or cloves for a warm, aromatic flavor. Each spice brings its own unique taste. It’s fun to experiment with what you have on hand. Just remember to keep the balance, so the okra still shines through. The vinegar you choose can change the taste of your pickled okra. While distilled white vinegar is a classic, you can try apple cider vinegar for a fruity hint. Rice vinegar offers a milder flavor. If you like tanginess, use red wine vinegar. Each vinegar will give your okra a different character. You can mix vinegars too, just keep the ratio balanced. Adding fresh herbs is a great way to boost flavor. Dill is a classic choice, but you can also use thyme or basil. Fresh oregano adds a nice earthy note. Simply tuck in a few sprigs when you pack your jars. The herbs will infuse their flavor into the okra as they pickle. This results in a fresh, vibrant taste that makes your pickled okra shine. For the full recipe, check out the detailed instructions above. Store your pickled okra in the refrigerator. Keep it in a clean jar with a tight lid. Make sure the okra stays submerged in the pickling juice. This helps maintain its crispness and flavor. If you open a jar, always use a clean spoon to avoid contamination. Homemade pickled okra lasts about 3 months in the fridge. After opening, consume it within 2 weeks for the best taste. If you notice any off smell or mold, discard it. Proper storage helps keep your okra safe and tasty. You can freeze pickled okra, but it may change texture. To do this, remove the okra from the jar. Place it in a freezer-safe bag or container. Make sure to remove as much air as possible. Frozen pickled okra can last up to 6 months, but it’s best used in cooked dishes. Remember, you want to enjoy that crunch and tang! For the full recipe, check out the instructions above. Pickled okra needs at least five days to fully develop its flavor. During this time, the okra absorbs the tangy brine. The longer you wait, the better the flavor gets. After about a week, the pickled okra reaches its peak taste. You can try it at five days, but it’s often best to wait longer. Using frozen okra for pickling is not the best choice. Frozen okra tends to lose its crisp texture. The freezing process breaks down the cell walls. This makes the okra mushy when pickled. For the best results, always use fresh okra. Fresh okra will give you that perfect crunch and flavor. You can find quality Southern pickled okra at local farmers' markets. Many specialty stores also carry it. Look for brands that focus on small-batch or homemade products. You can also buy it online from reputable sellers. If you prefer, try making your own with the full recipe. Southern pickled okra is easy to make with fresh ingredients and simple steps. You learned how to prepare the jars, mix the pickling liquid, and pack the okra. I shared tips to adjust spice levels and storage best practices. You can also explore variations using different spices and vinegars. Remember to store your pickled okra properly, as this affects its shelf life. With this guide, you can enjoy tasty, homemade pickled okra whenever you like. Dive in and make your own batch today!

Southern Pickled Okra

Discover how to make delicious Southern Pickled Okra with this easy recipe! Using fresh okra, garlic, and spices, you can create a tangy snack perfect for any occasion. This guide walks you through the steps to pickle your own okra at home, ensuring a delightful crunch in every bite. Don't miss out on bringing this Southern classic to your kitchen. Click through to explore the full recipe and impress your friends with your pickling skills!

Ingredients
  

1 pound fresh okra, washed and trimmed

2 cups distilled white vinegar

1 cup water

3 tablespoons kosher salt

2 tablespoons granulated sugar

4 cloves garlic, peeled

1 tablespoon mustard seeds

1 tablespoon coriander seeds

1 teaspoon red pepper flakes (adjust for spice level)

1 teaspoon black peppercorns

Fresh dill sprigs (optional, for added flavor)

Instructions
 

Begin by sterilizing your jars and lids by placing them in boiling water for 10 minutes. Remove and allow to cool.

    In a medium saucepan, combine the vinegar, water, kosher salt, and sugar. Bring this mixture to a boil over medium heat, stirring until the salt and sugar are dissolved. Once boiling, remove from heat and set aside.

      In each sterilized jar, place 1 clove of garlic, 1 tablespoon of mustard seeds, ¼ tablespoon of coriander seeds, ¼ teaspoon of red pepper flakes, and ¼ teaspoon of black peppercorns. For extra flavor, add a few sprigs of dill if desired.

        Pack the okra vertically into the jars, allowing some space at the top (about half an inch).

          Pour the hot vinegar mixture over the okra, ensuring they are submerged. Wipe the rim of the jars with a clean cloth to remove any residue.

            Seal the jars tightly with lids while they are still hot, allowing the pickling juice to create a vacuum seal as they cool.

              Let the jars cool to room temperature before refrigerating. For optimum flavor, allow the okra to pickle for at least 5 days before tasting.

                Prep Time: 15 minutes | Total Time: 1 week (including pickling) | Servings: Makes 4 pint jars

                  - Presentation Tips: Serve the pickled okra in a decorative jar with a ribbon for gifting, or arrange them on a charcuterie board as a vibrant and tangy snack!

                    WANT TO SAVE THIS RECIPE?

                    Leave a Comment

                    Recipe Rating