

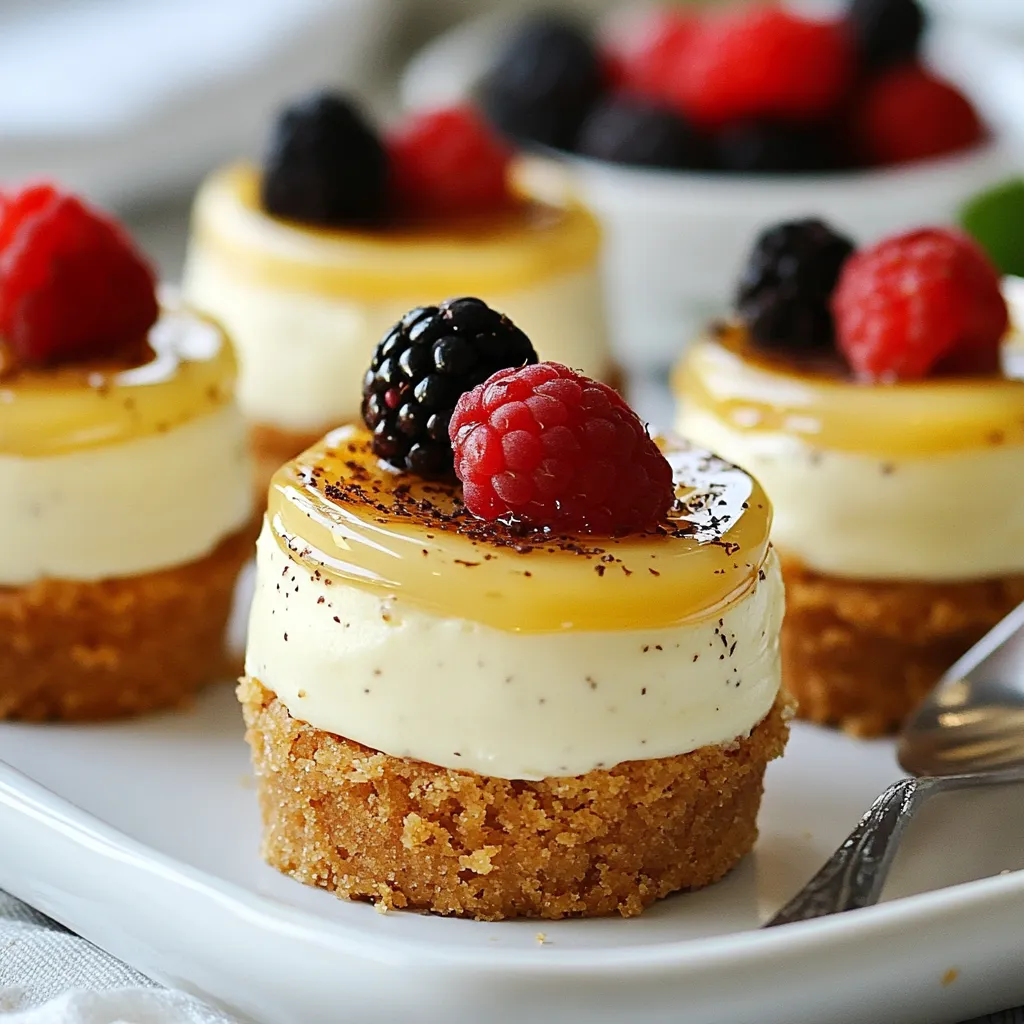
Indulging in Vanilla Bean Crème Brûlée Cheesecake Cups is a treat you won’t forget! These delightful cups blend creamy cheesecake with rich vanilla flavors and a crunchy brûlée topping. They are perfect for fancy dinners or casual gatherings. I’ll guide you through each step, from mixing the crust to creating the perfect brûlée finish. Let’s dive into making this delicious dessert that will impress your friends and family!
Why I Love This Recipe
- Decadent Flavor: This cheesecake combines the rich taste of vanilla bean with a creamy texture, making every bite a luxurious experience.
- Individual Servings: These cups are perfect for portion control and are easy to serve at gatherings, ensuring everyone gets their own delightful treat.
- Brûlée Finish: The caramelized sugar topping adds a delightful crunch that perfectly contrasts the smooth cheesecake filling.
- Simple Preparation: With straightforward steps and minimal ingredients, this recipe is easy enough for beginners to tackle while still impressing guests.
Ingredients
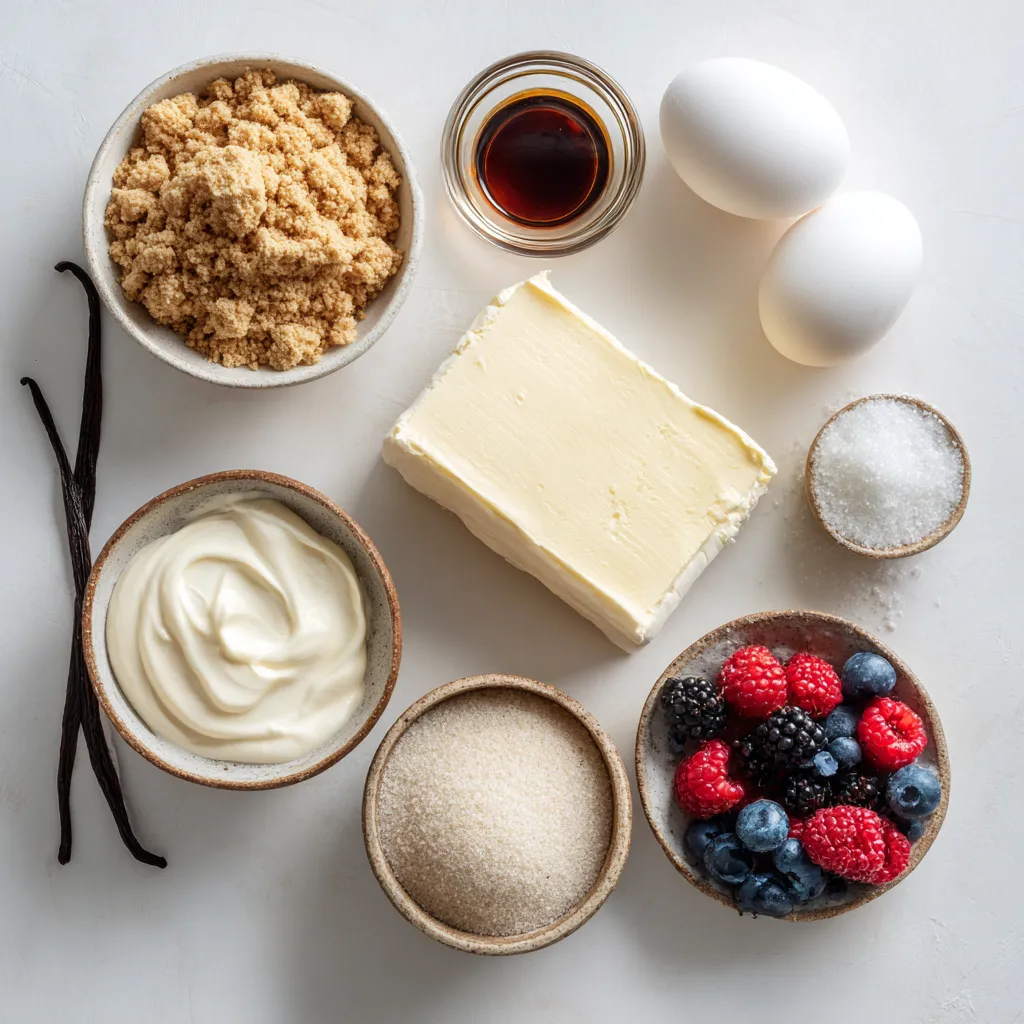
List of Ingredients
- 1 cup digestive biscuits, crushed
- 4 tablespoons unsalted butter, melted
- 8 oz cream cheese, softened
- 1/2 cup granulated sugar
- 1 teaspoon vanilla extract
- 1 vanilla bean, seeds scraped
- 2 large eggs
- 1 cup heavy cream
- 2 tablespoons brown sugar (for topping)
- Fresh berries (for garnish, optional)
To create a delightful treat, you need simple ingredients. Digestive biscuits give a nice crunch and base. Melted unsalted butter binds them together. Cream cheese adds creaminess, while granulated sugar sweetens the mix.
Vanilla extract and vanilla bean offer rich vanilla flavor. Using both gives depth that makes the dessert special. Large eggs help set the filling. Heavy cream makes it light and fluffy.
For the topping, brown sugar caramelizes beautifully. You can add fresh berries or mint for a pretty touch. These ingredients come together to make your vanilla bean crème brûlée cheesecake cups shine.
Step-by-Step Instructions
Preparing the Crust
- Mixing Digestive Biscuits and Butter
Start by crushing 1 cup of digestive biscuits. You can use a food processor or place them in a zip-top bag and crush them with a rolling pin. Next, melt 4 tablespoons of unsalted butter. Combine the crushed biscuits and melted butter in a mixing bowl. Stir until the biscuits are well-coated.
- Forming the Crust in Serving Cups
Divide the mixture evenly among 6 serving cups. Press the mixture firmly into the bottom of each cup to form a solid crust. This step helps create a sturdy base for your cheesecake filling. Set the cups aside while you prepare the filling.
Crafting the Cheesecake Filling
- Beating Cream Cheese and Sugar
In a clean bowl, beat 8 oz of softened cream cheese with 1/2 cup of granulated sugar. Use an electric mixer to mix until it becomes smooth and creamy. This is an important step for a silky texture.
- Adding Vanilla Flavors
Next, add 1 teaspoon of vanilla extract and the seeds from 1 vanilla bean. Stir these into the cream cheese mixture until well blended. The vanilla bean adds a rich flavor and tiny flecks that look beautiful.
- Incorporating Eggs
Add 2 large eggs, one at a time. Mix well after each addition. This ensures that the eggs blend smoothly into the mixture, which helps the cheesecake set properly.
Finalizing and Baking
- Whipping Heavy Cream
In a separate bowl, whip 1 cup of heavy cream until soft peaks form. This adds lightness to the cheesecake. Be careful not to over-whip it, as it can become grainy.
- Filling Cups with Cheesecake Mixture
Gently fold the whipped cream into the cream cheese mixture. This should be done carefully to keep the mixture light. Spoon the cheesecake filling over the crusts in each cup. Smooth the tops with a spatula for a nice finish.
- Baking Instructions and Water Bath Technique
Preheat your oven to 325°F (160°C). Place your filled cups in a baking dish. Fill the dish with hot water until it reaches halfway up the sides of the cups. This water bath helps the cheesecake bake evenly. Bake for about 25-30 minutes. The edges should be set but the center should be slightly jiggly.
- Cooling and Chilling Time
After baking, carefully remove the cups from the oven. Let them cool at room temperature for about an hour. Then place them in the fridge for at least 4 hours, or overnight. Chilling lets the flavors deepen and the texture set perfectly.
Tips & Tricks
Achieving the Perfect Cheesecake Texture
Using room temperature ingredients is key. This helps everything mix well. Cold cream cheese may clump and make your batter lumpy. Let it sit out for about 30 minutes before you start.
Another tip is to avoid overmixing. Mix just until combined. Overmixing can add too much air and lead to cracks during baking.
Perfecting the Brûlée Topping
To get that perfect brûlée topping, a kitchen torch is your best friend. Hold the torch about 2 inches above the sugar. Move it slowly to melt the sugar evenly. Watch it closely to avoid burning!
If you don’t have a torch, you can use your oven broiler. Place the cups on a baking sheet, sprinkle sugar, and broil them. Keep an eye on them, as they can burn fast.
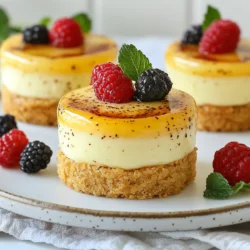
Presentation Tips
Garnishing with fresh berries adds color and flavor. Place a few berries on top of each cup for a nice touch. You can also add a mint sprig for extra flair.
For serving, these cheesecake cups pair well with coffee or sweet dessert wines. They make a perfect ending to any meal!
Pro Tips
- Use Fresh Vanilla Beans: For the best flavor, opt for fresh vanilla beans instead of vanilla extract. The seeds add a rich aroma and visual appeal to your cheesecake.
- Chill Overnight: Allowing the cheesecake cups to chill overnight not only enhances their flavor but also helps achieve a firmer texture, making them easier to serve.
- Perfect the Brûlée: When caramelizing the sugar topping, move the torch continuously to avoid burning any one spot. Aim for a golden brown color for the perfect crispy layer.
- Garnish Creatively: Fresh berries, mint, or edible flowers make beautiful garnishes. They not only enhance the presentation but also add a refreshing contrast to the rich cheesecake.
Variations
Different Flavor Options
You can give your cheesecake cups a fun twist. Adding citrus zest brightens the flavor. Use lemon or orange zest for a fresh taste. Just a teaspoon will do. Mix it into the cream cheese before adding the eggs. This little change can make your dessert feel new and exciting.
Another great option is a chocolate swirl. Melt some dark chocolate and let it cool slightly. After mixing your cream cheese and sugar, swirl in the melted chocolate. This adds a rich flavor and looks stunning. Your guests will love the surprise!
Gluten-Free Alternatives
If you want a gluten-free treat, you can switch the digestive biscuits. Use gluten-free graham crackers instead. Crush them just like the biscuits. Mix them with melted butter as you would normally. This simple swap keeps your dessert tasty and suitable for all.
Mini and Large Serving Ideas
You can easily adjust the size of your cheesecake cups. For mini servings, use smaller cups and reduce the bake time. Check them after 15-20 minutes. For larger servings, use bigger cups. You will need to bake them a bit longer. Just make sure the center still jiggles slightly. This way, you can serve the perfect portions for any event!
Storage Info
How to Store Leftover Cheesecake Cups
- Best Storage Practices in the Fridge
Store the cheesecake cups in an airtight container. This keeps them fresh and tasty. Place them in the fridge if you plan to eat them within a few days. Make sure to cover them well to prevent drying out.
- Freezing Options
You can freeze the cheesecake cups for longer storage. Wrap each cup tightly in plastic wrap. Then, place them in a freezer-safe bag. They can last up to three months in the freezer. When ready to eat, thaw them in the fridge overnight.
Shelf Life of Cheesecake Cups
- Recommended Consumption Timeframe
Enjoy your cheesecake cups within five days if stored in the fridge. After that, the texture and taste may change. If frozen, consume them within three months for the best flavor and quality.
FAQs
Can I make this cheesecake ahead of time?
Yes, you can make this cheesecake ahead of time. I recommend making it the day before. This allows the flavors to blend well. Just store it in the fridge until you are ready to serve.
What is the best way to prevent cracks in the cheesecake?
To prevent cracks, use room temperature ingredients. Mix gently to avoid incorporating too much air. Also, bake it in a water bath. This helps control the temperature and keeps the cheesecake moist.
Can I use a different type of cream cheese?
You can use low-fat cream cheese if you want a lighter version. Just remember, it may change the texture slightly. For a firmer cheesecake, stick with regular cream cheese.
Is it possible to make a dairy-free version?
Yes, you can make a dairy-free version! Use vegan cream cheese and coconut cream. This will keep the rich taste while avoiding dairy. Check labels to ensure all ingredients are dairy-free.
What should I do if I don’t have a kitchen torch?
If you lack a kitchen torch, no worries! You can use your oven’s broiler. Just watch it closely. Place the cups on a baking sheet and broil for a few minutes until the sugar caramelizes.
How can I adjust for a larger batch?
To make a larger batch, simply double the recipe. Use larger cups or a bigger pan. Adjust the baking time if needed. Check for doneness by looking for slightly jiggly centers.
This blog post covered how to make delicious cheesecake cups. We went over the ingredients, step-by-step instructions, and tips to achieve the best texture. I shared storage info and answered common questions too.
Now you have the tools to create, store, and enjoy your cheesecake cups. Remember, the key is to use room temperature ingredients and avoid overmixing. Happy bakin
Vanilla Bean Crème Brûlée Cheesecake Cups
Ingredients
- 1 cup digestive biscuits, crushed
- 4 tablespoons unsalted butter, melted
- 8 oz cream cheese, softened
- 1 2 granulated sugar
- 1 teaspoon vanilla extract
- 1 unit vanilla bean, seeds scraped
- 2 large eggs
- 1 cup heavy cream
- 2 tablespoons brown sugar (for topping)
- to taste unit fresh berries (for garnish, optional)
Instructions
- Prepare the Crust: In a mixing bowl, combine the crushed digestive biscuits with the melted butter. Mix until the biscuits are well-coated.
- Shape the Crust: Divide the biscuit mixture evenly among 6 serving cups, pressing it down firmly to create a crust. Set aside.
- Make the Cheesecake Filling: In another bowl, beat the softened cream cheese with granulated sugar using an electric mixer until smooth and creamy.
- Add Flavors: Mix in the vanilla extract and scraped vanilla bean seeds into the cream cheese mixture until well incorporated.
- Incorporate Eggs: Add eggs one at a time, mixing thoroughly after each addition until the mixture is smooth.
- Whip the Cream: In a separate bowl, whip the heavy cream until soft peaks form. Gently fold the whipped cream into the cream cheese mixture until just combined.
- Fill the Cups: Spoon the cheesecake filling over the prepared crusts in each cup, smoothing the tops with a spatula.
- Bake: Preheat the oven to 325°F (160°C). Place the cups in a baking dish and fill the dish with hot water until it reaches halfway up the sides of the cups. Bake for about 25-30 minutes, or until the edges are set but the center is slightly jiggly.
- Cool: Remove the cups from the oven and let them cool at room temperature for about an hour. Then refrigerate for at least 4 hours or overnight for the best texture.
- Brûlée Topping: Just before serving, sprinkle a thin layer of brown sugar over the top of each cheesecake cup. Using a kitchen torch, carefully caramelize the sugar until it is melted and golden, creating a crispy top.
- Garnish and Serve: If desired, garnish with fresh berries or a mint sprig on top of each cup for a pop of color.
