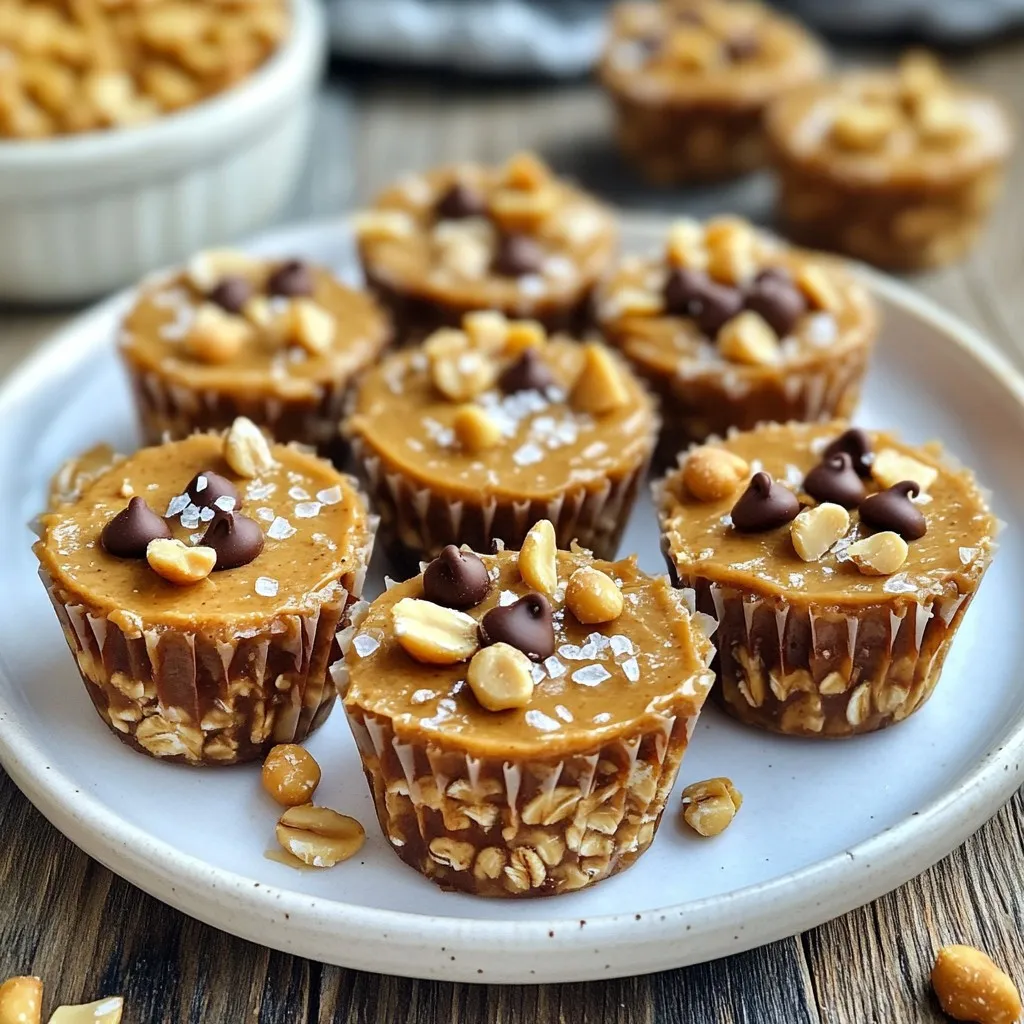
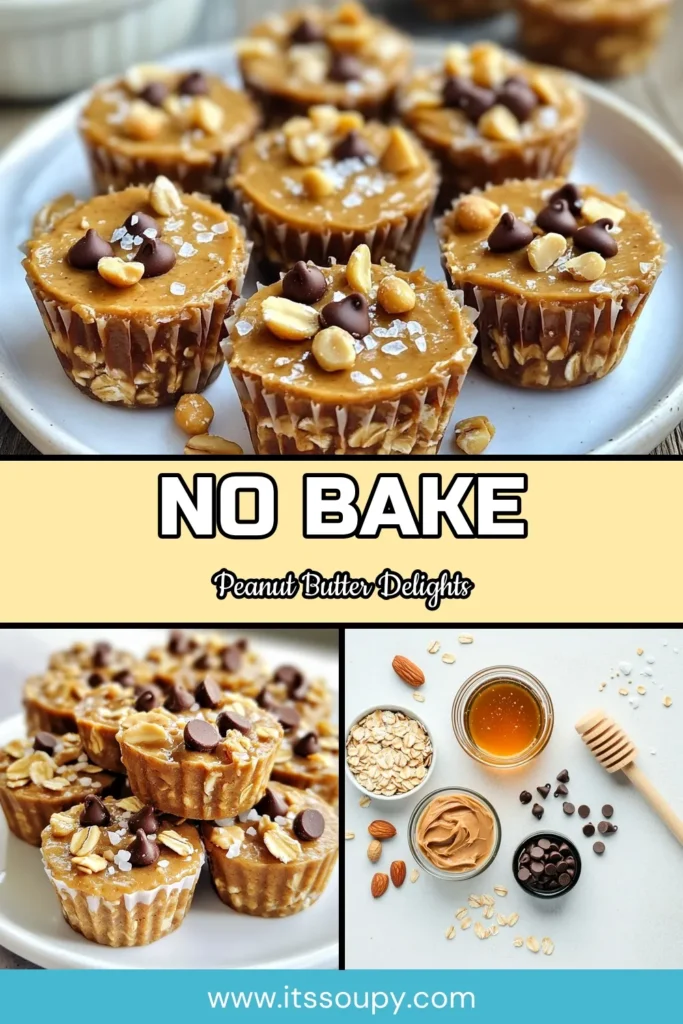
Are you ready for a sweet treat? These No-Bake Peanut Butter Oat Cups are simple, delicious, and perfect for snack time. You only need a few ingredients to whip them up. Plus, they require no baking! In this guide, I’ll share everything you need, from the best ingredients to easy steps. Let’s get started creating this tasty snack that will satisfy your cravings without the oven!
Why I Love This Recipe
- Quick and Easy: This recipe requires no baking and can be prepared in just 10 minutes, making it a perfect snack solution for busy days.
- Nutritious Ingredients: Packed with oats, peanut butter, and nuts, these cups provide a healthy balance of protein, fiber, and essential nutrients.
- Customizable Treat: You can easily swap the chocolate chips or nuts for your favorites, allowing for endless variations to suit your taste.
- Perfect for On-the-Go: These oat cups are great for a quick breakfast or snack, making them a convenient choice for busy lifestyles.
Ingredients
List of Ingredients
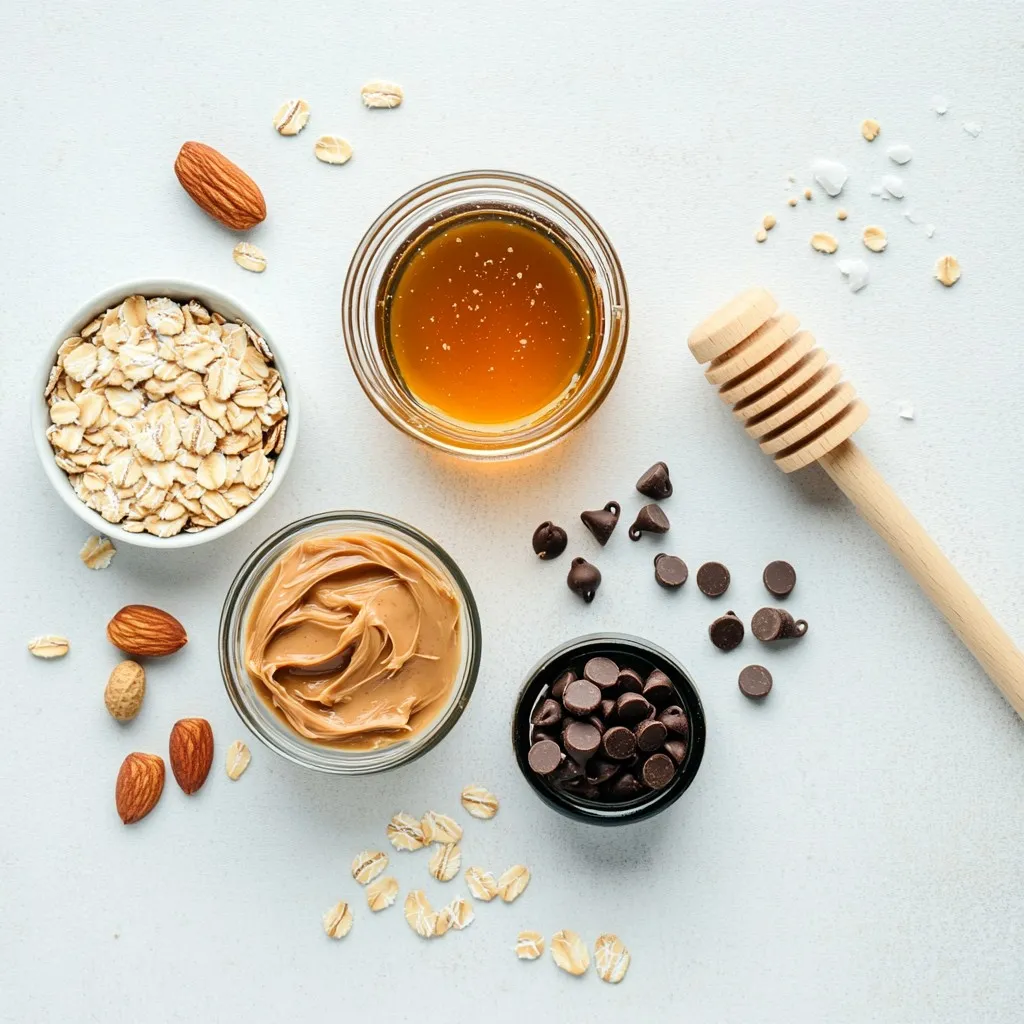
- 1 cup rolled oats
- 1/2 cup natural peanut butter
- 1/4 cup honey or maple syrup
- 1/2 teaspoon vanilla extract
- 1/4 cup mini chocolate chips (or carob chips)
- 1/4 cup chopped nuts (e.g., almonds or walnuts)
- Pinch of sea salt
These ingredients come together to create a tasty and healthy treat. The rolled oats add texture, while the peanut butter gives a rich flavor. Honey or maple syrup adds sweetness, and the vanilla extract brings warmth to each bite. Mini chocolate chips are a fun touch, and chopped nuts add a nice crunch.
Optional Add-Ins and Substitutions
You can switch things up based on what you have. Here are some ideas:
- Use almond butter or cashew butter instead of peanut butter.
- Swap honey for agave syrup for a vegan option.
- Add seeds like chia or flax for extra nutrition.
- Mix in dried fruit like raisins or cranberries for a fruity twist.
These options let you get creative while keeping the snack nutritious and tasty.
Notes on Ingredient Quality
Choosing good quality ingredients makes a big difference. Look for natural peanut butter with no added sugar or oils. Organic rolled oats are great because they are less processed. If possible, choose raw honey or pure maple syrup for better flavor. Fresh nuts will give you the best crunch and taste. Quality ingredients ensure your no-bake cups are not only delicious but also healthy!
Step-by-Step Instructions
Preparation Process Overview
Making no-bake peanut butter oat cups is simple and quick. You need only a few ingredients. This recipe takes around 10 minutes to prep. After mixing, you chill the cups for 30 minutes.
Detailed Instructions Breakdown
1. Mix the Base: In a large bowl, combine 1 cup of rolled oats, 1/2 cup of peanut butter, 1/4 cup of honey, and 1/2 teaspoon of vanilla extract. Stir until the mix is sticky and well-blended.
2. Add Extras: Toss in 1/4 cup of mini chocolate chips and 1/4 cup of chopped nuts. Fold gently to ensure even distribution.
3. Prep the Muffin Tin: Line a muffin tin with paper liners. You can also use cooking spray to grease the cups lightly.
4. Fill the Cups: Scoop the mixture into the muffin cups. Press down firmly to pack them tightly.
5. Chill: Place the muffin tin in the fridge for at least 30 minutes. This helps the cups set and hold their shape.
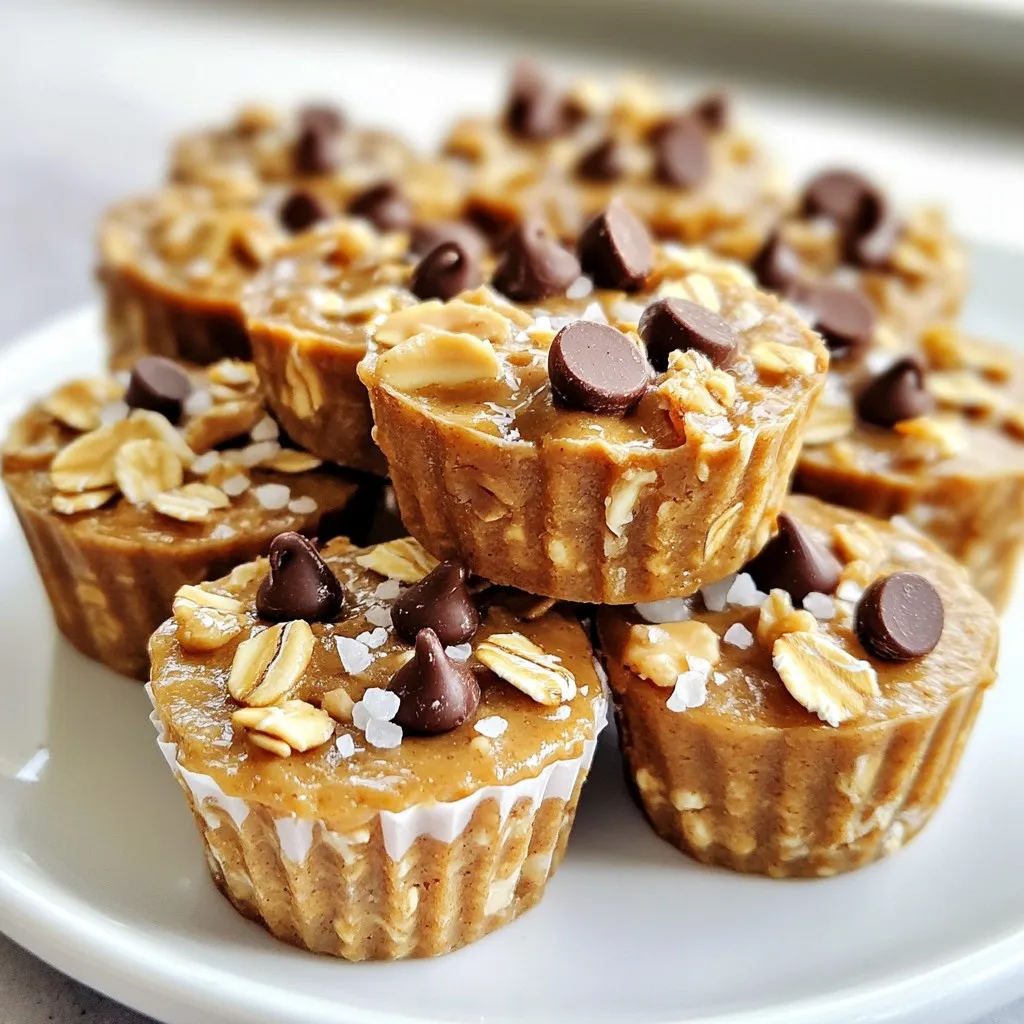
6. Serve: After chilling, remove the cups from the tin. Optionally, sprinkle a pinch of sea salt on top for extra flavor.
Visual Cues for Each Step
- Mixing: Look for a sticky texture when combining all base ingredients.
- Folding: Ensure the chocolate chips and nuts are evenly mixed without breaking them.
- Packing: The mixture should be firmly pressed into each muffin cup.
- Chilling: Cups should be firm to the touch after 30 minutes in the fridge.
These steps make delicious, healthy snacks easy to prepare. Enjoy your oat cups!
Tips & Tricks
Common Mistakes to Avoid
One common mistake is not packing the mixture tightly into the muffin cups. If you don’t press it down well, the cups may fall apart. Another mistake is skipping the chilling time. This step helps the cups set properly. Avoid using too much sweetener. It can make the cups too sticky and overly sweet.
How to Achieve the Best Texture
To get the best texture, use natural peanut butter. It has a smoother consistency and better flavor. Make sure the oats are rolled oats, not instant. Rolled oats give a chewier bite. When mixing, combine the wet and dry ingredients well. This creates a uniform texture. If the mixture feels too dry, add a bit more peanut butter.
Serving Suggestions and Pairings
These oat cups are great on their own. You can also serve them with yogurt or fruit for a more filling snack. They pair well with a glass of milk or a smoothie. For a fun twist, try adding sliced bananas on top. You can even drizzle some extra honey or chocolate syrup for added sweetness.
Pro Tips
- Chill Time Matters: Allowing the cups to chill for at least 30 minutes is crucial for them to set properly. If you can, chill them longer for an even firmer texture.
- Nut Butter Variation: Feel free to experiment with different nut butters like almond or cashew for a unique flavor twist that keeps things interesting!
- Sweetness Level: Adjust the amount of honey or maple syrup to your taste. If you prefer less sweetness, start with less and add more gradually.
- Storage Tips: Store the oat cups in an airtight container in the refrigerator for up to a week. They also freeze well, making them perfect for meal prep!
Variations
Flavor Variations
You can easily change up the flavor of your oat cups. If you want a nut-free version, use sunbutter instead of peanut butter. This still gives you that creamy taste. You can also try almond butter for a different twist. For a fun flavor, add cinnamon or cocoa powder. A dash of cinnamon brings warmth, while cocoa adds a rich chocolatey taste.
Ingredient Swaps
Feel free to swap sweeteners. If you want a lower-calorie option, use agave syrup instead of honey. You can also try maple syrup for a unique flavor. If you need a nut-free option, use seeds like sunflower or pumpkin seeds instead of nuts. For a grain-free option, use crushed gluten-free cereal in place of oats.
Creative Presentation Ideas
Make your oat cups extra special with fun presentations. Serve them on a colorful plate. Add some fresh fruit or extra chocolate chips on the side. You can also stack the cups in a clear jar for a cute display. Wrap them in pretty paper for gifts or snacks on the go. This makes them look good and taste even better!
Storage Info
Best Storage Practices
To keep your no-bake peanut butter oat cups fresh, store them in an airtight container. You can stack them in layers, separating each layer with parchment paper. This way, they won’t stick together. Place the container in the fridge. The cold helps preserve their taste and texture.
How Long They Last
When stored properly, these oat cups can last for up to one week in the fridge. If you notice any change in smell or texture, it’s best to toss them out. Remember, freshness is key to enjoying the full flavor of peanut butter and oats.
Freezing Tips for Long-term Storage
If you want to keep the oat cups longer, freezing is a great option. Wrap each cup tightly in plastic wrap or foil. Then, place them in a freezer bag or container. They can last up to three months in the freezer. When you’re ready to eat one, let it thaw in the fridge overnight. Enjoy a quick, tasty snack anytime!
FAQs
Can I use a different type of nut butter?
Yes, you can use other nut butters. Almond butter and cashew butter work well. Just make sure the butter is smooth and creamy. This keeps your oat cups nice and sticky. You might want to adjust the sweetness. Some nut butters taste less sweet than peanut butter.
How do I make these vegan?
To make these oat cups vegan, replace honey with maple syrup. Maple syrup gives a sweet taste without using any animal products. Also, check your nut butter. Ensure it does not have any added ingredients like honey. Most natural nut butters are vegan-friendly.
What can I do if the mixture is too dry?
If your mixture feels too dry, add a bit more nut butter. You can also add a splash of milk or plant-based milk. Stir well after each addition. This helps to reach a sticky consistency. You want the mixture to stick together but not be too wet.
The blog post guides you through every important step. You learned about key ingredients and how to pick quality ones. I shared easy steps to prepare your dish, along with tips to avoid common mistakes. You can experiment with flavor variations and serve ideas to excite your meals. Finally, you got solid advice on storage to keep your food fresh and tasty. Remember, cooking is about enjoyment and creativity. Dive in and make something delicious toda

No-Bake Peanut Butter Oat Cups
Ingredients
- 1 cup rolled oats
- 0.5 cup natural peanut butter
- 0.25 cup honey or maple syrup
- 0.5 teaspoon vanilla extract
- 0.25 cup mini chocolate chips or carob chips
- 0.25 cup chopped nuts (e.g., almonds or walnuts)
- 1 pinch sea salt
Instructions
- In a large mixing bowl, combine the rolled oats, peanut butter, honey (or maple syrup), and vanilla extract. Stir until everything is well mixed and forms a sticky consistency.
- Add the mini chocolate chips and chopped nuts to the mixture, and fold gently to combine evenly.
- Line a muffin tin with paper liners or lightly grease it with cooking spray.
- Using your hands or a spoon, scoop the mixture into each muffin cup, pressing down firmly to pack them tightly.
- Once all the mixture is in the muffin tin, place the tin in the refrigerator for at least 30 minutes to allow the cups to set.
- After the chilling time, remove the cups from the muffin tin and optionally sprinkle a pinch of sea salt on top for an added flavor kick.
