

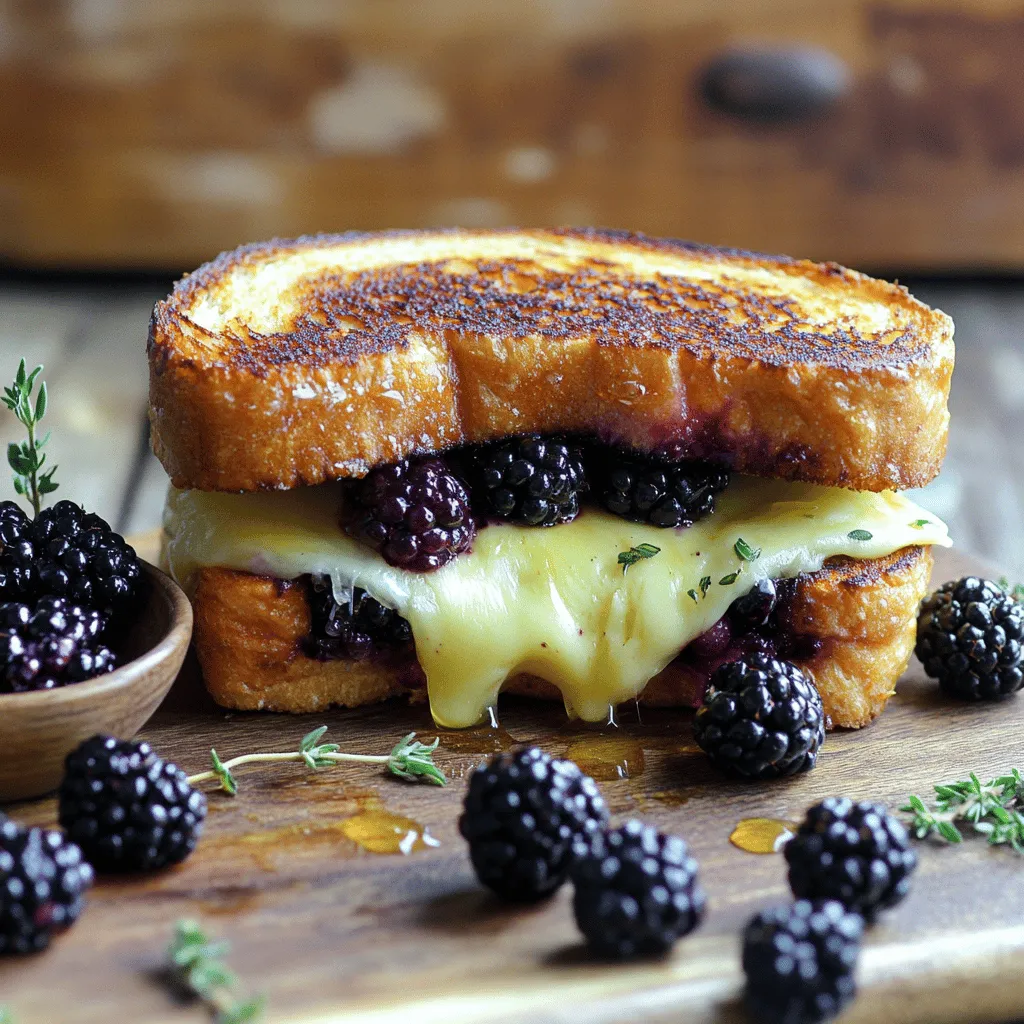
Get ready to transform your lunch game with the irresistible Blackberry and Brie Grilled Cheese Delight! This sandwich pairs creamy brie with sweet blackberries for a taste that dances on your palate. I’ll guide you through each step, from mixing the blackberry spread to achieving the perfect golden crisp. Whether you’re a grilled cheese lover or a curious foodie, this recipe will satisfy your cravings and wow your taste buds!
Ingredients
To make the Irresistible Blackberry and Brie Grilled Cheese, you will need the following ingredients:
- 4 slices of sourdough bread
- 100g brie cheese, sliced
- 1 cup fresh blackberries
- 2 tablespoons honey
- 1 tablespoon fresh thyme leaves (or 1 teaspoon dried thyme)
- 2 tablespoons unsalted butter, softened
- Optional: a pinch of salt to enhance flavors
These simple ingredients come together to create a delightful sandwich. Each one plays a key role in building those amazing flavors. The sourdough bread gives a nice crunch. The brie cheese melts into a creamy goodness. Fresh blackberries add a sweet and tart touch. Honey ties it all together with its rich sweetness. Thyme brings an earthy note that elevates the taste. Butter ensures a golden-brown finish when grilled. You can add salt if you want to balance the sweetness.Enjoy creating this delicious treat!
Step-by-Step Instructions
Preparation of the Blackberry Mixture
- In a small bowl, combine fresh blackberries, honey, and thyme.
- Use a fork to gently mash the blackberries. Aim for a chunky spread.
- If you like, add a pinch of salt to enhance the sweetness.
Assembly of the Sandwich
- Spread a thick layer of the blackberry mixture on two slices of sourdough bread.
- Place slices of brie cheese on top of the blackberry mixture.
- Cover with the other two slices of sourdough to form two complete sandwiches.
Cooking the Sandwich
- Spread softened butter on the outer sides of each sandwich.
- Heat a non-stick skillet or griddle over medium heat.
- Place the sandwiches in the skillet once it’s hot.
- Grill for about 3-4 minutes on each side. Look for golden-brown bread and melted cheese.
Tips & Tricks
Achieving the Perfect Grilled Cheese
To make the perfect grilled cheese, control the temperature. Use medium heat. This helps brown the bread without burning it.
Timing is key for melting the cheese. Grill each side for 3-4 minutes. Check for a golden color and gooey cheese.
Flavor Enhancements
You can enhance the taste with simple seasonings. Try a pinch of salt for balance. A dash of black pepper can add warmth too.
Pair your sandwich with a light salad or fresh fruit. A crisp side complements the rich cheese and sweet berries.
Presentation Ideas
For plating, slice the sandwich diagonally. This gives it a nice, inviting look.
Add a small bowl of fresh blackberries on the side. A sprig of thyme makes a beautiful garnish. This simple touch elevates your dish.
Variations
Cheese Alternatives
You can swap brie for other cheeses. Try creamy goat cheese for a tangy twist. Cream cheese adds a smooth texture and mild flavor. Aged cheddar gives a sharp bite, while fontina melts beautifully. Each cheese brings a unique taste to your sandwich.
Bread Alternatives
Change up the bread for fun. Whole wheat or rye adds fiber and flavor. A baguette gives a nice crunch. For gluten-free options, use gluten-free bread or lettuce wraps. These choices keep your sandwich exciting while meeting dietary needs.
Ingredient Substitutions
Feel free to explore different fruits or spreads. Use sliced pears for sweetness or figs for a rich taste. Swap honey with maple syrup for a different sweetness. If you’re vegan, try plant-based cheese and butter. These simple swaps keep the dish tasty and inclusive.
Storage Info
Storing Leftovers
To keep your blackberry and brie grilled cheese fresh, wrap each sandwich tightly in plastic wrap or foil. This helps to prevent the bread from getting hard. You can also place them in an airtight container. If stored correctly, they will last for about 2 days in the fridge. For best taste, eat them fresh, but leftovers can still be delicious!
Reheating Tips
When it comes to reheating, you have a few good options. You can use a skillet over low heat for a few minutes on each side. This method keeps the bread crispy and melts the cheese nicely. Another option is to use an oven set to 350°F. Place the sandwich on a baking sheet and heat for about 10 minutes. Just remember to cover it with foil to keep it from getting too dry. Enjoy your warm, gooey sandwich again!
FAQs
What is the best type of bread for grilled cheese?
The best bread for grilled cheese is sourdough. Its thick crust holds the filling well. You can also try whole wheat for a nutty flavor. For gluten-free options, look for gluten-free bread that is sturdy. This helps create a great texture and taste.
Can I make this sandwich ahead of time?
Yes, you can make this sandwich ahead of time. Here are some steps:
- Prepare the blackberry mixture and store it in the fridge.
- Assemble the sandwiches but do not grill them.
- Wrap the sandwiches in plastic wrap to keep them fresh.
- When ready to eat, grill them straight from the fridge. This keeps the bread from getting soggy.
How can I make this sandwich healthier?
To make this sandwich healthier, try these swaps:
- Use whole grain bread instead of sourdough.
- Replace brie with a lower-fat cheese, like part-skim mozzarella.
- Add spinach or arugula for extra nutrients.
- Use less honey or a sugar-free alternative.
These changes can help you enjoy a tasty sandwich with fewer calories.
This blog post explored how to make the perfect grilled cheese sandwich with brie and blackberries. You learned about key ingredients, step-by-step cooking tips, and creative variations. Each detail helps you create a delicious and unique meal. Remember, experimentation is key! Use your favorite flavors and add your personal touch. Enjoy every bite, and don’t hesitate to share your creations. Happy cooking!

