
Slow Cooker Tomato Basil Tortellini Soup Delight
Are you ready to warm up with a big bowl of comfort? In this blog post, I’ll share my favorite

Are you ready to warm up with a big bowl of comfort? In this blog post, I’ll share my favorite
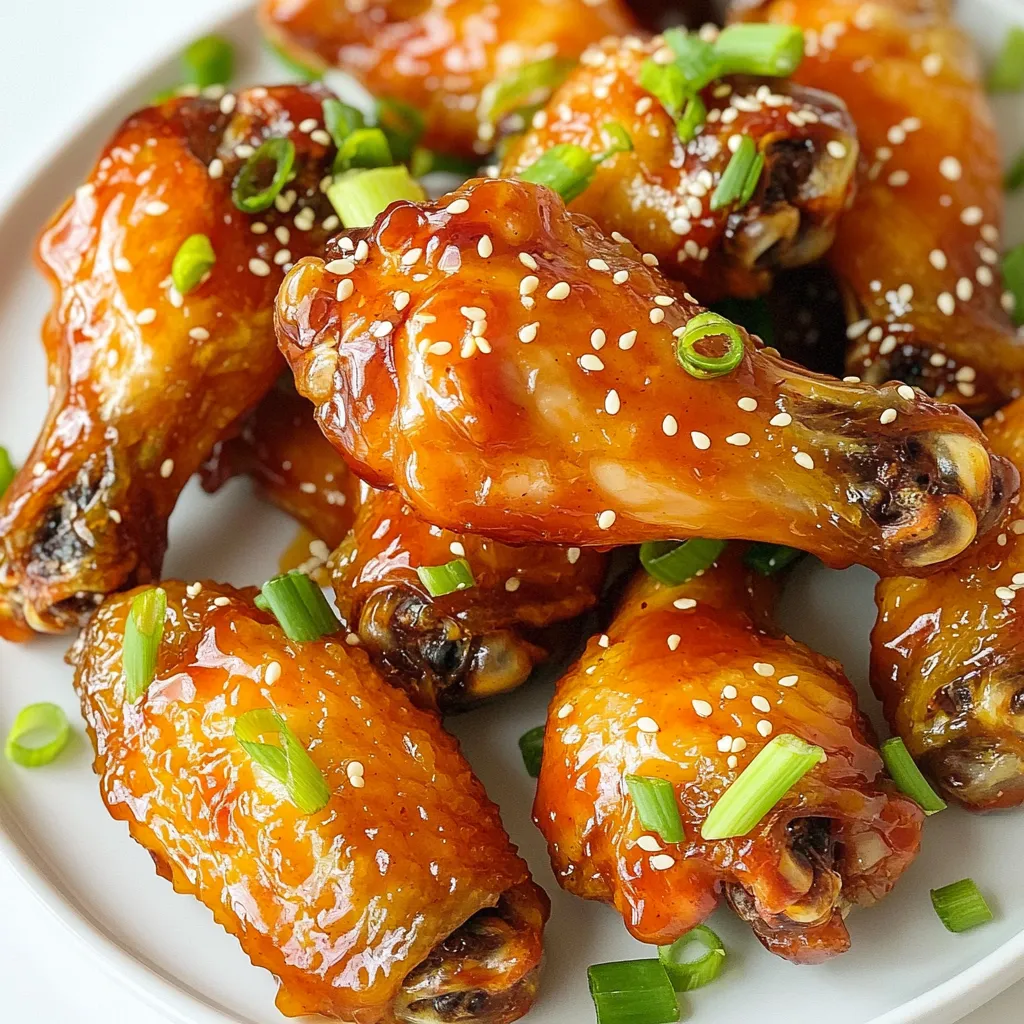
Are you ready to spice up your snack game? These Air Fryer Honey Sriracha Wings are full of flavor and

Welcome to your new favorite recipe! Cinnamon Swirl Banana Bread Bakery-Style Delight combines two beloved treats into one mouthwatering experience.

If you’re craving a warm and tasty meal, this One-Pot Tuscan White Bean Soup is your answer. It’s packed with

Are you looking for a quick and tasty dinner? This Savory Chicken Caprese Skillet fits the bill! With juicy chicken,

Ready to spice up your dinner? This Fiery Chicken Ramen with Creamy Garlic Broth is a game changer! In this
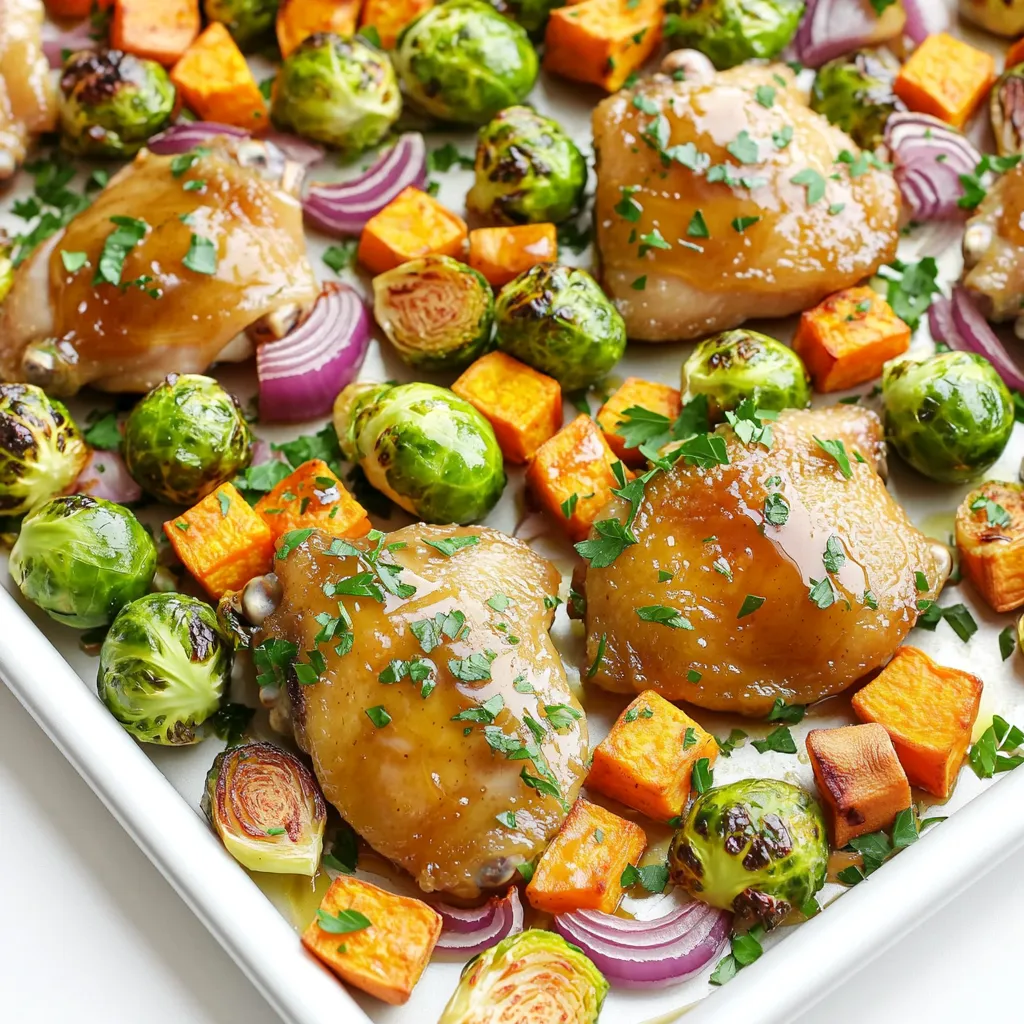
Looking for a delicious one-pan meal that captures the flavors of fall? You’ve found it! This Sheet-Pan Maple Dijon Chicken

If you crave a tasty dessert that fuels your body, you’ll love my Protein-Packed Cottage Cheese Chocolate Mousse Delight. This
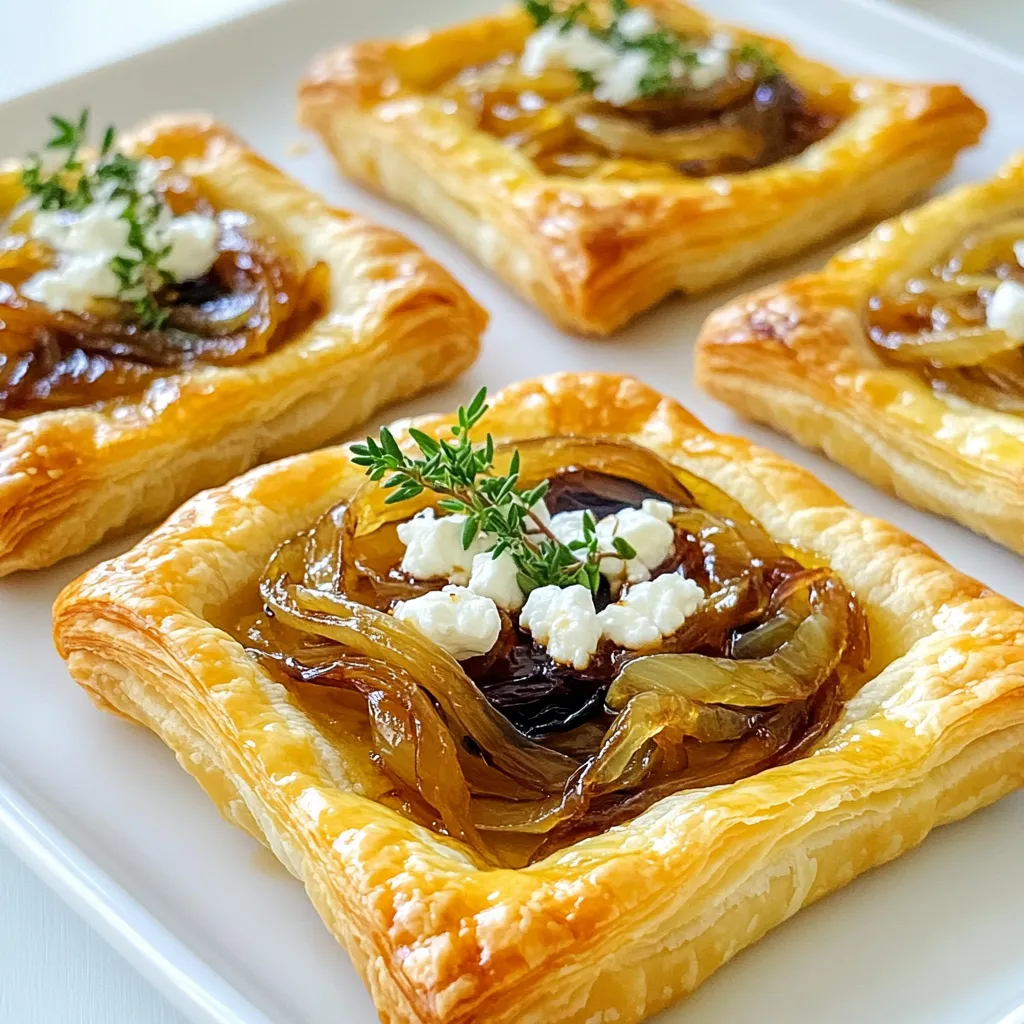
Get ready to impress your taste buds with my Caramelized Onion and Goat Cheese Puff Pastry Tarts! These delicious tarts
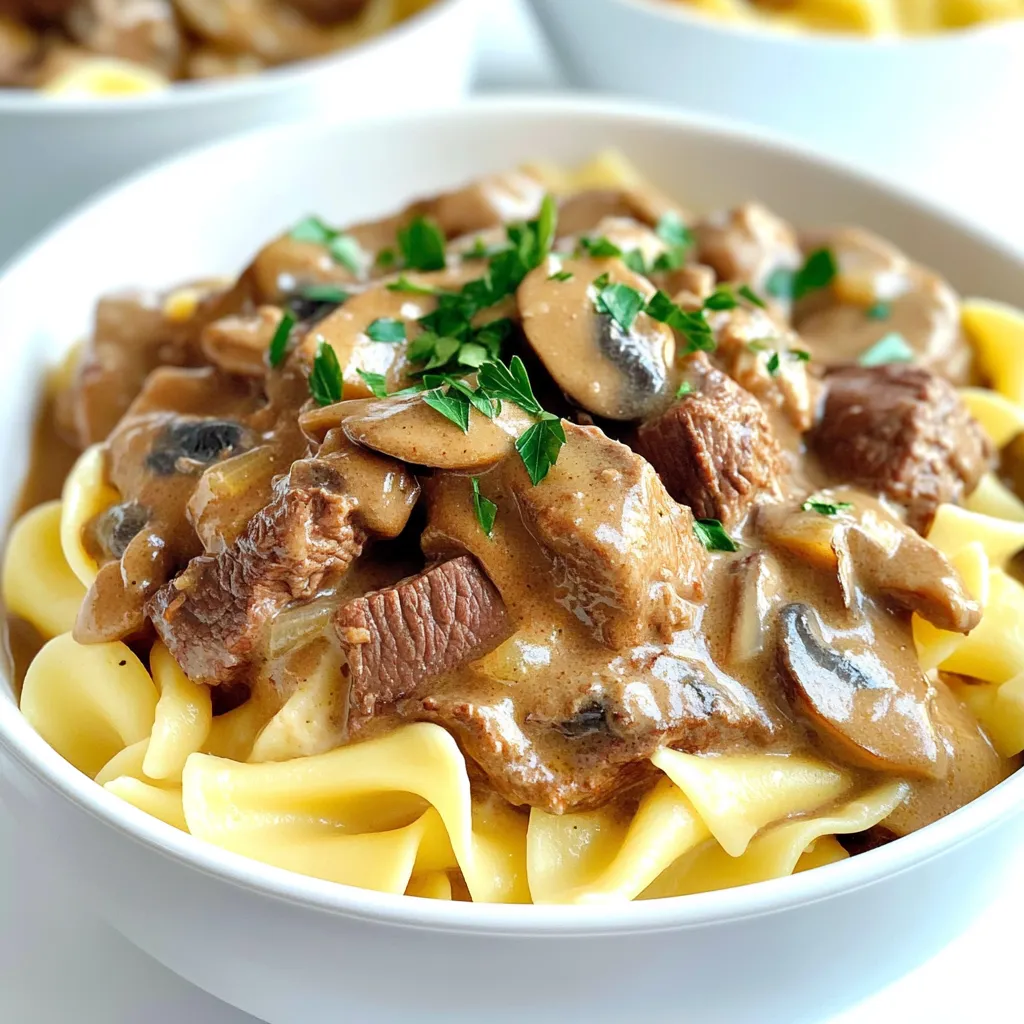
Get ready for a flavor-packed dish that warms your heart and fills your belly! My Slow Cooker Beef Stroganoff with
