Cheesy Tennessee Onions Flavorful and Easy Recipe
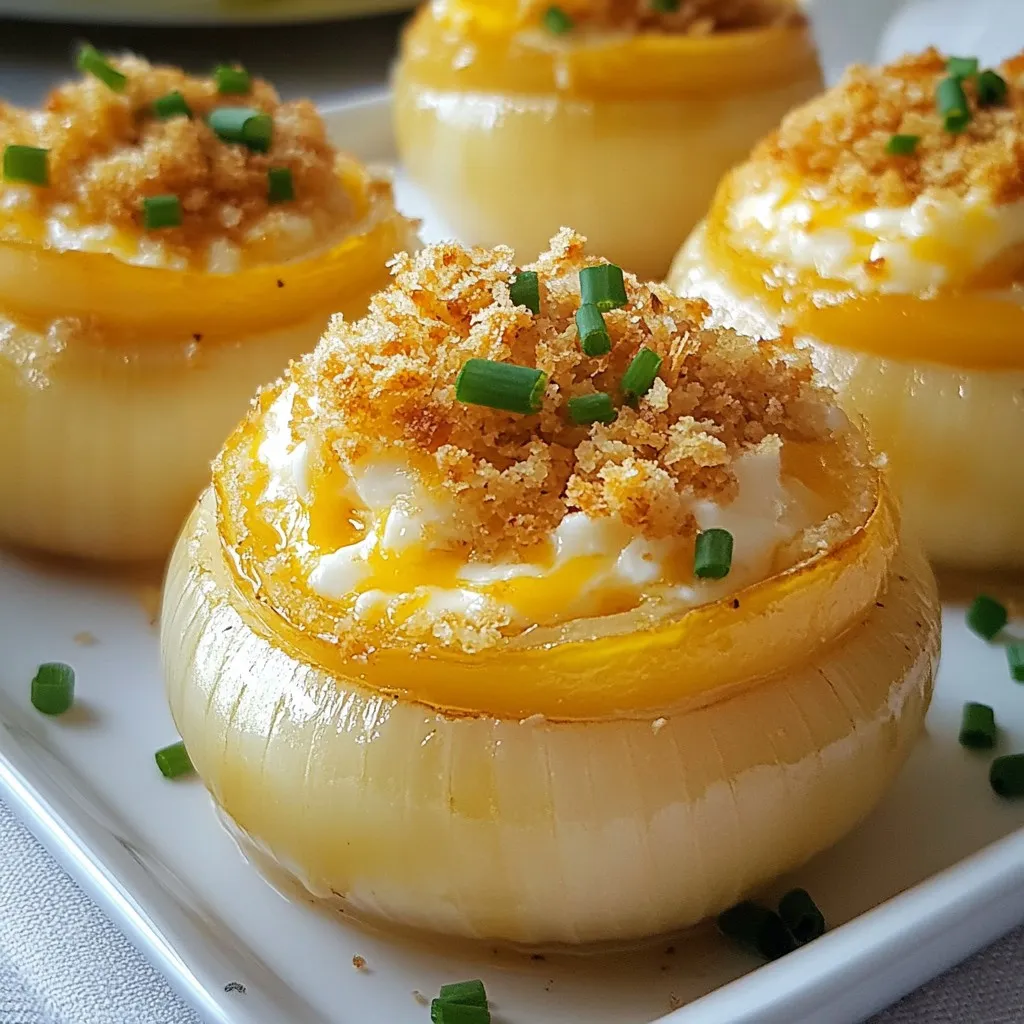
If you’re looking for a new side dish that hits all the right notes, you’ve found it! Cheesy Tennessee Onions

If you’re looking for a new side dish that hits all the right notes, you’ve found it! Cheesy Tennessee Onions
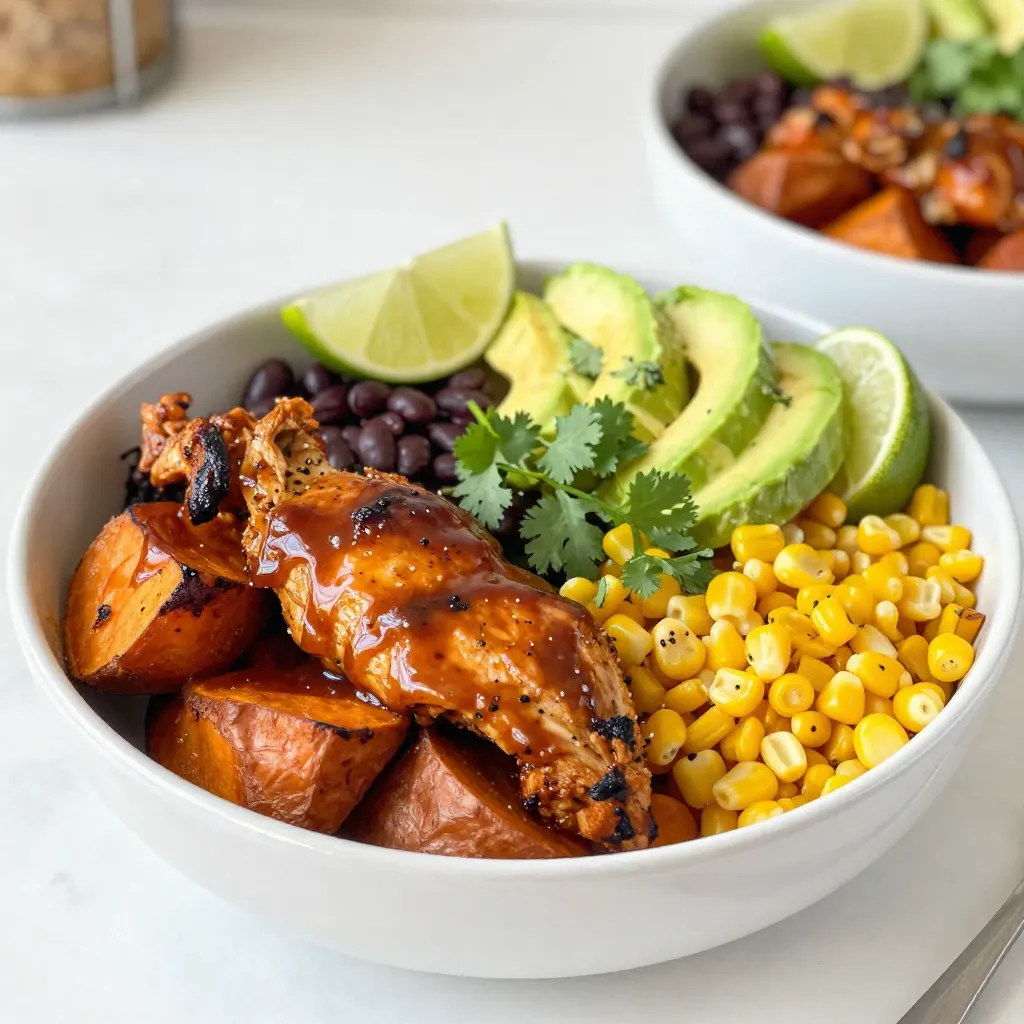
Are you ready to spice up your meal routine? BBQ Chicken Sweet Potato Bowls are the perfect mix of flavors,

Are you ready to impress your friends and family this holiday season? My delightful and easy Festive Christmas Bread recipe
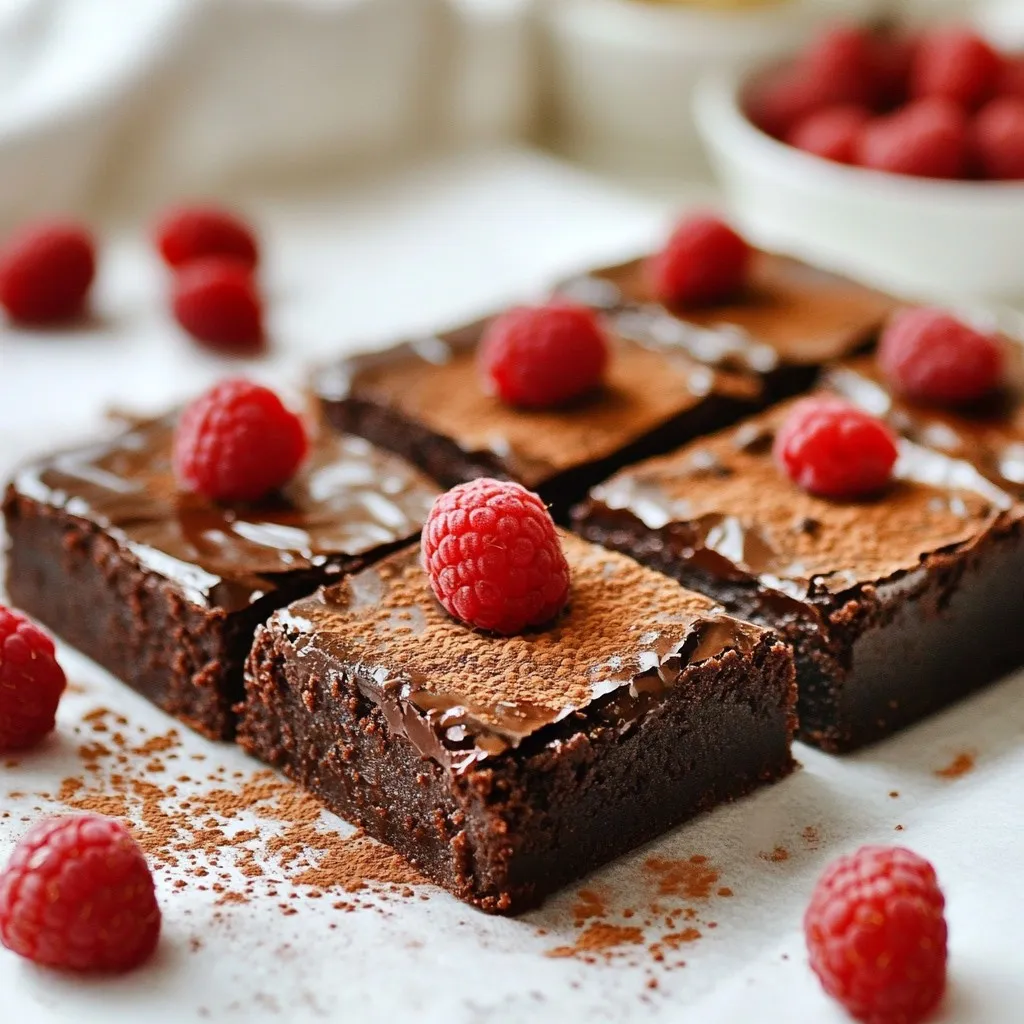
Craving a rich and indulgent treat without the guilt? Try my Calorie Fudgy Brownies! These brownies are soft, chocolatey, and

Get ready to indulge in the ultimate cheesy comfort food with my Taco Ranch Bites! These tasty bites combine the

If you crave a smooth and rich chocolate ganache, you’re in the right place! This foolproof recipe uses just four
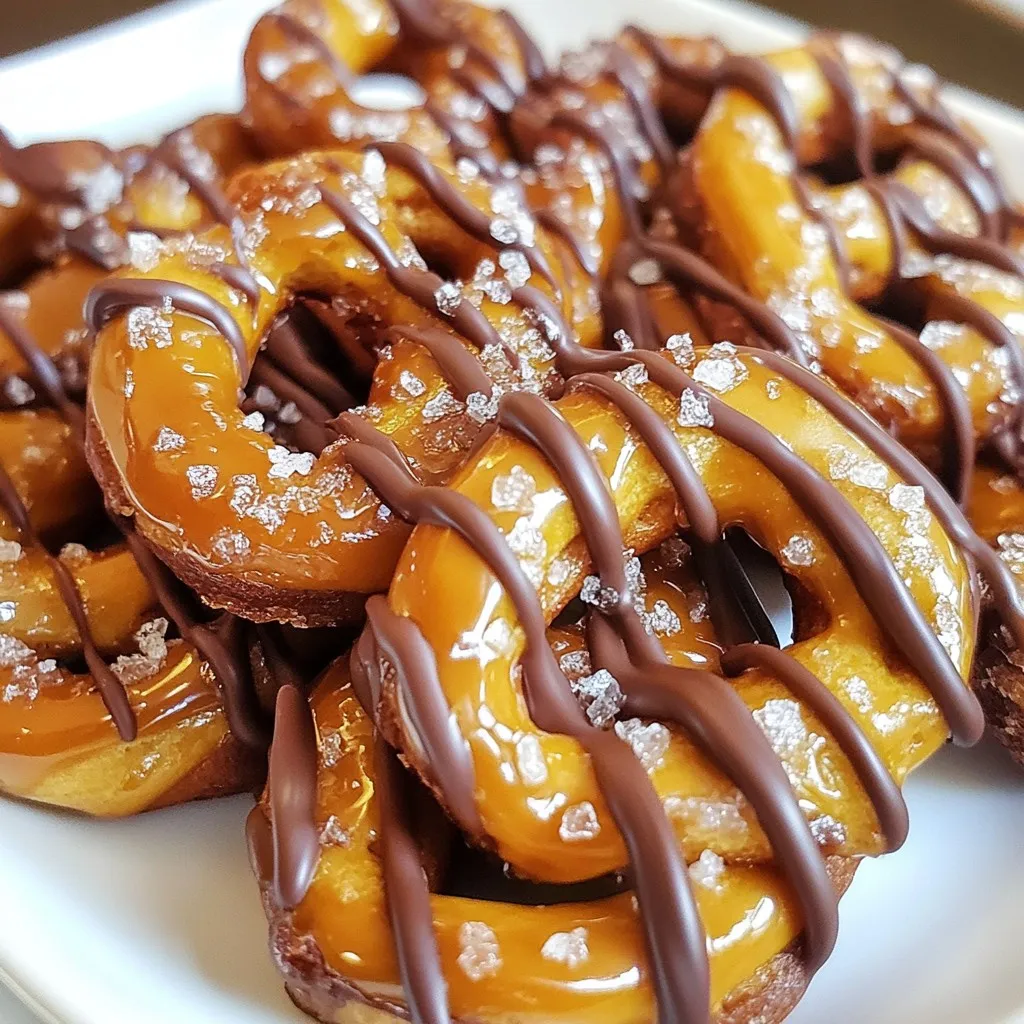
Craving a snack that combines sweet, salty, and crunchy? You’re in for a treat with Butter Toffee Pretzels! This easy
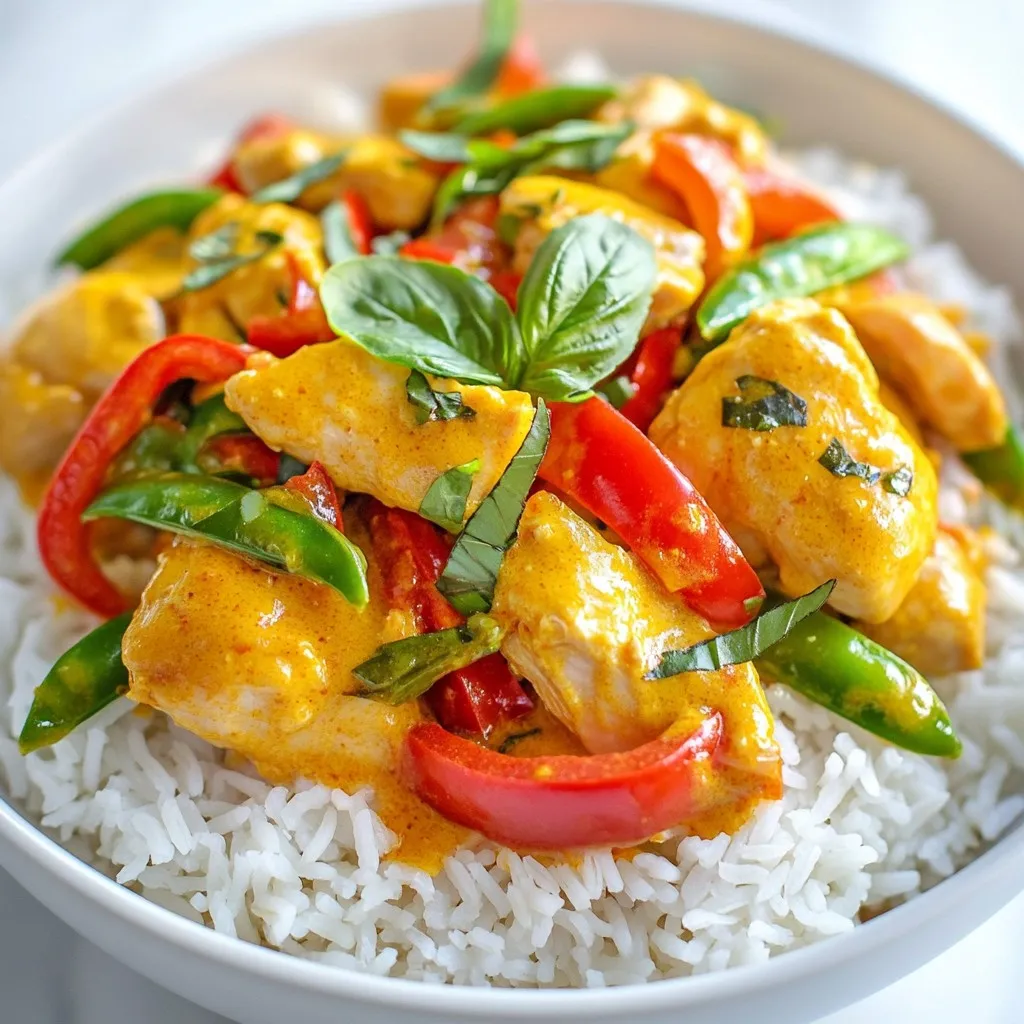
Are you craving a delicious meal but short on time? I have just the recipe for you! My Quick Panang

Ready to create a fun and tasty treat? Caramel Apple Grapes combine the sweetness of grapes and the rich flavor
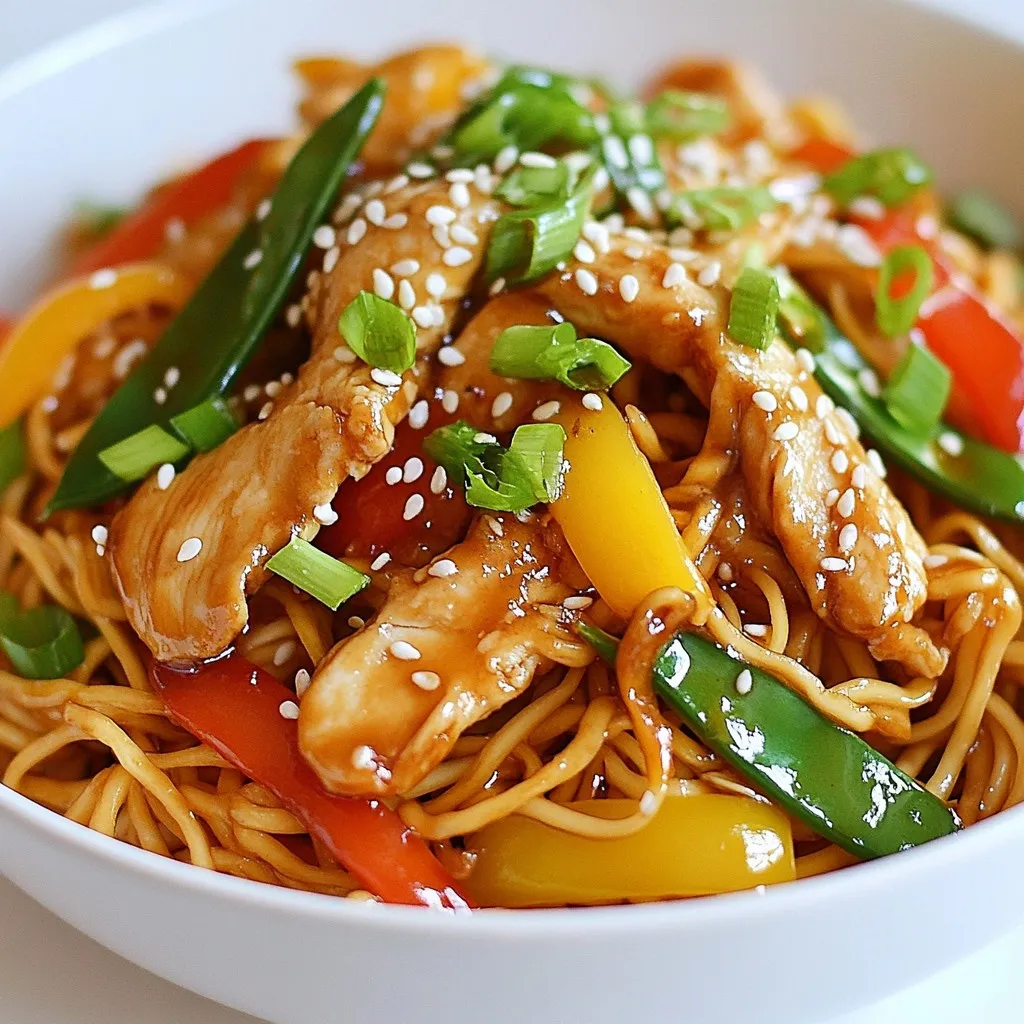
If you love quick, tasty meals, Chicken Chow Mein with Fresh Sauce will delight you! This dish bursts with flavors
