Caramel Apple Crisp Bars with Oat Topping Delight
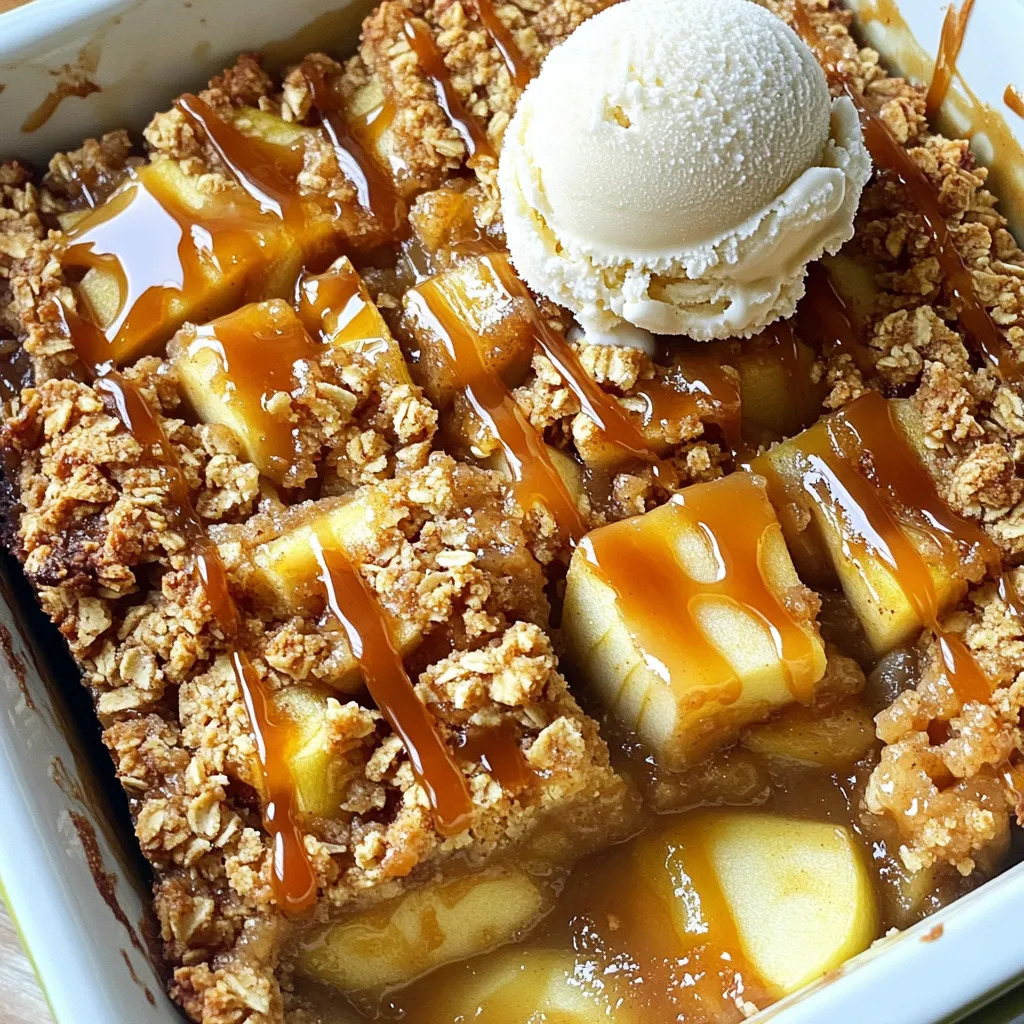
Are you ready to enjoy a delicious dessert that pairs sweet apples with rich caramel? My Caramel Apple Crisp Bars

Are you ready to enjoy a delicious dessert that pairs sweet apples with rich caramel? My Caramel Apple Crisp Bars
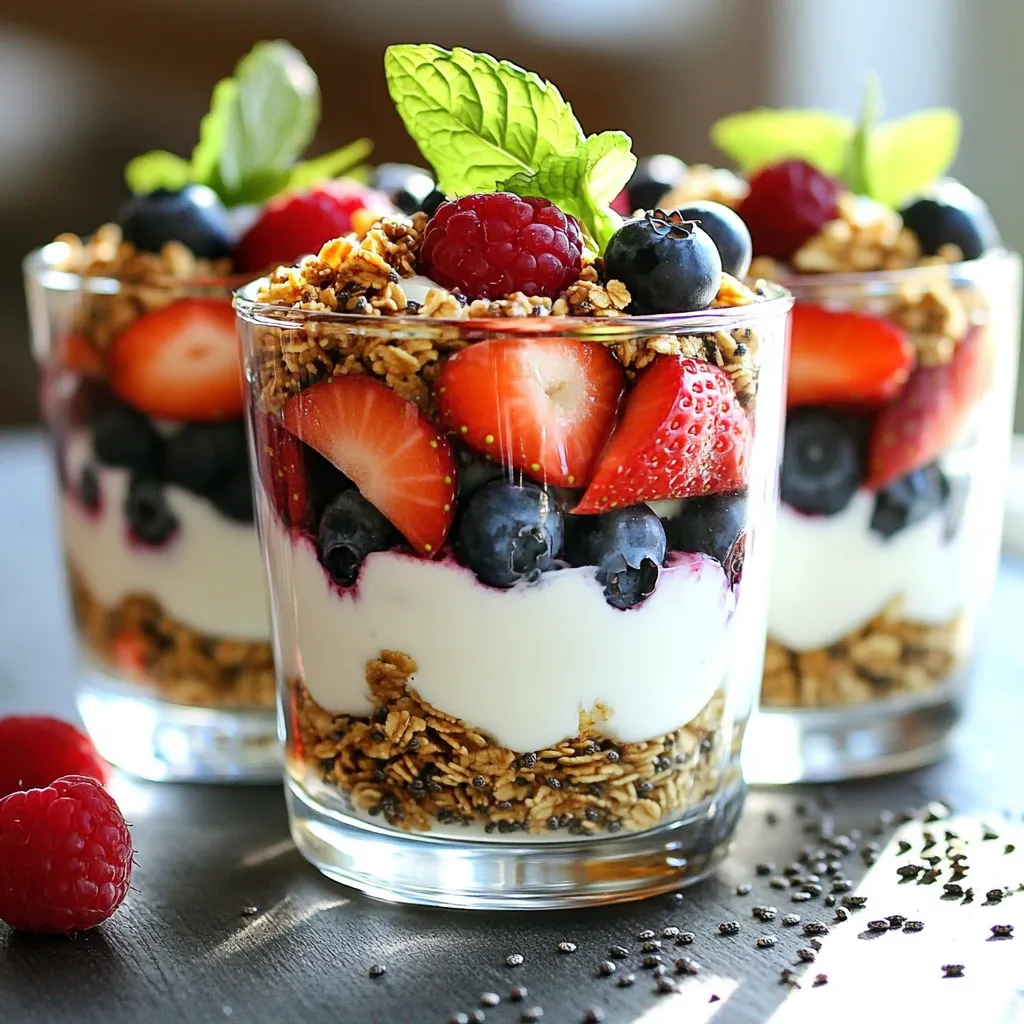
Looking for a quick, tasty, and healthy snack? I’ve got you covered with my Minute High-Protein Greek Yogurt Parfaits Delight!
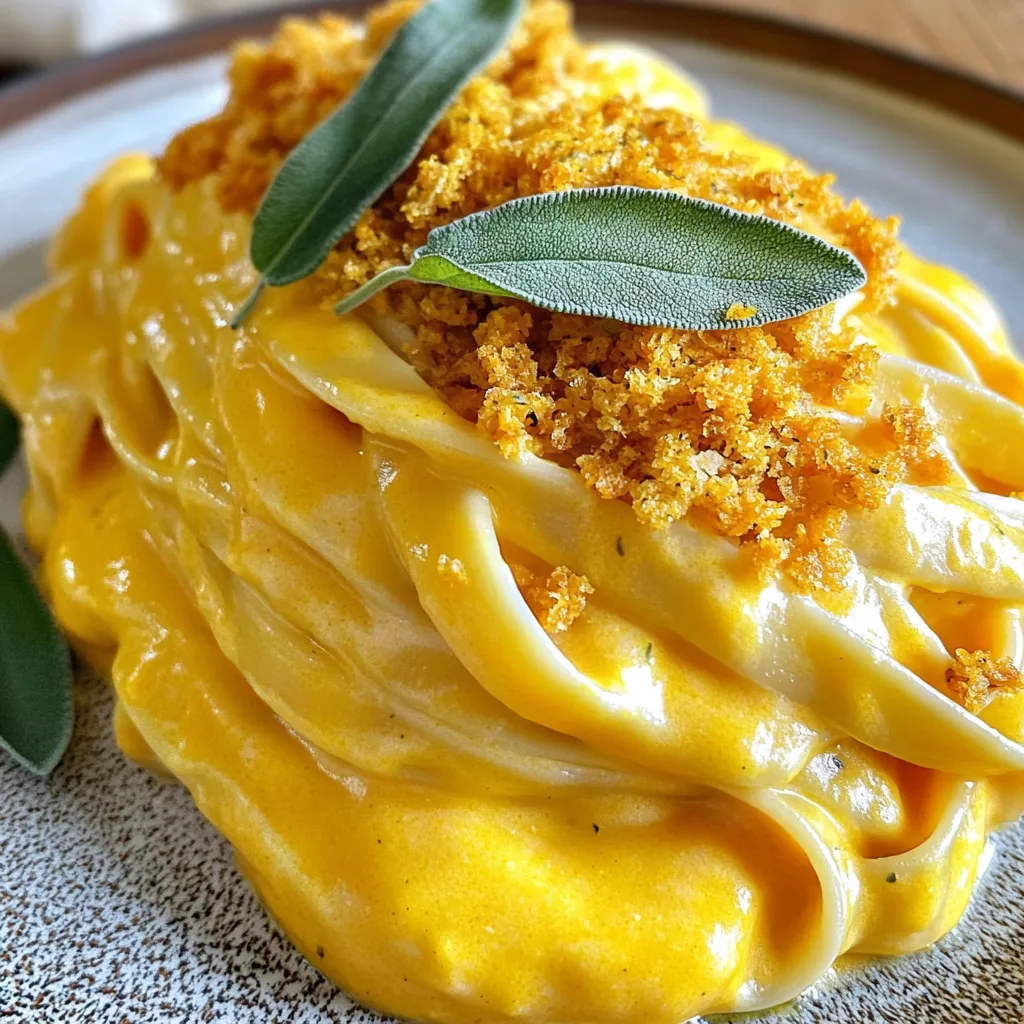
If you crave a warm, cozy dish this fall, you must try my creamy pumpkin Alfredo with sage breadcrumbs. This
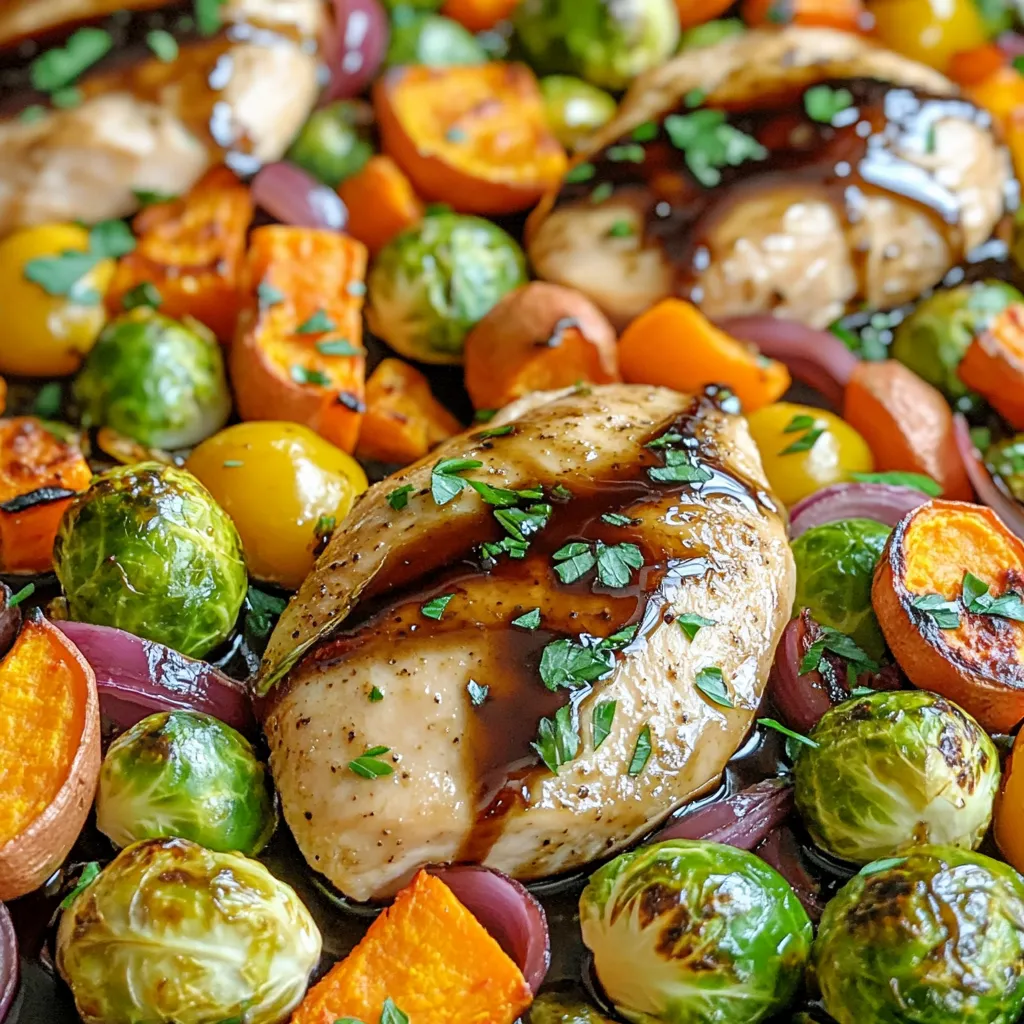
Looking for a simple, tasty dinner? My Savory Sheet-Pan Balsamic Chicken and Fall Vegetables is the answer. This one-pan dish

Craving a sweet treat with a cozy twist? My Cozy Chai Spice Snickerdoodle Cookies are here to warm your heart!

Looking for a cozy meal that’s easy to make and packed with flavor? My Slow Cooker Butternut Squash and Lentil
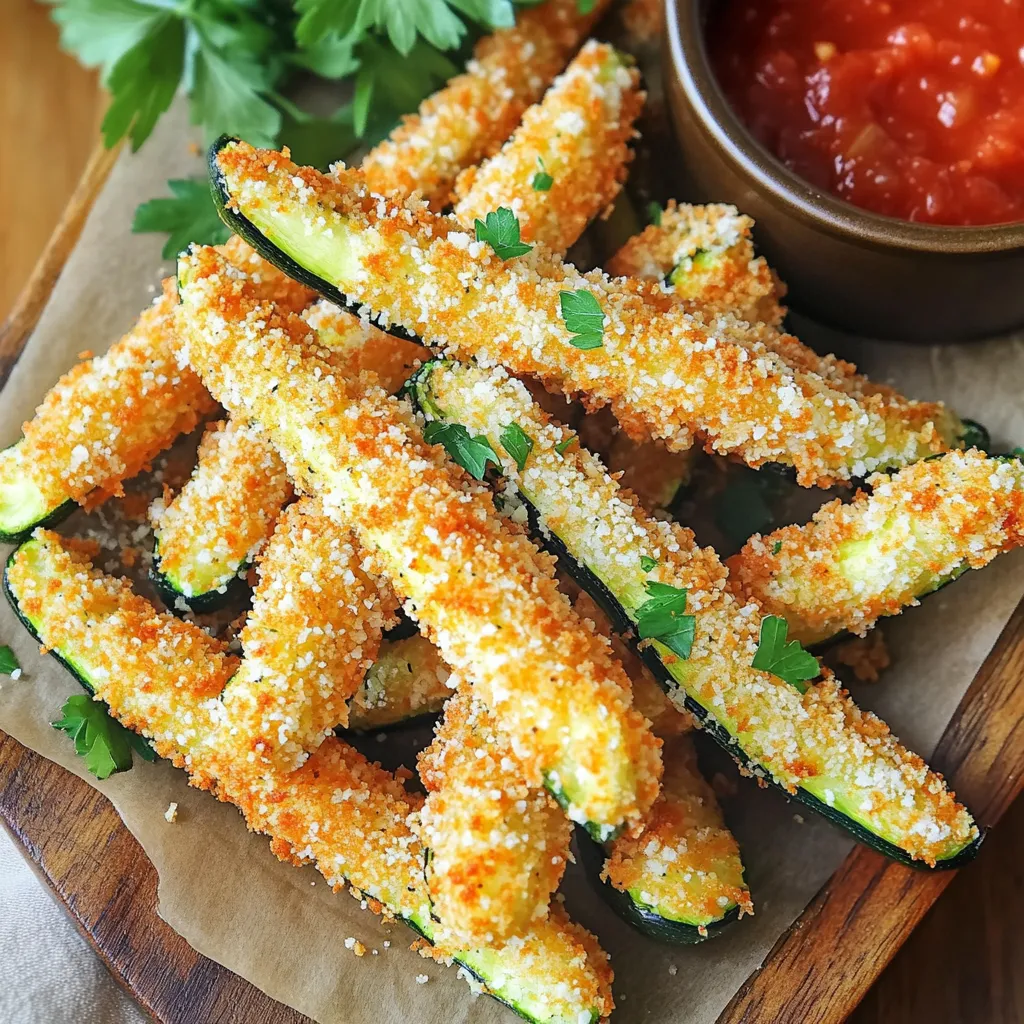
Looking for a tasty snack that’s simple and crispy? You’re in the right place! My Air Fryer Crispy Parmesan Zucchini

If you love rich, fudgy treats with a hint of caramel, you’re in for a treat! This Turtle Fudge recipe

If you’re looking for a side dish that wows, you’ve found it: Crispy Garlic Herb Smashed Potatoes! This dish combines

Craving a quick and tasty meal? These Minute Spicy Gochujang Udon Noodles are your answer! They’re simple to make and
