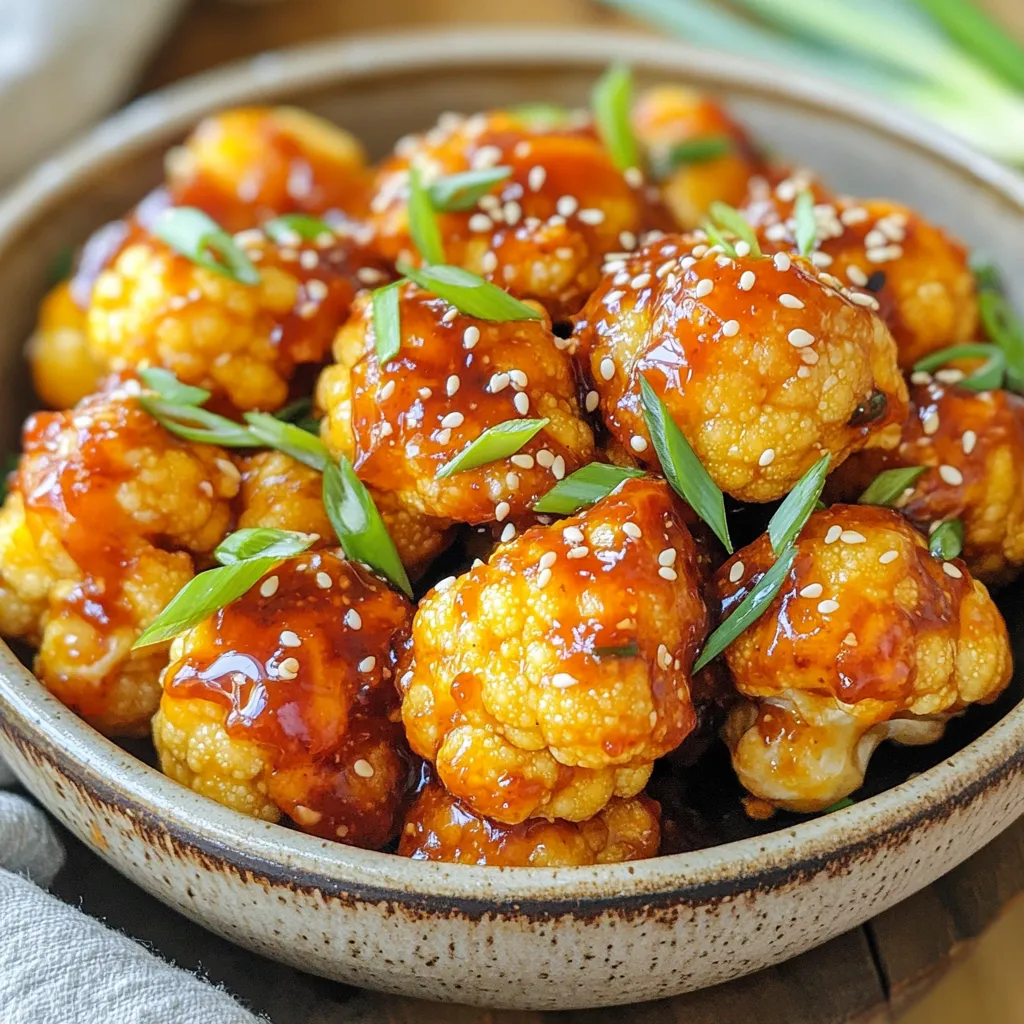
Air Fryer Sweet Chili Cauliflower Bites Crunchy Treat
Get ready to enjoy a tasty snack with my Air Fryer Sweet Chili Cauliflower Bites! These crunchy treats are perfect

Get ready to enjoy a tasty snack with my Air Fryer Sweet Chili Cauliflower Bites! These crunchy treats are perfect
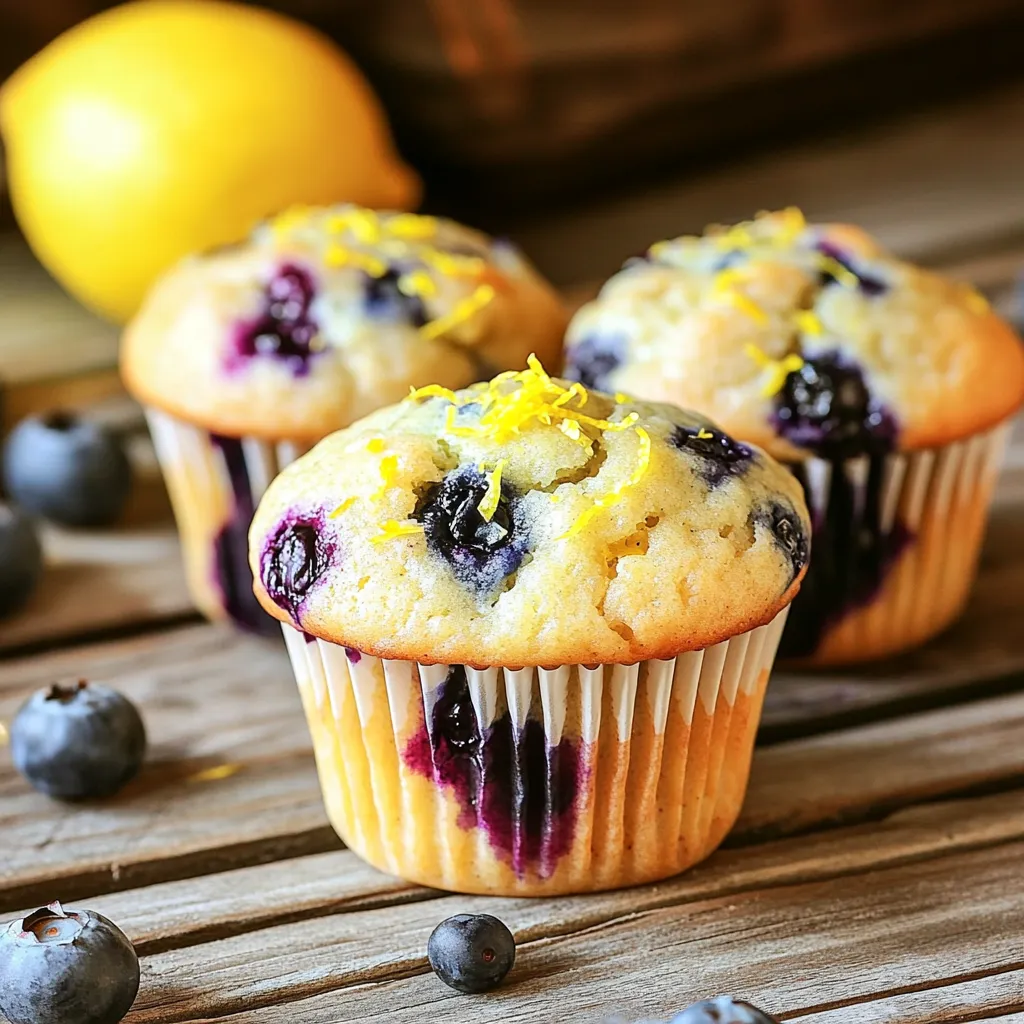
Are you looking for a tasty and healthy snack? Try my Lemon Blueberry Protein Muffins! These muffins are easy to

Are you ready to elevate your dinner game? Slow Cooker Creamy Tuscan Chicken Thighs Delight is here to wow your
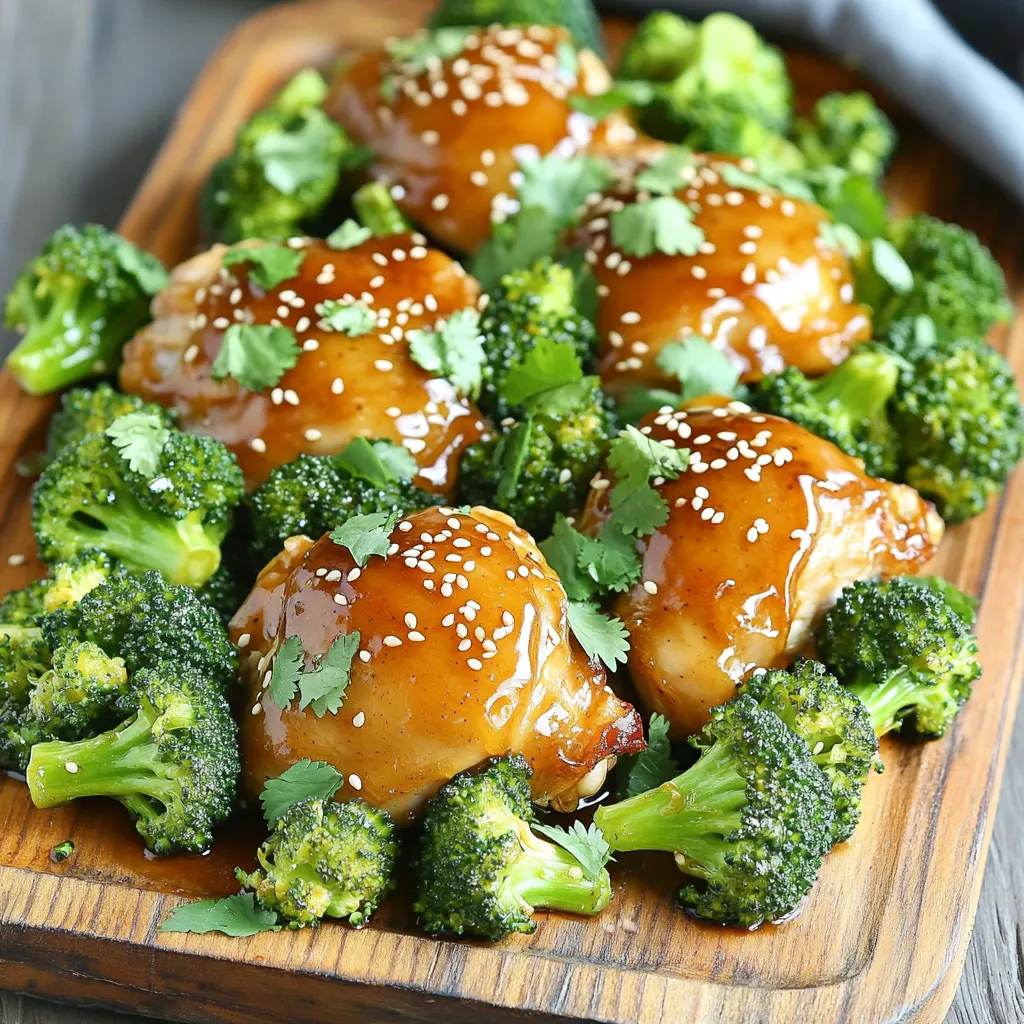
Welcome to Sheet-Pan Honey Garlic Chicken and Broccoli Delight! If you crave a simple, tasty dinner, you’ve come to the
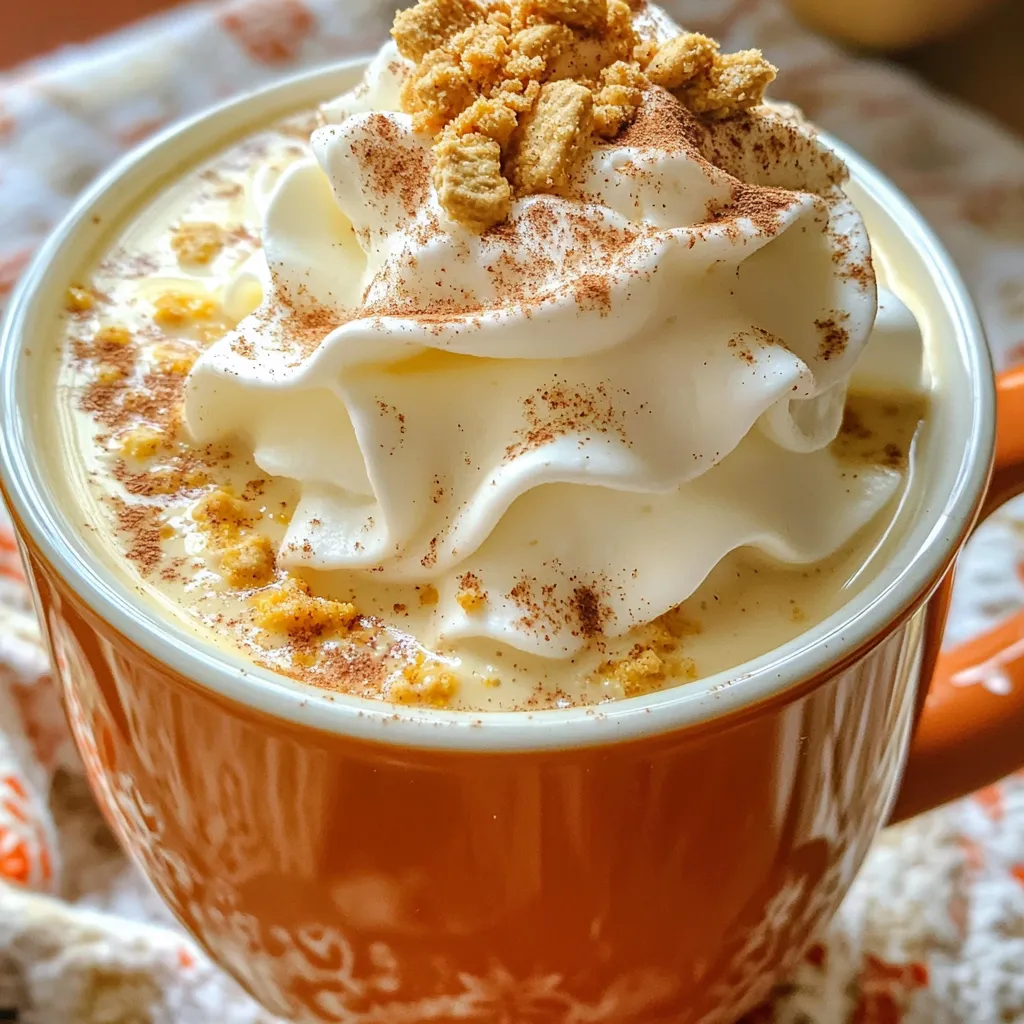
Craving a cozy treat that warms both your heart and taste buds? You’re in the right place! My Pumpkin Spice
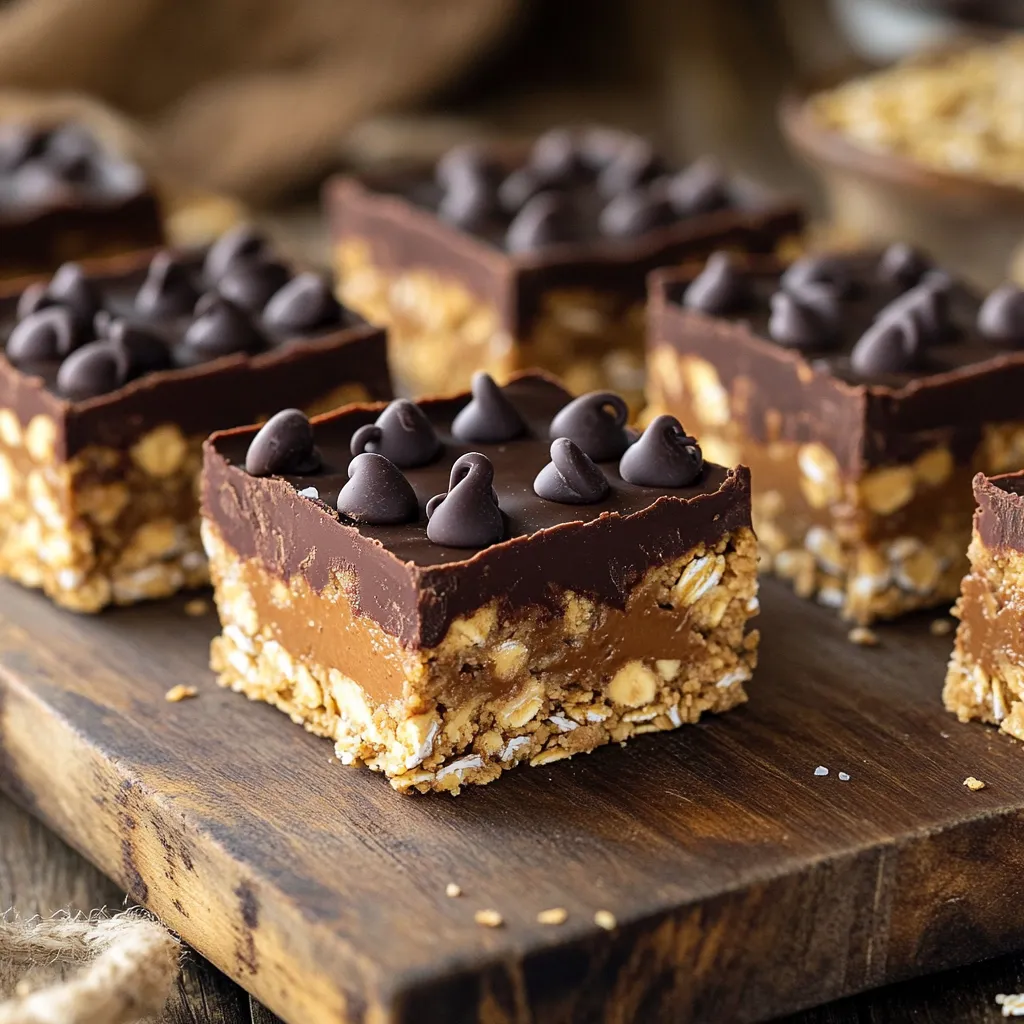
If you crave a quick, tasty snack, you’ve found the right recipe! My No-Bake Peanut Butter Chocolate Oat Bars are
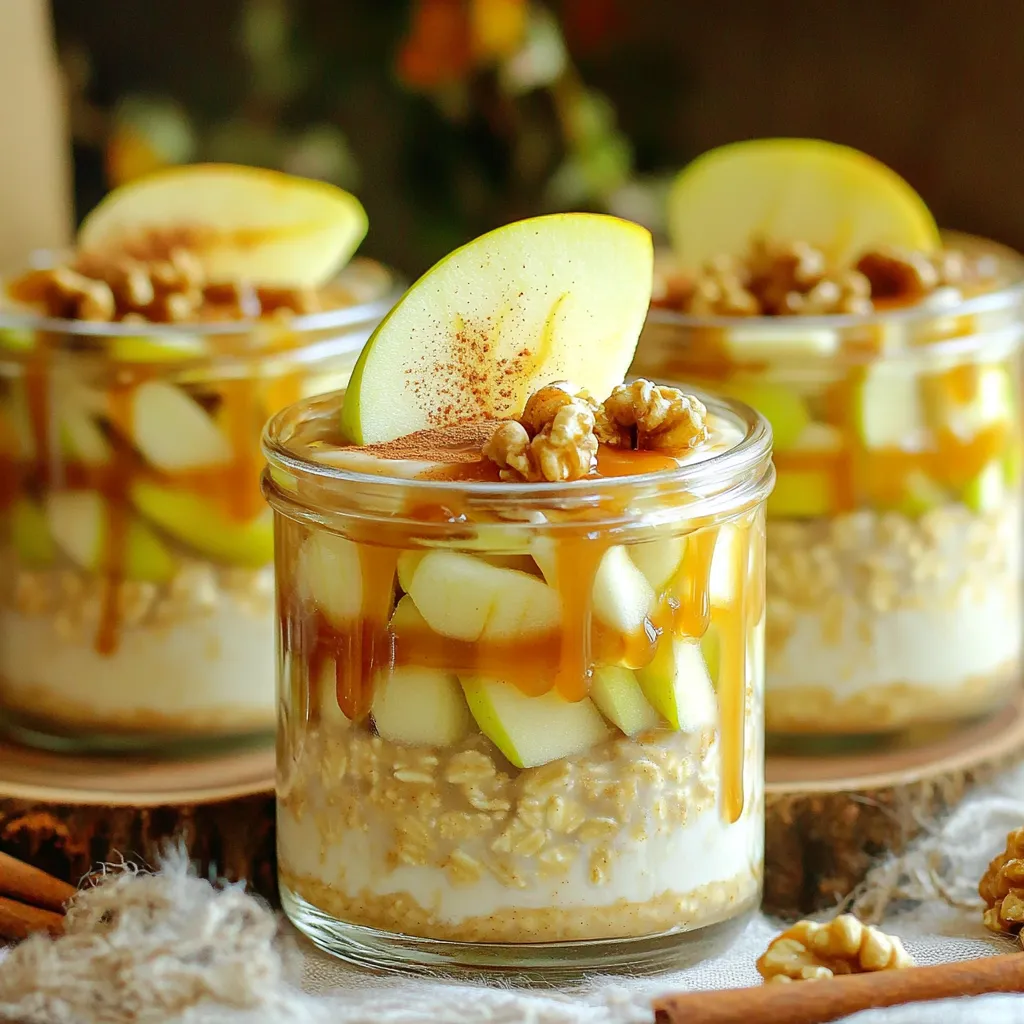
Are you ready for a delicious and easy breakfast? Caramel Apple Overnight Oats combine sweet caramel flavor and fresh apples
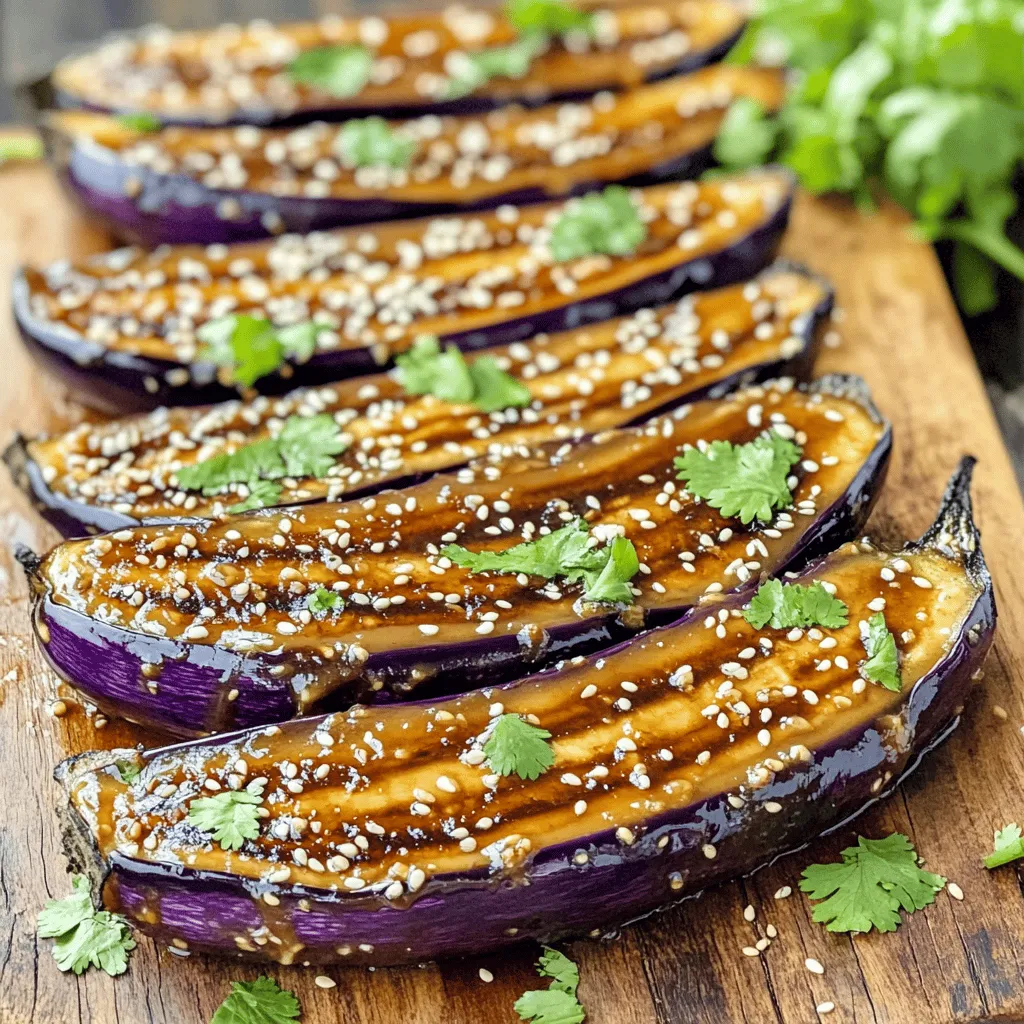
Welcome to a world of taste with my Miso Maple Glazed Eggplant Steaks! With just four main ingredients—eggplant, miso paste,

Looking for a warm and tasty dish that’s easy to make? Try my One Pot Creamy Tomato Basil Tortellini Soup.

Craving a cool treat that’s both simple and healthy? Let me introduce you to protein cottage cheese ice cream! This
