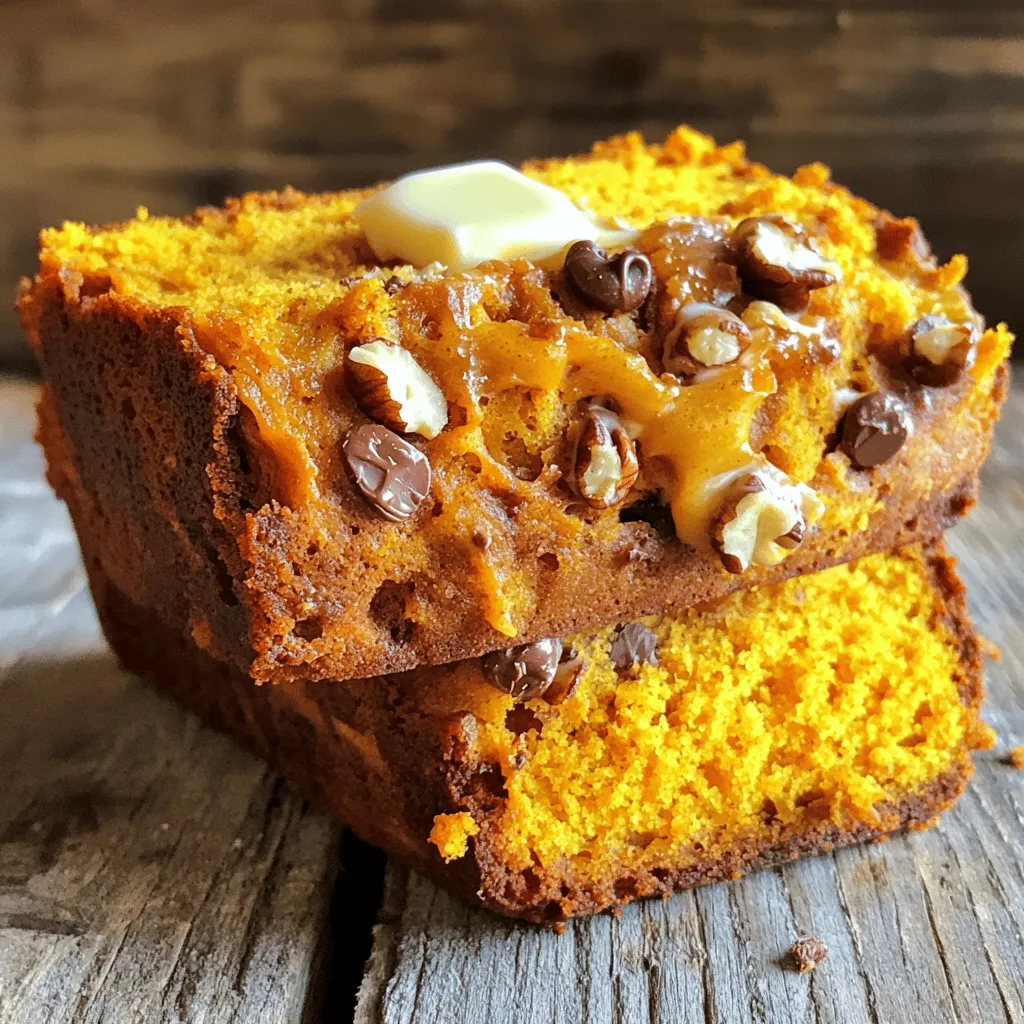
Copycat Starbucks Pumpkin Bread Irresistible Delight
Do you crave the cozy flavors of fall all year? This Copycat Starbucks Pumpkin Bread recipe is your answer! With

Do you crave the cozy flavors of fall all year? This Copycat Starbucks Pumpkin Bread recipe is your answer! With

Craving a sweet treat that’s both delightful and easy? You’ll love my Air Fryer Apple Fritters! With fresh apples and
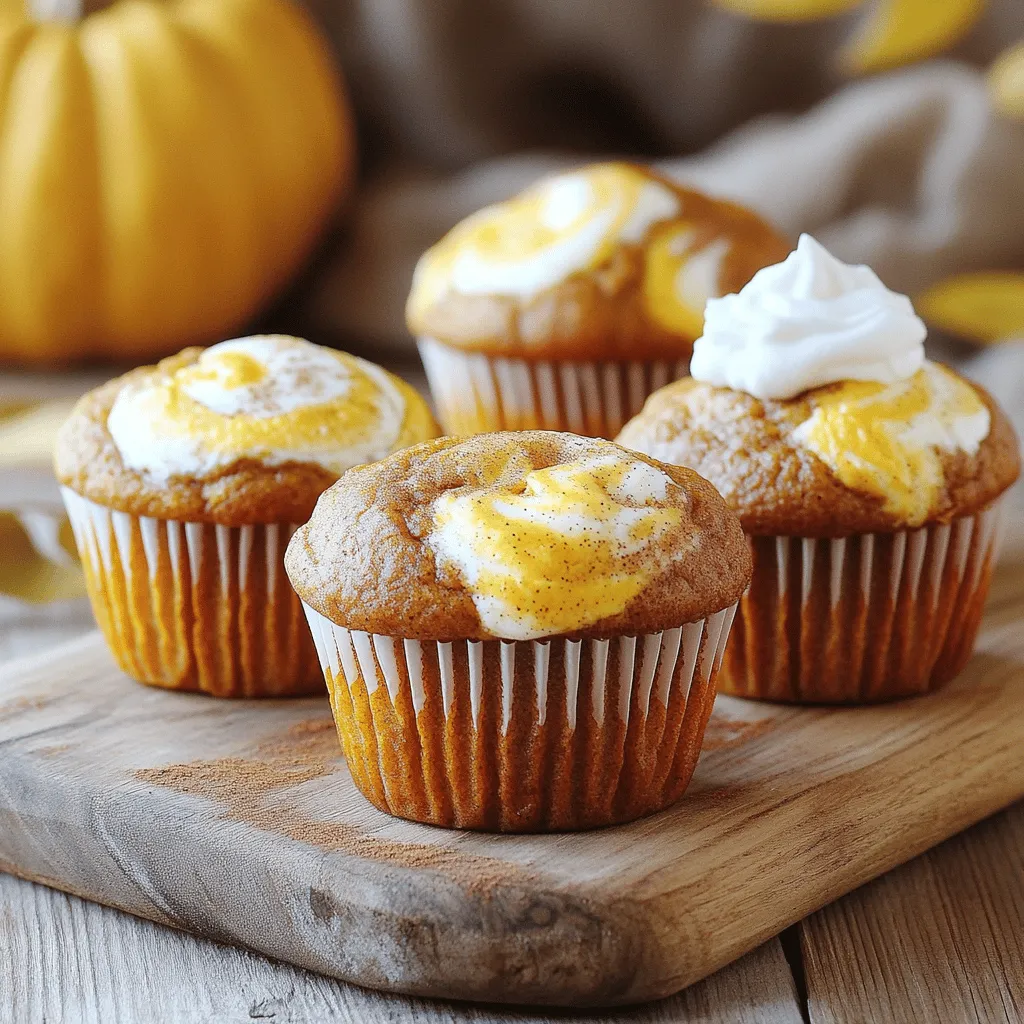
Get ready to delight your taste buds with Pumpkin Cream Cheese Swirl Muffins! This easy recipe gives you a soft,
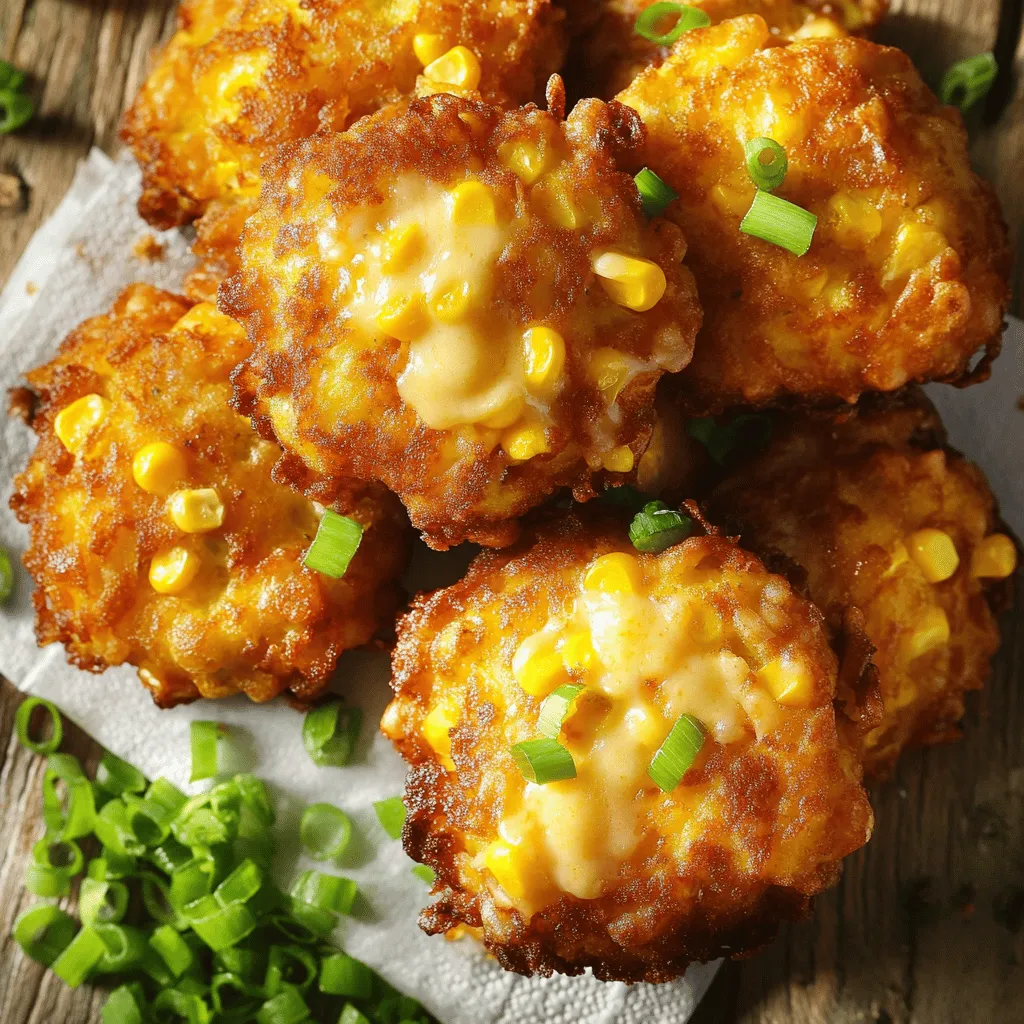
Get ready to indulge in the crispy, cheesy goodness of Cheesy Corn Fritters! These tasty bites combine fresh corn and
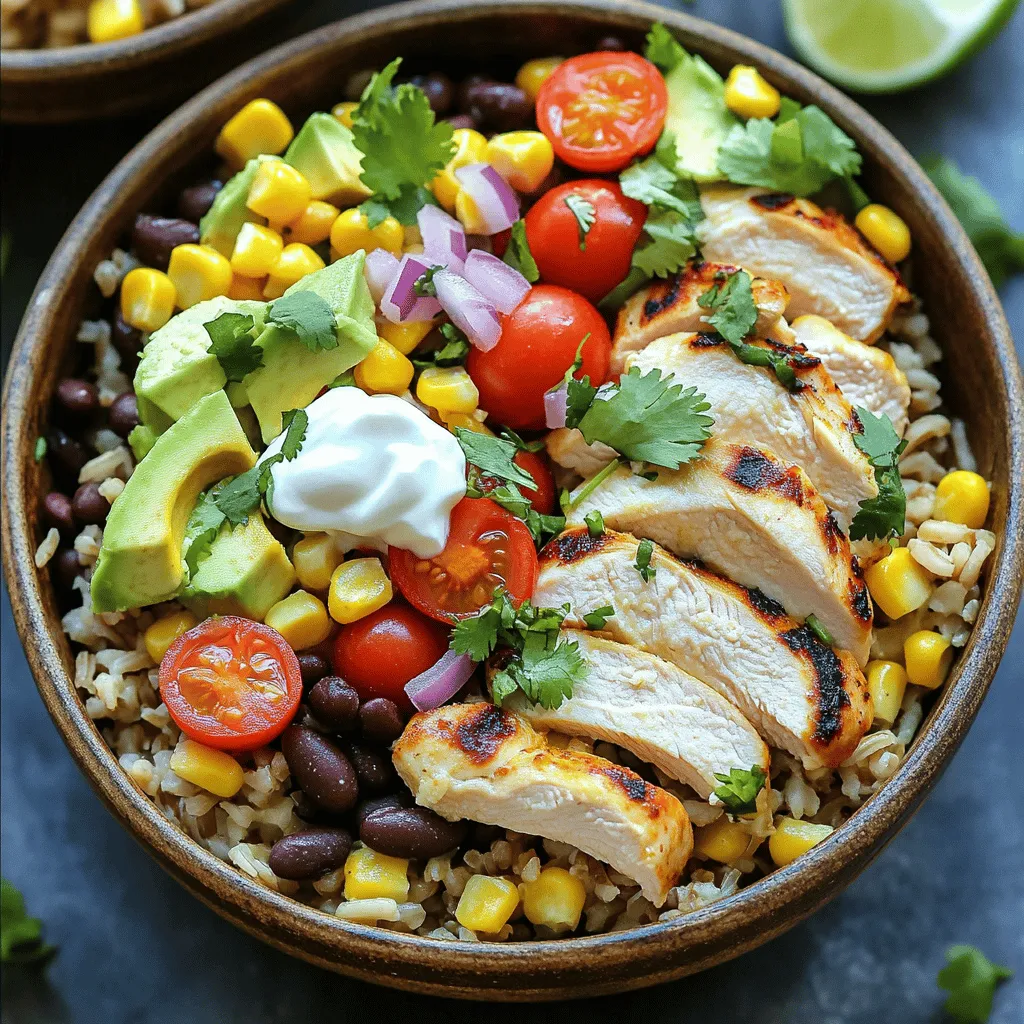
Looking for a quick and tasty meal? Chicken burrito bowls are your answer! They’re simple to make and perfect for
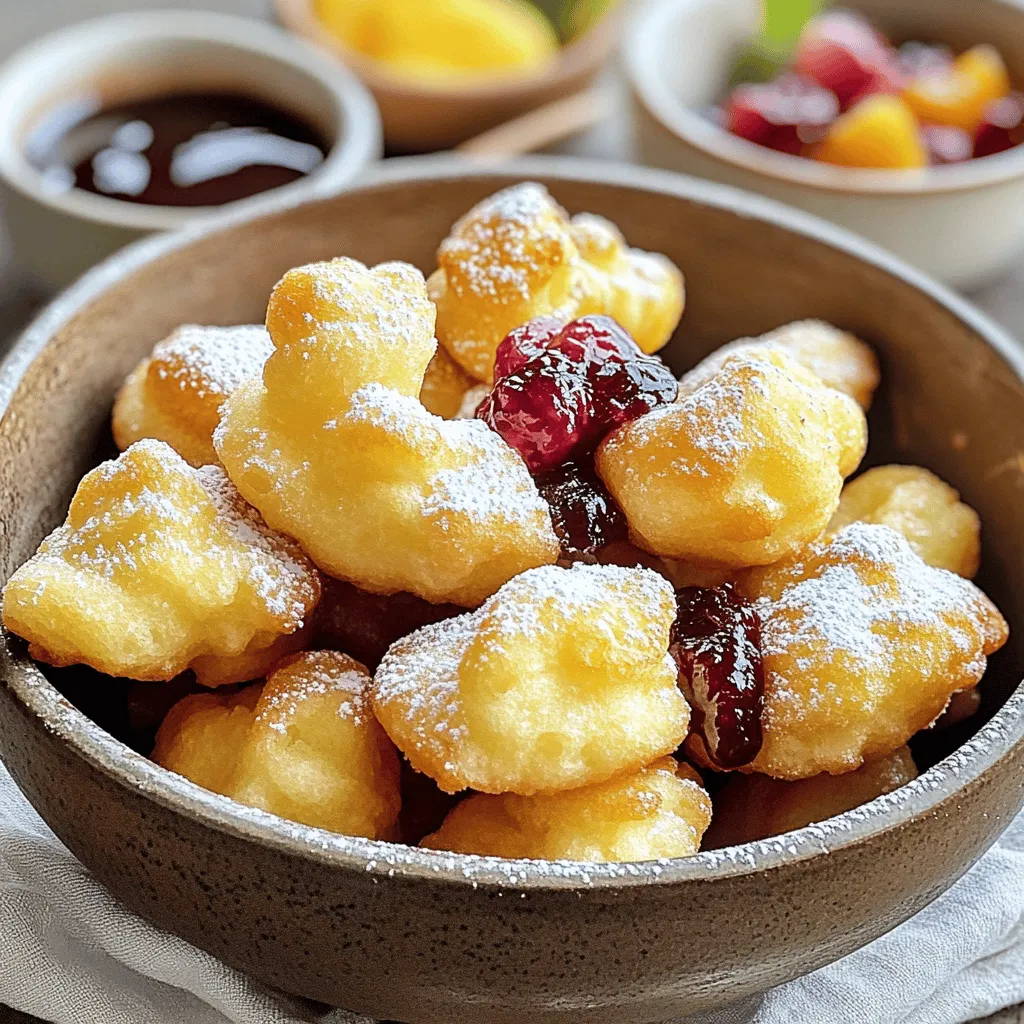
Looking for a fun and tasty snack? You’ll love these Air Fryer Funnel Cake Bites! They’re quick to make and
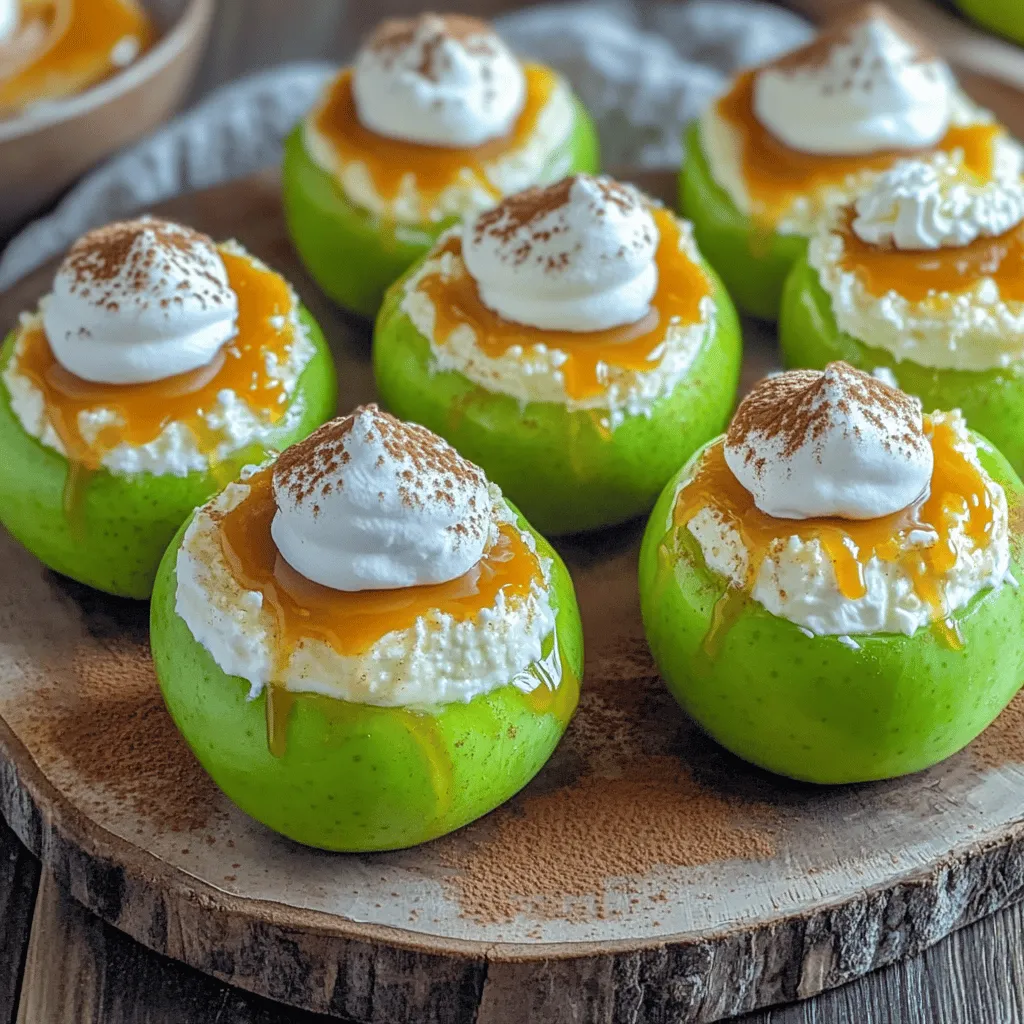
If you love dessert, you’ll adore Cheesecake Stuffed Baked Apples! This sweet treat combines tender apples with a creamy cheesecake
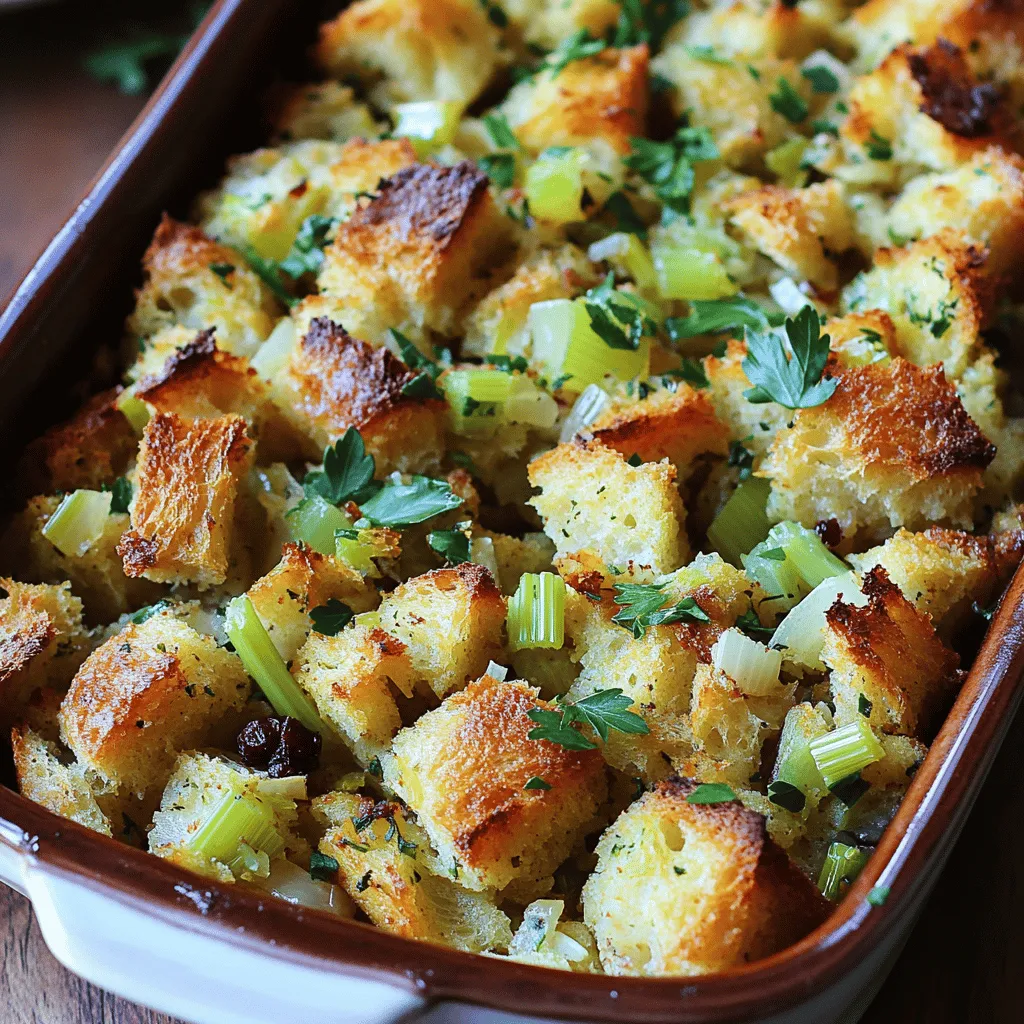
Thanksgiving is all about traditions, and what better way to honor them than with Grandma’s classic stuffing? This delectable dish

Craving a sweet treat this fall? Let me introduce you to Pumpkin Oreo Truffles! These no-bake delights combine creamy pumpkin,
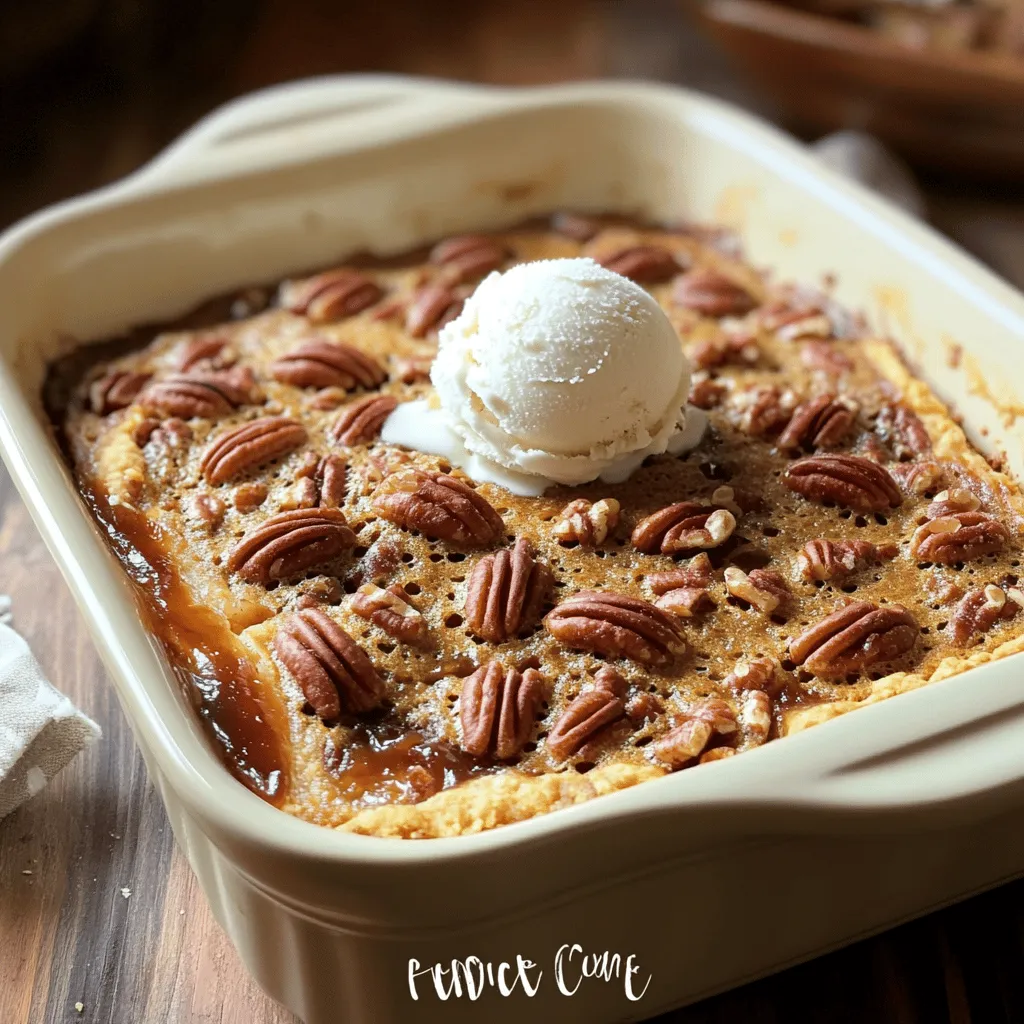
Are you ready to impress your family with a dessert that’s both simple and tasty? This Easy Pecan Pie Dump
