
Sheet Pan Garlic Butter Chicken and Veggies Delight
Get ready to enjoy a simple and tasty meal with my Sheet Pan Garlic Butter Chicken and Veggies Delight! This

Get ready to enjoy a simple and tasty meal with my Sheet Pan Garlic Butter Chicken and Veggies Delight! This
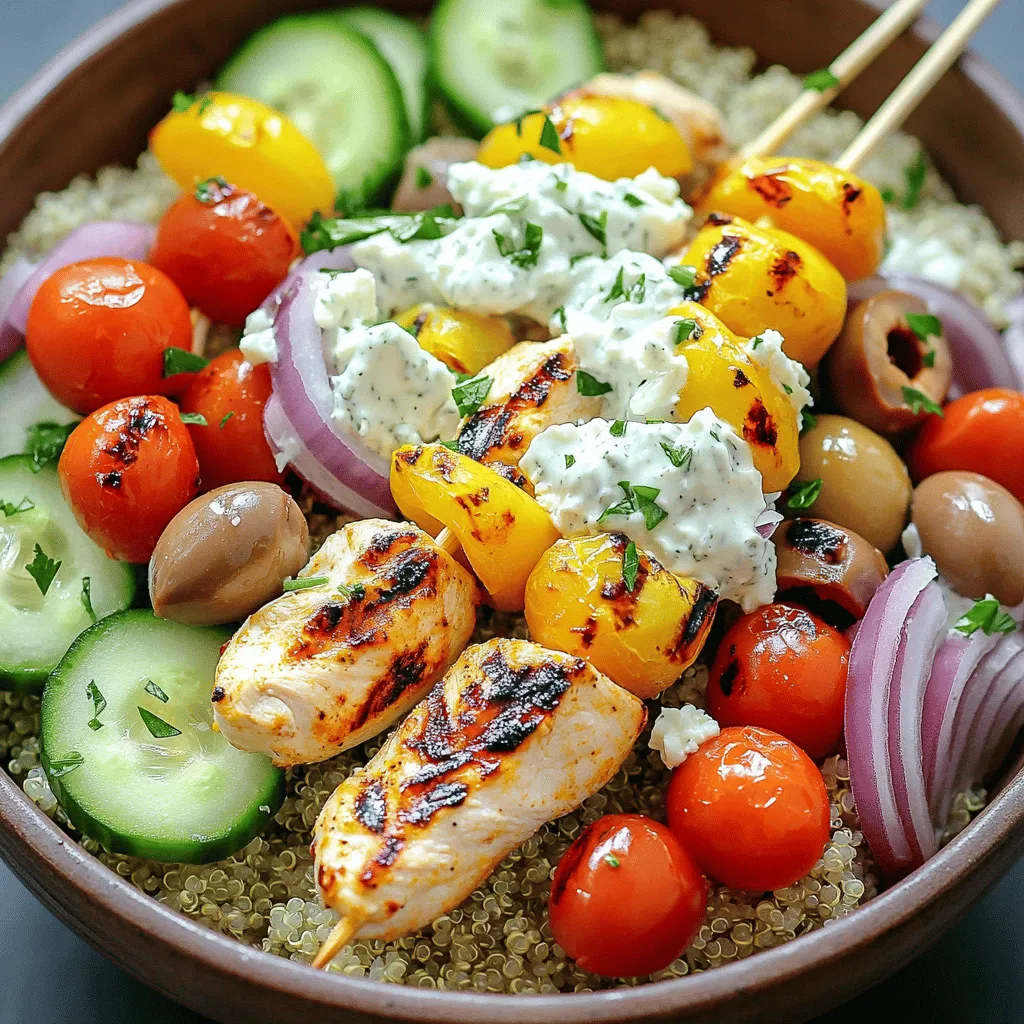
Looking for a quick and tasty meal? My Greek Chicken Souvlaki Bowls are packed with flavor and super easy to
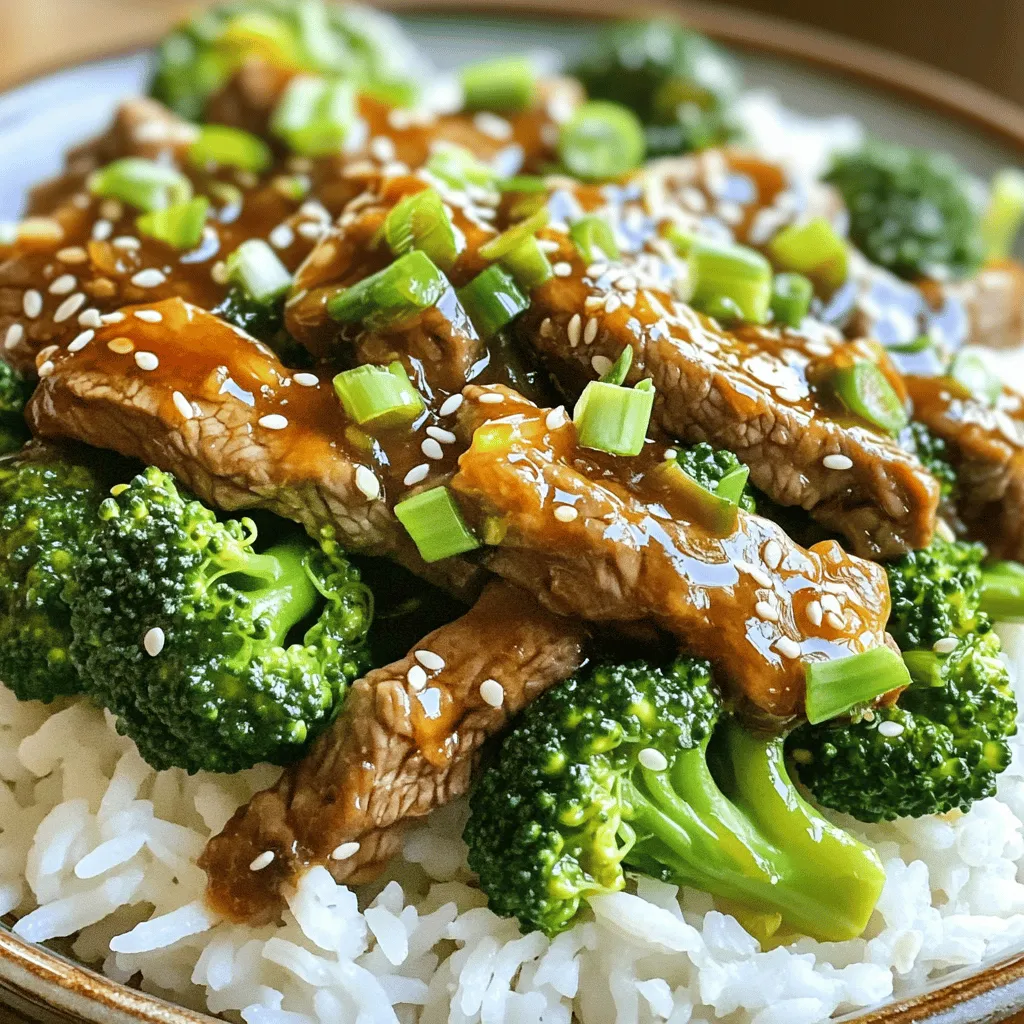
Are you ready to whip up a tasty dish in no time? This Minute Sesame Ginger Beef & Broccoli recipe
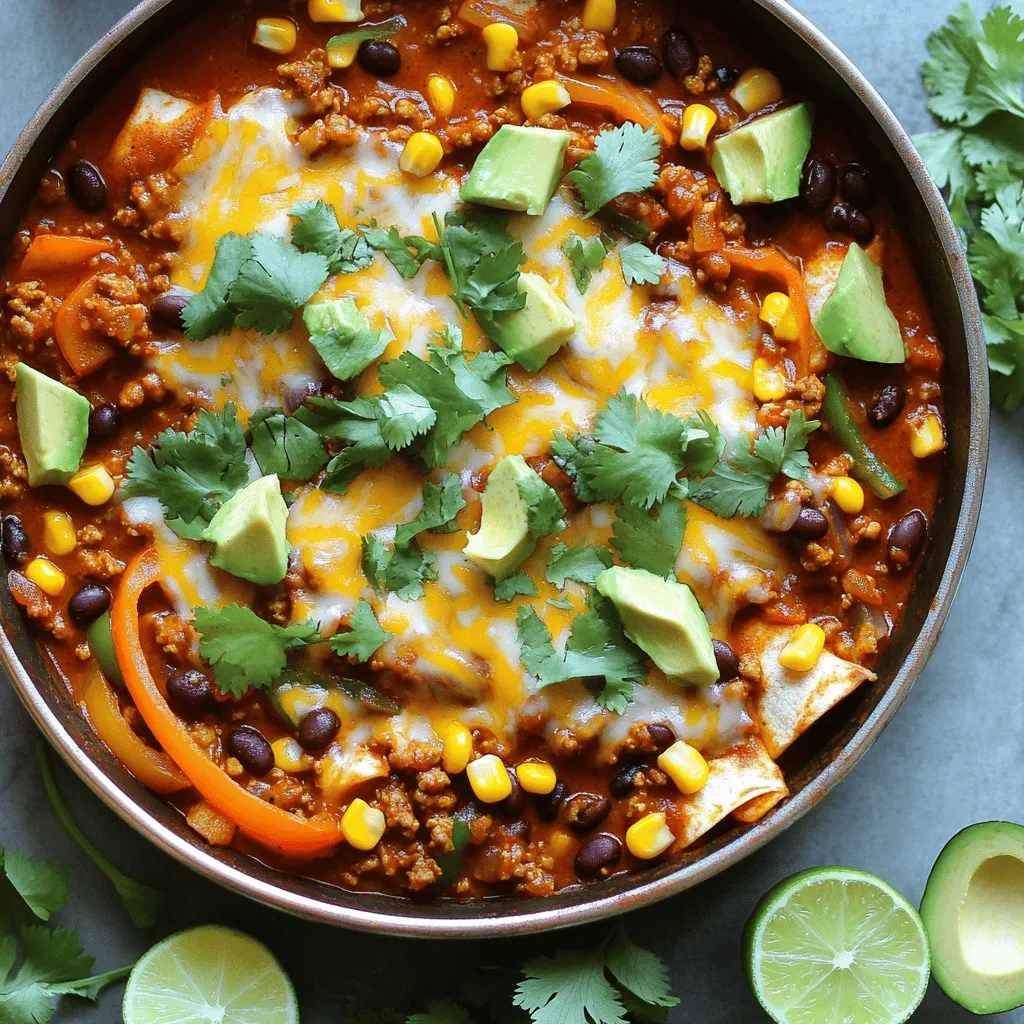
Looking for a hearty dinner that bursts with flavor? Try my Chipotle Turkey Enchilada Skillet! This dish combines ground turkey,
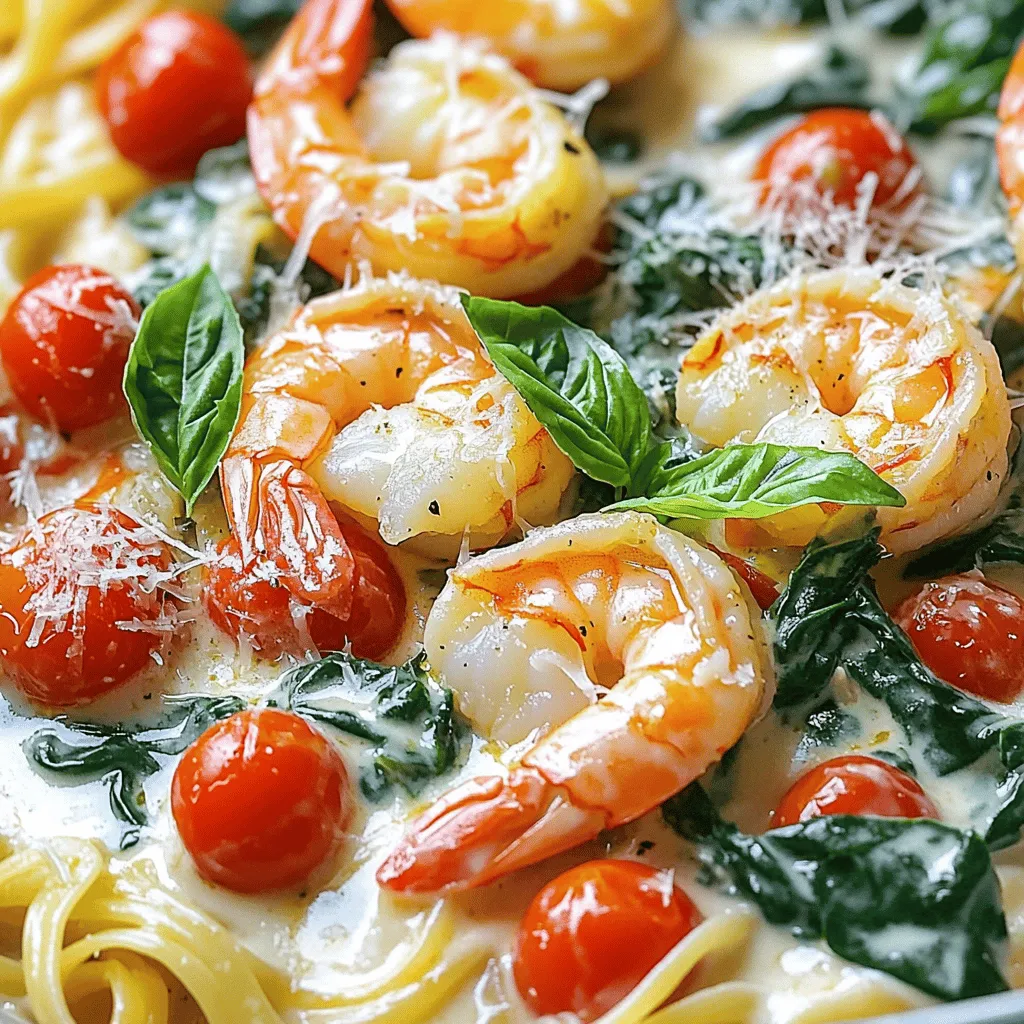
If you crave a flavorful, easy meal, then Creamy Tuscan Shrimp with Spinach is for you. This dish combines tender
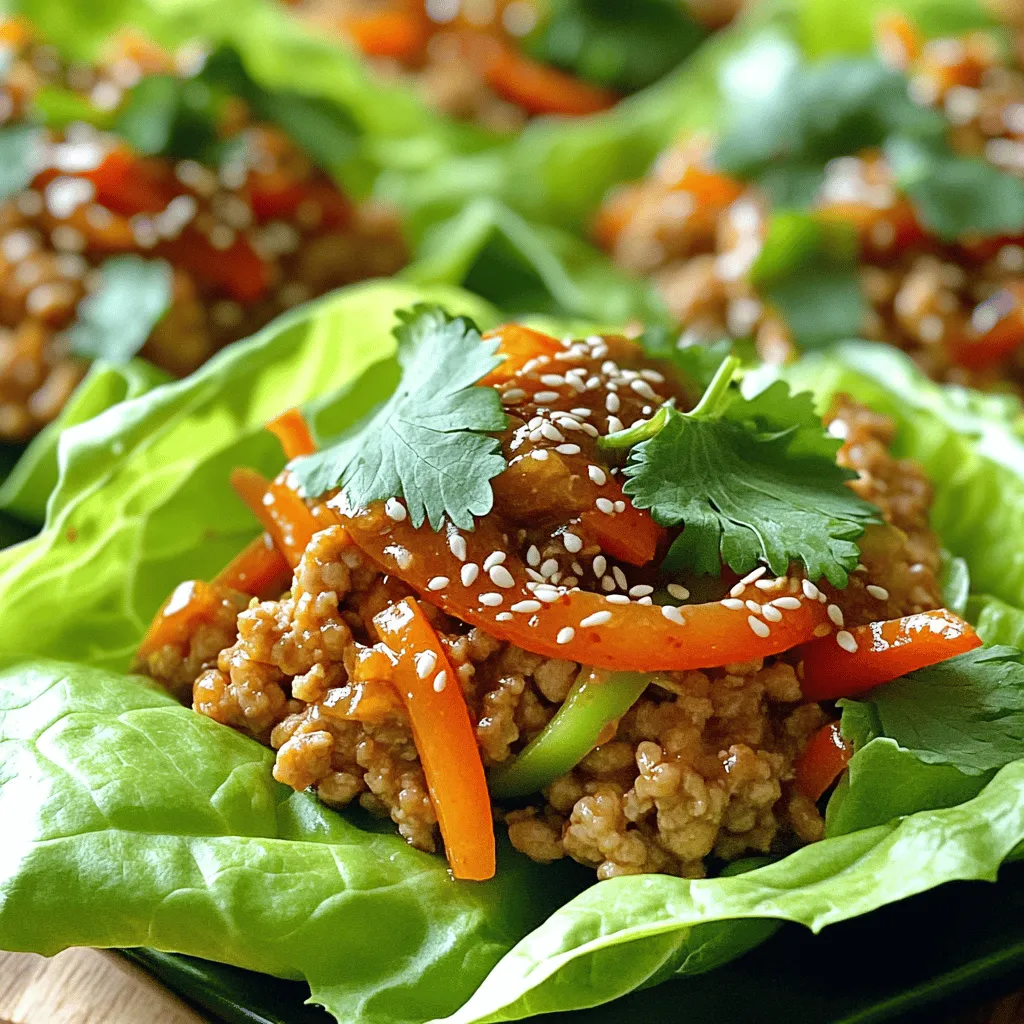
Looking for a quick and tasty meal? Gochujang Chicken Lettuce Wraps are simple and bursting with flavor! Whether you’re busy
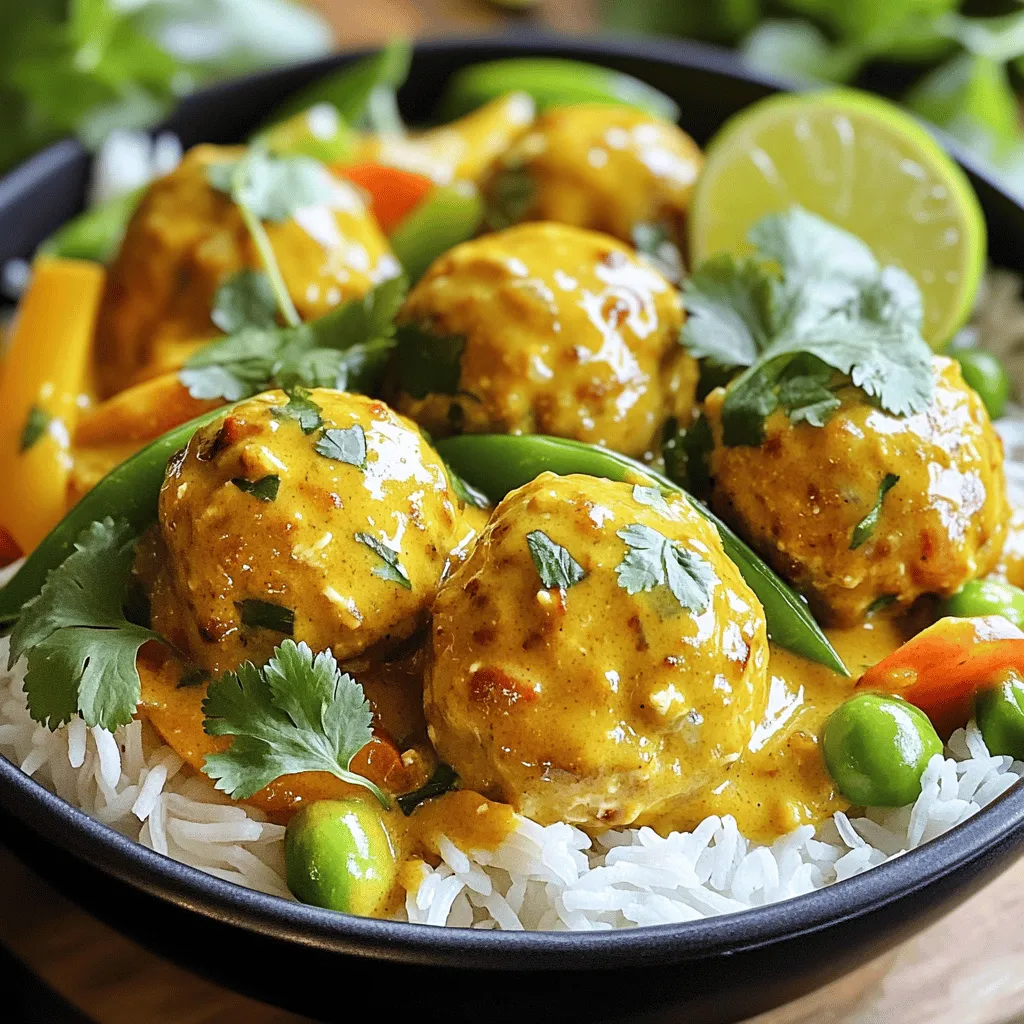
Are you ready to elevate your dinner game? Dive into my Coconut Curry Chicken Meatballs One Pot Delight. In just

Looking for a tasty twist on your veggies? You’ll love these Air Fryer Parmesan Cauliflower Steaks! In this guide, I’ll
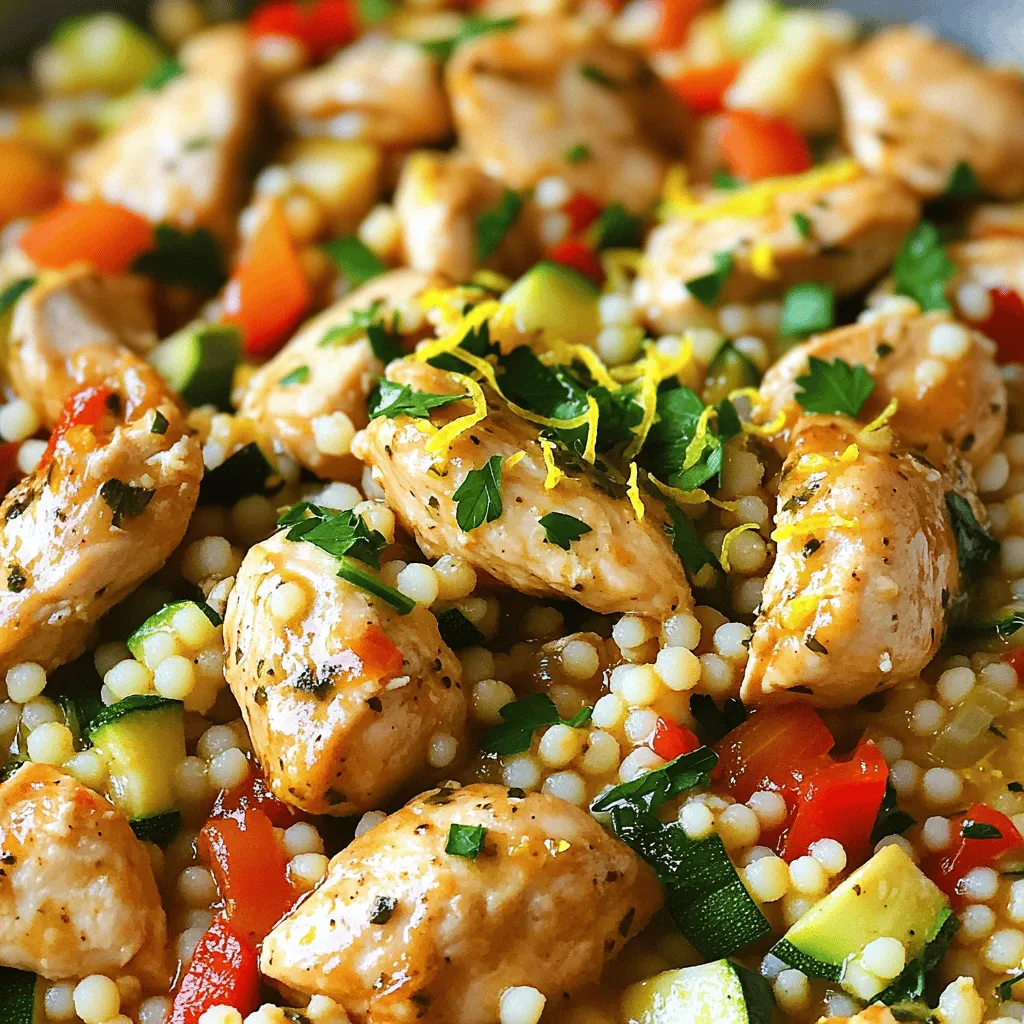
Get ready to elevate your dinner game with my One Pot Lemon Herb Chicken Couscous! This dish combines juicy chicken,
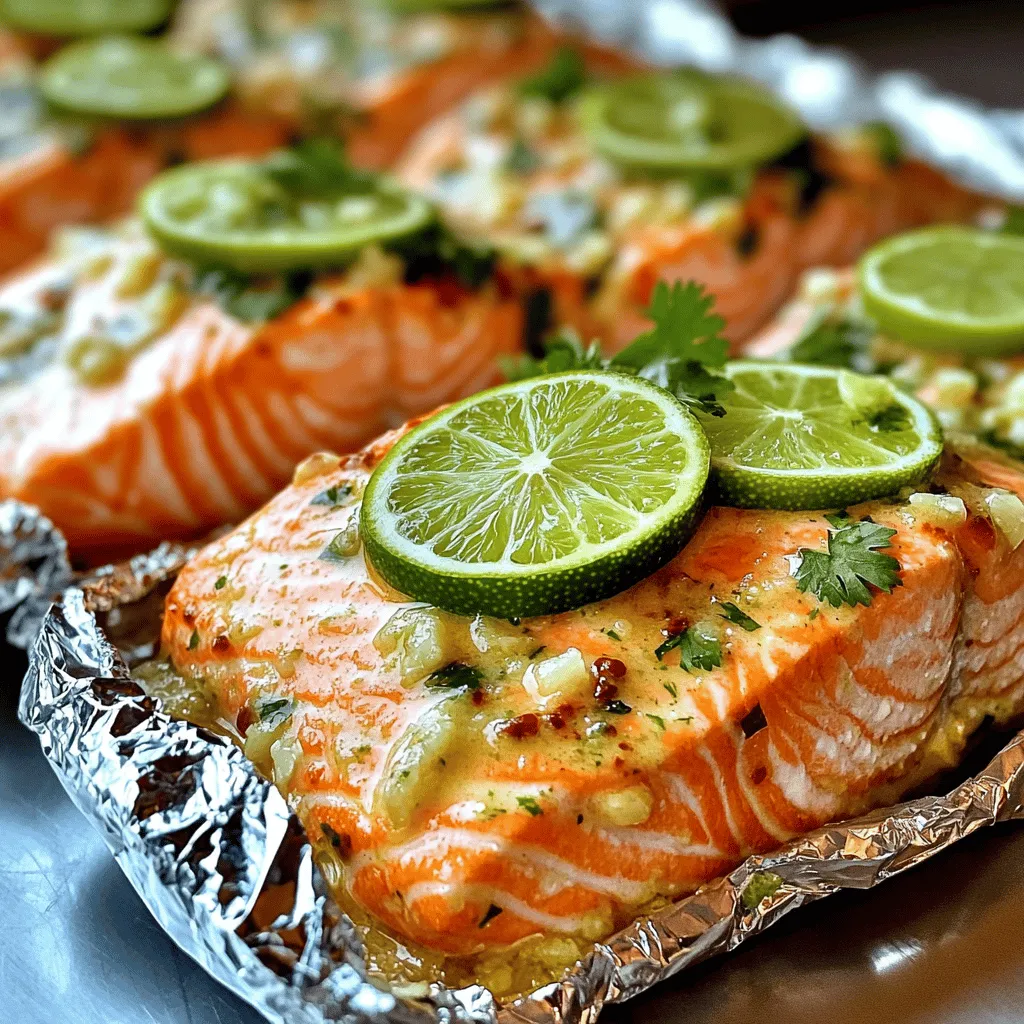
Get ready for a flavor explosion with my Garlic Butter Lime Cilantro Salmon Packets! These tasty packets are packed with
