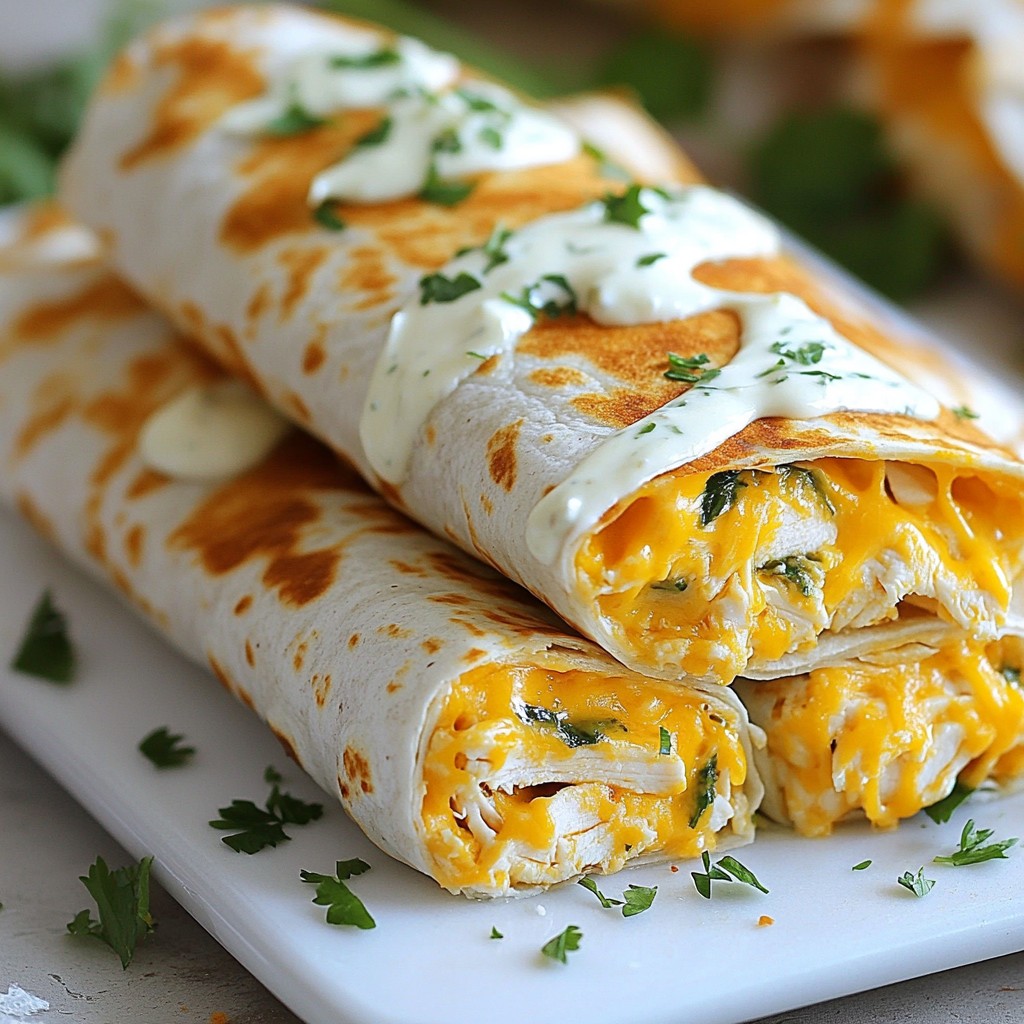
Looking for a quick and tasty meal? Cheesy Garlic Chicken Wraps are your answer! With simple ingredients and easy steps, you can whip up a delicious dish in no time. I’ll show you how to make these wraps packed with flavor. Whether you’re cooking for yourself or feeding a crowd, this recipe has something for everyone. Let’s dive in and get started!
Why I Love This Recipe
- Quick and Easy: This recipe comes together in just 30 minutes, making it perfect for busy weeknights.
- Cheesy Goodness: With creamy mozzarella and cream cheese, these wraps are irresistibly cheesy and satisfying.
- Customizable: You can easily swap in your favorite veggies or sauces, making it versatile for any taste.
- Kid-Friendly: The delicious flavors and fun wraps make this a hit with kids and adults alike!
Ingredients
Essential Ingredients
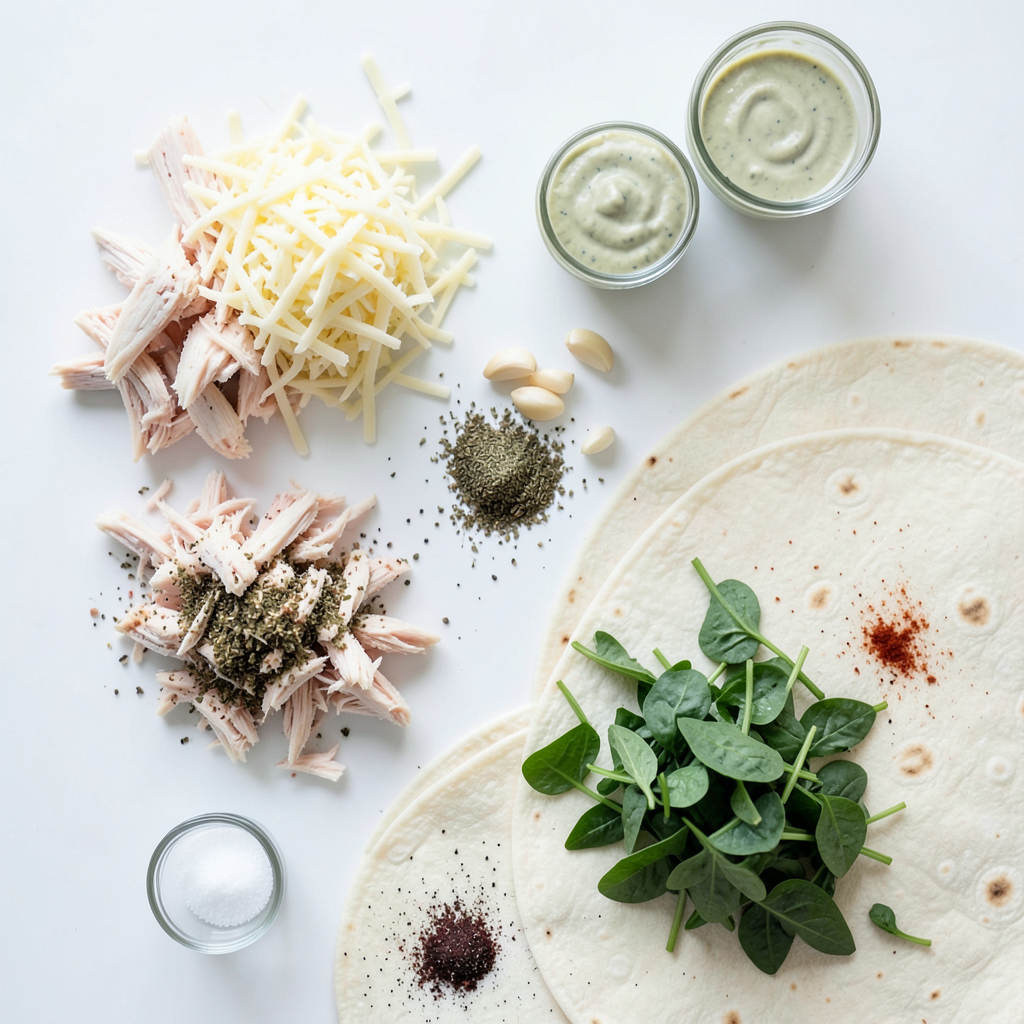
- 2 cups cooked chicken, shredded
- 1 cup shredded mozzarella cheese
- 1/2 cup cream cheese, softened
- 2 cloves garlic, minced
- 1/2 teaspoon dried oregano
- 1/2 teaspoon paprika
- 4 large flour tortillas
- 1 cup fresh spinach, chopped
- Salt and pepper to taste
These ingredients lay the foundation for a tasty meal. The chicken provides protein, while the cheeses add that creamy, cheesy goodness. Garlic brings a strong flavor, and spices like paprika and oregano enhance the dish.
Optional Ingredients
- 1/4 cup ranch dressing
Ranch dressing can add a cool, tangy flavor. It’s great if you want an extra kick. You can skip it if you prefer a simpler taste.
Recommended Tools
- Large mixing bowl
- Non-stick skillet
- Spatula
- Cutting board
- Knife
These tools help you mix, cook, and serve your wraps easily. A non-stick skillet is key to getting a nice, crispy outside on your wraps. Make sure you have a sharp knife for chopping the spinach.
Step-by-Step Instructions
Mixing the Chicken Filling
To start, grab a large mixing bowl. Add 2 cups of cooked chicken that you’ve shredded. Next, toss in 1 cup of shredded mozzarella cheese. Then, add 1/2 cup of softened cream cheese. It gives a nice creamy texture. Mince 2 cloves of garlic and add that too. Sprinkle in 1/2 teaspoon of dried oregano and 1/2 teaspoon of paprika. Season with salt and pepper to taste. Use a fork or spatula to mix everything well. You want a smooth and tasty filling.
Assembling the Wraps
Now, take 4 large flour tortillas. Lay them flat on a clean surface. Divide the chicken mixture evenly among the tortillas. Place the filling right in the center of each. Next, sprinkle 1 cup of chopped fresh spinach on top. If you like, you can drizzle some ranch dressing over the spinach. This adds extra flavor! Fold the sides of each tortilla inwards. Then, roll from the bottom to form a wrap. Tuck in the sides as you roll to keep the filling inside.
Cooking the Wraps
Heat a non-stick skillet over medium heat. Place the wraps seam-side down in the skillet. Cook for about 3 to 4 minutes. You want the bottom to be golden brown and crispy. Then, carefully flip the wraps over. Cook for another 3 to 4 minutes until both sides are golden and the cheese has melted. Once done, remove the wraps from the skillet. Let them cool for a minute before slicing them in half. Enjoy your cheesy garlic chicken wraps!
Tips & Tricks
Perfecting the Flavor
For the best flavor, use fresh garlic. It adds a strong and tasty kick. Mix the spices well to spread the flavor evenly. Adjust the salt and pepper to your taste. If you like heat, try adding a pinch of cayenne pepper. It can give your wraps a nice zing. Consider adding some herbs like basil or thyme for extra depth.
Ensuring a Crispy Wrap
To make sure your wraps are crispy, heat your skillet well before adding them. This helps seal the wraps quickly. Use a non-stick skillet to prevent sticking. Cook them seam-side down first. This keeps the filling from spilling out. Flip them gently to avoid tearing. If you want extra crunch, brush the wraps lightly with olive oil before cooking.
Serving Suggestions
Serve your cheesy garlic chicken wraps with a side of ranch dressing for dipping. This adds a creamy and tangy touch. You can also add fresh veggies like carrot sticks or celery for crunch. A simple side salad pairs nicely too. For a fun twist, serve with homemade salsa. It brings a fresh and zesty flavor to the meal.
Pro Tips
- Use Rotisserie Chicken: Opt for store-bought rotisserie chicken to save time on cooking and shredding.
- Add Extra Veggies: Feel free to incorporate other vegetables such as bell peppers or onions for added flavor and nutrients.
- Cheese Variations: Experiment with different types of cheese like cheddar or pepper jack for a unique twist on flavor.
- Make Ahead: Prepare the chicken mixture in advance and store it in the fridge for a quick assembly when you're ready to eat.
Variations
Alternative Proteins
You can switch the chicken for other proteins. Try shredded turkey or diced ham. These options give a new taste. You can also use cooked shrimp for a seafood twist. Just ensure the shrimp is cooked and peeled.
Vegan or Vegetarian Options
To make these wraps vegan, use chickpeas or tofu. Mash chickpeas with spices to mimic the chicken. For tofu, press it, then sauté until golden. Use vegan cheese to keep that cheesy flavor. Add extra veggies like bell peppers or mushrooms for crunch and color.
Flavor Twist Ideas
Want to change the flavor? Add spices like cumin or chili powder for heat. You can also mix in sun-dried tomatoes for a tangy twist. If you like sweet, try adding pineapple chunks. Fresh herbs like basil or cilantro can brighten the dish. Experiment with your favorite flavors!
Storage Info
How to Store Leftovers
To store your cheesy garlic chicken wraps, let them cool down first. Place them in an airtight container. Make sure to keep them in the fridge. They will last for about three days. This way, you can enjoy them later without losing flavor.
Freezing Instructions
You can also freeze these wraps for later meals. Wrap each one in plastic wrap or foil tightly. Place them in a freezer-safe bag. Label the bag with the date. They can last up to three months in the freezer. Just remember to thaw them in the fridge before reheating.
Reheating Tips
To reheat your wraps, you have a few good options. You can use a skillet for a crispy finish. Heat it over medium heat and cook each side until warm. Another option is the oven. Preheat it to 350°F (175°C) and bake for about 15 minutes. If you want a quick way, use the microwave. Just heat them for 1-2 minutes. Add a splash of water to keep them moist.
FAQs
Can I use raw chicken?
No, using raw chicken is not safe for these wraps. Always cook chicken first. Cooked chicken adds flavor and makes sure it’s safe to eat. You can use leftover chicken or store-bought rotisserie chicken for quick prep. Just shred it to mix with the other tasty ingredients.
What can I substitute for cream cheese?
If you don’t have cream cheese, you can use Greek yogurt. It’s creamy and adds a nice tang. You can also try ricotta cheese for a different flavor. Both options keep the wrap moist and delicious.
How do I make these wraps gluten-free?
To make these wraps gluten-free, use gluten-free tortillas. Many brands offer great options. Just check the label to ensure they fit your needs. You can also add more veggies or use lettuce for a low-carb twist.
This blog post detailed how to make tasty wraps. You learned about key ingredients, tools, and step-by-step instructions. We explored ways to enhance flavor and keep wraps crispy. Variations let you try new proteins and adapt to different diets. Plus, we covered how to store and reheat your leftovers.
Remember, cooking is fun and creative. Use this guide to make your wraps unique and delicious! Enjoy your cooking journey.