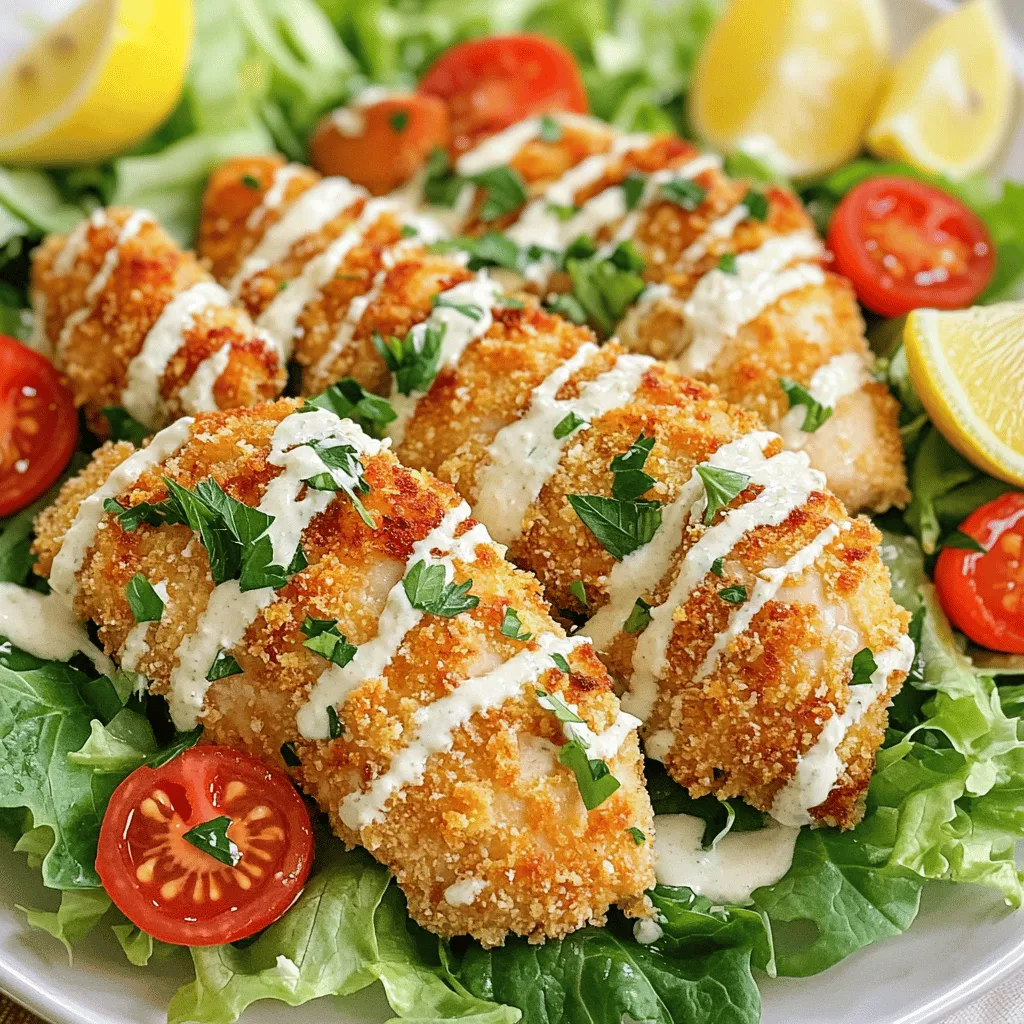
Are you ready to elevate your salad game? Today, we’re diving into a Chicken Caesar Salad with Crispy Chicken that combines crunch and flavor in every bite. Imagine juicy chicken breasts coated in crispy breadcrumbs paired with fresh romaine, vibrant cherry tomatoes, and rich Caesar dressing. Whether you’re looking for a quick lunch or a family dinner, this dish checks all the boxes. Let’s get started on creating this delicious delight!
Ingredients
Chicken Ingredients
– 2 boneless, skinless chicken breasts
– 1 cup breadcrumbs (panko for extra crunch)
– 1/2 cup grated Parmesan cheese
Salad Ingredients
– 2 cups romaine lettuce, chopped
– 1/2 cup cherry tomatoes, halved
– 1/4 cup Caesar dressing (store-bought or homemade)
Additional Ingredients
– Fresh parsley, chopped for garnish
– Lemon wedges for serving
– Seasoning (salt, pepper, garlic powder, onion powder)
When I make Chicken Caesar Salad with Crispy Chicken, I love using fresh, quality ingredients. The chicken breasts are key. I choose boneless and skinless, as they cook evenly and stay juicy. For the best crunch, I use panko breadcrumbs. They give a light, airy texture that makes every bite exciting.
Next, I chop the romaine lettuce. It adds a nice crunch and freshness to the dish. Halved cherry tomatoes provide a sweet burst of flavor. The Caesar dressing brings it all together. You can buy it or make your own at home, which is always fun!
Don’t forget to season everything! A mix of salt, pepper, garlic powder, and onion powder makes the chicken even tastier. I add fresh parsley for color and lemon wedges for a zesty twist. These ingredients create a flavorful, balanced meal that looks great on the plate.You’ll find everything you need to create this delightful dish!
Step-by-Step Instructions
Preparation Steps
1. Preheat your oven to 400°F (200°C). This helps the chicken cook perfectly.
2. Line a baking sheet with parchment paper. It keeps the chicken from sticking.
3. In a shallow bowl, mix 1 cup of breadcrumbs with 1/2 cup of grated Parmesan cheese. Add 1 teaspoon of garlic powder and 1 teaspoon of onion powder. Sprinkle in salt and pepper to taste.
Chicken Cooking Process
1. Pat the chicken breasts dry using a paper towel. Dry chicken helps the coating stick.
2. Dip each chicken breast into the breadcrumb mixture. Press down gently to make sure it sticks.
3. Place the coated chicken on the prepared baking sheet. Bake it in the oven for 25-30 minutes. The chicken should be crispy and reach an internal temperature of 165°F (74°C).
Salad Assembly
1. While the chicken bakes, prepare your salad. In a large bowl, toss 2 cups of chopped romaine lettuce with 1/2 cup of halved cherry tomatoes.
2. Add 1/4 cup of Caesar dressing to the salad. Mix until everything is well coated.
3. Once the chicken is done, take it out and let it rest for 5 minutes. Slice the chicken into strips.
4. Top the salad with the crispy chicken strips. If you like, sprinkle on more Parmesan cheese. Garnish with chopped parsley, and serve with lemon wedges for a zesty kick.Enjoy your Chicken Caesar Salad with Crispy Chicken Delight!
Tips & Tricks
Perfecting the Crispy Chicken
To get that perfect crispy chicken, start with panko breadcrumbs. They give the best crunch. Mix them with grated Parmesan cheese, garlic powder, onion powder, salt, and pepper. This mix adds flavor and texture.
Before coating, pat the chicken dry. This helps the breadcrumbs stick better. Dip the chicken into the mix, pressing down gently. Make sure every part is covered. Bake it at 400°F (200°C) for 25-30 minutes. You want it golden and cooked through. The chicken should reach an internal temperature of 165°F (74°C).
To keep the chicken juicy, let it rest for five minutes after baking. This step keeps the juices inside.
Salad Enhancements
For a homemade Caesar dressing, blend mayonnaise, anchovies, lemon juice, garlic, and Parmesan. This mix gives a fresh taste. If you prefer store-bought, choose a brand with simple ingredients for the best flavor.
When it comes to lettuce, romaine is the best choice. Its crisp leaves hold the dressing well. You can also mix in some baby kale for extra nutrients and texture.
Presentation Tips
Serving matters! Use a large salad bowl or individual plates. Place the crispy chicken strips on top of the salad for a beautiful look.
For garnishing, sprinkle extra Parmesan and chopped parsley on top. This adds color and flavor. Don’t forget lemon wedges on the side! They brighten up the dish and add zesty flavor.
Variations
Ingredient Substitutions
You can change up proteins in this salad. Shrimp or tofu makes great substitutes. Both add unique flavors and textures. If you’re feeling adventurous, try grilled salmon for a smoky taste.
Add toppings for extra crunch and flavor. Croutons are classic, but avocado offers creaminess. Nuts like walnuts or pecans also elevate your salad. They add a nice crunch and flavor boost.
Dietary Modifications
For gluten-free options, use gluten-free breadcrumbs. They work just as well as regular ones. You can also try crushed cornflakes for a fun twist.
If you’re watching calories, look for low-calorie dressings. Many brands offer lighter Caesar options. You can also make your own with yogurt instead of mayo. It’s creamy and tangy, just like the classic.
Flavor Variations
You can spice things up with different herbs and spices. Try adding oregano or basil for a fresh twist. A pinch of paprika adds a nice kick.
Explore international flavors by adding different dressings. A Thai peanut sauce makes it exciting. For a Mexican flair, try adding chipotle dressing. Each option brings a new taste to your Chicken Caesar Salad.
Storage Info
Refrigeration Guidelines
To store leftover chicken and salad, place them in separate containers. This keeps the salad fresh and the chicken crispy. Use airtight containers made of glass or plastic. These containers help prevent moisture and keep flavors intact. The salad will stay good for about two days. The chicken, if stored properly, can last up to three days.
Reheating Instructions
To reheat crispy chicken, use an oven or air fryer. Both methods help to keep the chicken crunchy. Avoid using a microwave, as it can make the chicken soggy. Heat the chicken at 350°F (175°C) for about 10 minutes. For the salad, keep it fresh by adding dressing just before serving. This stops the greens from browning and wilting.
Freezing Tips
You can freeze the chicken but not the salad. The salad loses its texture when frozen. For best results, wrap the chicken tightly in plastic wrap and foil. This prevents freezer burn. Label it with the date. When you’re ready to eat, thaw the chicken in the fridge overnight before reheating. Enjoy this Chicken Caesar Salad with Crispy Chicken Delight anytime!
FAQs
What is the best way to make chicken crispy?
To make chicken crispy, use these techniques:
– Use panko breadcrumbs. They create a lighter, crunchier coating.
– Pat the chicken dry. This helps the coating stick better.
– Press the coating on. Ensure it adheres well for crunch.
– Bake at high heat. Cooking at 400°F (200°C) crisps up the chicken.
– Let it rest. Allowing the chicken to rest keeps it juicy.
These steps ensure you get that perfect crunch in every bite.
Can I make this salad in advance?
Yes, you can make this salad in advance. Here are some tips for meal prep:
– Prep the chicken. Cook and cool the chicken before storing.
– Store salad separately. Keep the dressing and salad mix apart until serving.
– Chill everything. Refrigerate both the chicken and salad components.
– Assemble before serving. Toss everything together just before enjoying.
This keeps the salad fresh and crunchy.
How do I customize my Chicken Caesar Salad?
You can personalize your Chicken Caesar Salad in many ways:
– Add more veggies. Consider bell peppers or cucumbers for extra crunch.
– Try different proteins. Use shrimp or tofu for a twist.
– Change the cheese. Swap Parmesan for feta or goat cheese.
– Top with nuts. Walnuts or almonds add a nice crunch.
– Use flavored dressings. Try ranch or balsamic for a different taste.
These ideas let you make the salad your own.
Is Caesar dressing necessary for this salad?
Caesar dressing is traditional, but it’s not necessary. Here are some alternatives:
– Ranch dressing. Creamy and tangy, it pairs well with the chicken.
– Vinaigrettes. A light lemon or balsamic vinaigrette adds brightness.
– Yogurt-based dressings. They can be healthier and still tasty.
– Homemade dressings. Mix Greek yogurt with garlic and lemon for a fresh take.
These alternatives can change the taste while keeping the salad enjoyable.
Can I serve this dish as a main course?
Absolutely! This Chicken Caesar Salad can shine as a main dish. Consider these sides to complete your meal:
– Garlic bread. A warm, buttery side pairs perfectly.
– Soup. A light soup can complement the salad well.
– Roasted veggies. Add some colorful roasted vegetables for balance.
– Quinoa or rice. Serving it with grains can make it heartier.
These options make your meal filling and delightful.
You’ve learned how to create a tasty Chicken Caesar Salad. We covered key ingredients, from chicken to salad toppings. You know how to make crispy chicken and toss a fresh salad. Tips and tricks were given for the perfect crunch and pretty presentation.
Feel free to customize this dish to match your taste. Remember, meal prep can save time, and leftovers store well. Enjoy making this delightful meal that both tastes great and looks appealing!