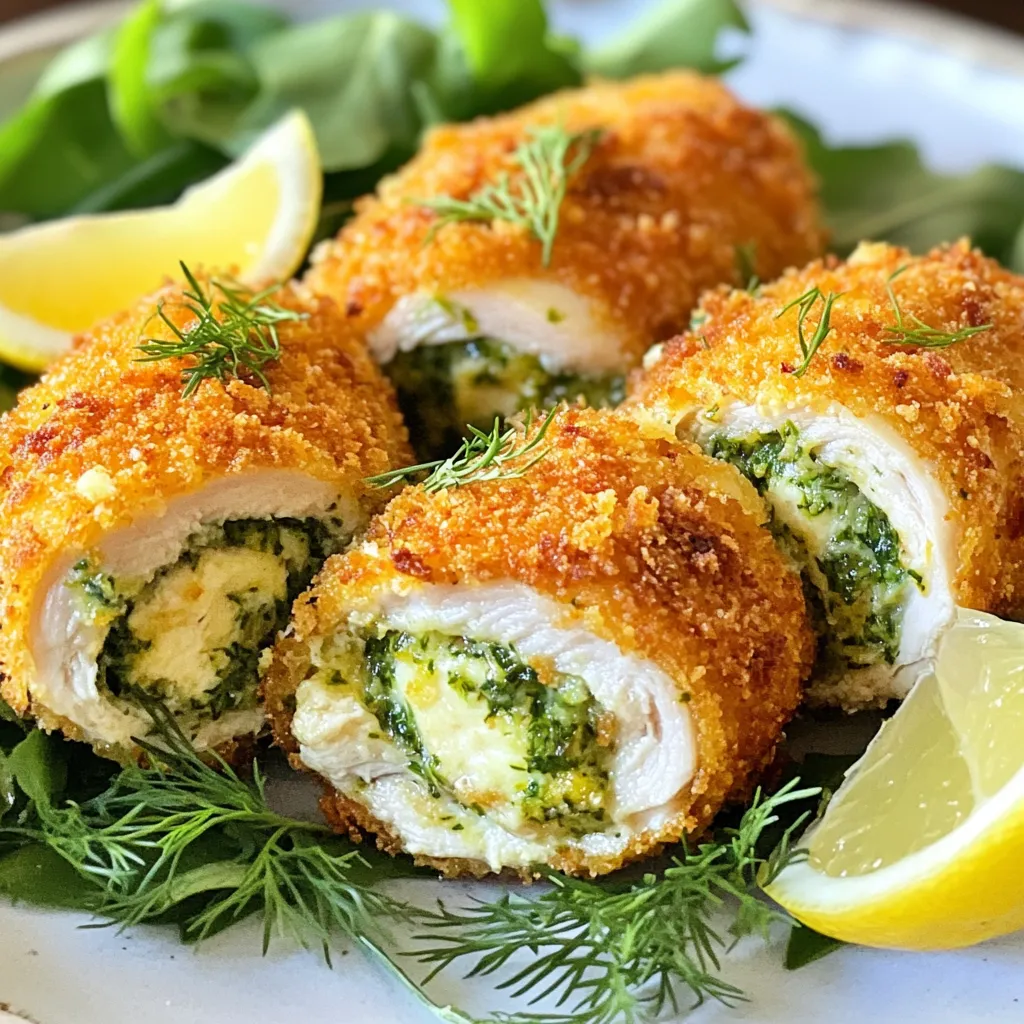
When you’re short on time but still crave a delicious meal, Chicken Kiev is your answer. This easy recipe combines tender chicken with rich herb butter, giving you a dish that tastes gourmet but is ready in minutes. I’ll walk you through the simple steps and share tips to make it perfect every time. Ready to impress your family or guests? Let’s dive in!
Why I Love This Recipe
- Easy Preparation: This recipe simplifies the traditional Chicken Kiev by using readily available ingredients and straightforward steps, making it accessible for home cooks at any skill level.
- Flavorful Herb Butter: The combination of garlic, parsley, dill, and lemon zest in the herb butter adds a burst of flavor that perfectly complements the chicken, creating a deliciously moist filling.
- Crispy Texture: Using panko breadcrumbs provides an extra crunch that contrasts beautifully with the tender chicken, elevating the dish to restaurant-quality status.
- Versatile Serving Options: Chicken Kiev can be served with a variety of sides, from fresh salads to creamy mashed potatoes, allowing for customization based on personal preference.
Ingredients
Main Ingredients
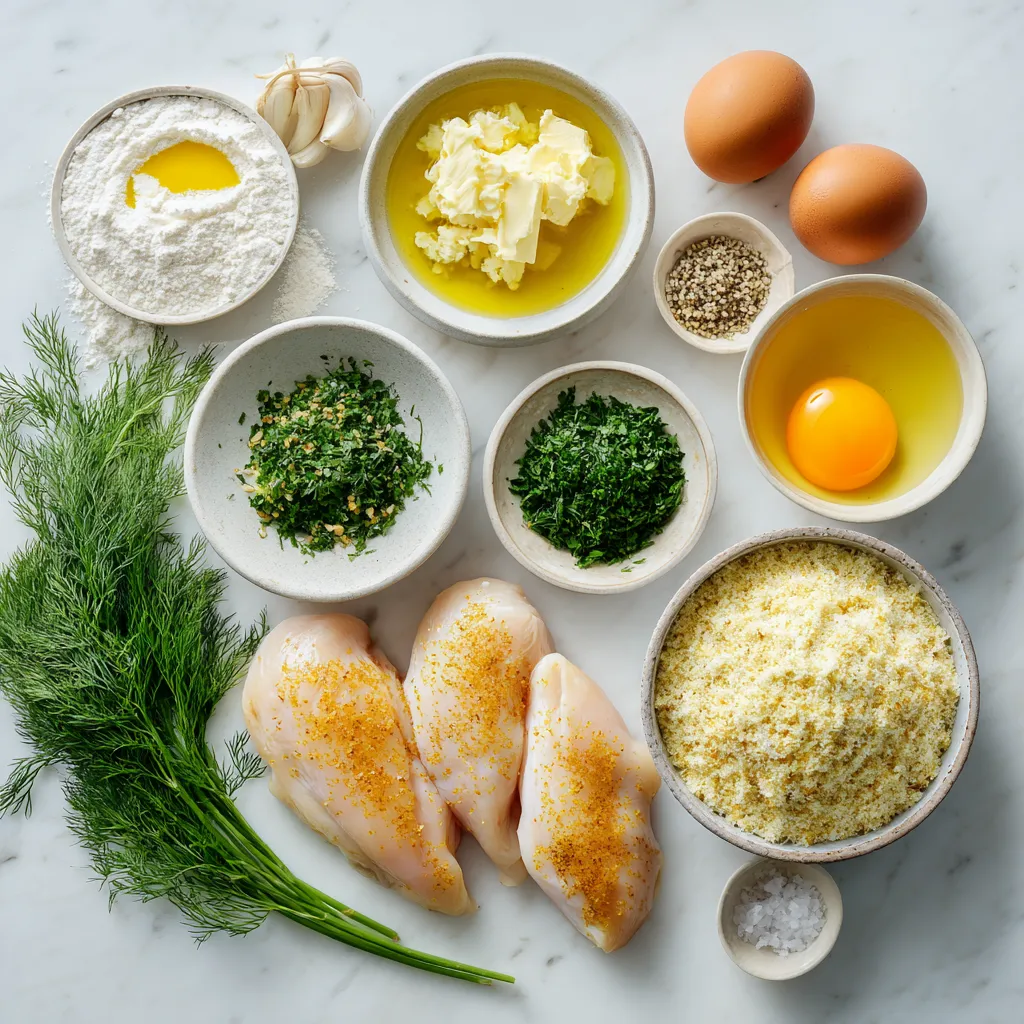
For Chicken Kiev, you will need:
– 4 boneless, skinless chicken breasts
– ½ cup unsalted butter, softened
– 3 cloves garlic, minced
– 2 tablespoons fresh parsley, chopped
– 1 tablespoon fresh dill, chopped
– 1 teaspoon lemon zest
– 1 teaspoon salt
– ½ teaspoon black pepper
These ingredients work together to create that classic, savory taste. The chicken is the star here, while the herb butter adds richness and flavor.
Cooking Essentials
You also need some key cooking items:
– 1 cup all-purpose flour
– 2 large eggs, beaten
– 2 cups breadcrumbs (preferably panko)
– Cooking oil (for frying)
The flour helps the coating stick. Eggs bind the breadcrumbs, giving a crunchy texture. Panko breadcrumbs make it extra crispy, while cooking oil ensures a golden finish.
Substitutions
If you want to swap ingredients, here are some ideas:
– Use olive oil instead of butter for a dairy-free option.
– Swap chicken for turkey or a plant-based option for a different twist.
– Fresh herbs can be replaced with dried ones, but use less since dried herbs are stronger.
These substitutions can help you cater to dietary needs while still enjoying Chicken Kiev.
Step-by-Step Instructions
Preparation of Herb Butter
To make the herb butter, start with a mixing bowl. Add the softened butter, minced garlic, chopped parsley, dill, lemon zest, salt, and pepper. Use a fork to mix everything until it’s smooth and creamy. This step is key for great flavor. Once mixed, scoop the butter onto a piece of plastic wrap. Shape it into a log. Wrap it tightly and chill it in the fridge for at least 30 minutes. This makes the butter firm and easy to use later.
Preparing Chicken Breasts
Next, you will prepare the chicken breasts. Take each breast and place it between two pieces of parchment paper. This keeps your kitchen clean. Use a meat mallet to pound the chicken gently. Aim for about ½ inch thick. This helps the chicken cook evenly. Make sure not to hit too hard. You want to flatten it, not tear it.
Breading Process
Now, let’s set up your breading station. You need three bowls: one for flour, one for beaten eggs, and one for breadcrumbs. Start with the flour. Dredge each chicken roll in flour, shaking off the excess. Then dip it in the beaten eggs. Finally, roll it in breadcrumbs until it’s fully coated. This gives the chicken a nice crunchy texture when cooked.
Cooking Method
For the cooking method, heat oil in a large skillet over medium heat. Gently place the chicken rolls seam-side down in the pan. Fry them for about 5-7 minutes on each side. Look for a golden brown color. Once fried, transfer the chicken to a baking dish. Bake in a preheated oven at 375°F (190°C) for 15-20 minutes. This step ensures the chicken is cooked through. The juices should run clear when it’s done. Let the Chicken Kiev rest for a few minutes before serving to keep it juicy.
Tips & Tricks
Cooking Tips
To get a perfect golden crust on your Chicken Kiev, follow these steps:
– Use panko breadcrumbs for extra crunch.
– Heat your oil to medium before frying.
– Avoid overcrowding the pan to keep the oil hot.
– Fry each side for about 5-7 minutes until golden.
A hot pan ensures the chicken cooks evenly and the crust stays crispy.
Resting Tips
Resting your Chicken Kiev is key for juicy meat. After cooking, let it rest for 5 minutes. This allows the juices to settle back into the chicken. If you cut it right away, the juices run out, and you get dry meat. So, resist the urge to dig in too soon!
Tools You May Need
Having the right tools can make your cooking easier:
– Meat mallet for pounding chicken.
– Mixing bowls for the herb butter and breading station.
– Skillet for frying.
– Baking dish for the oven finish.
These tools help you prepare and cook your Chicken Kiev with ease.
Pro Tips
- Butter Temperature: Ensure the butter is softened but not melted; this helps it stay contained within the chicken while cooking.
- Pounding Chicken Evenly: Use a meat mallet to pound the chicken evenly to ensure even cooking and prevent dryness.
- Breading Technique: For a crispier texture, double dip the chicken in flour, then eggs, and breadcrumbs for a thicker coating.
- Resting Period: Allow the Chicken Kiev to rest for a few minutes after baking; this helps the juices redistribute and enhances flavor.
Variations
Flavor Variations
You can change the taste of Chicken Kiev by using different herbs. Try these options:
– Thyme: Adds a warm, earthy flavor.
– Basil: Gives a fresh, sweet taste.
– Chives: Brings a mild onion flavor.
– Oregano: Offers a robust, savory note.
Mix these herbs into the butter for a new spin. You can also add spices like paprika or cayenne for a kick!
Healthier Options
If you want a lighter meal, you can bake the chicken instead of frying it. Here’s how:
– Preheat your oven to 375°F (190°C).
– After breading, place the chicken rolls on a baking sheet.
– Spray them lightly with cooking oil.
This method cuts down on fat while keeping the chicken juicy. You can also use low-fat butter or a plant-based spread for a healthier herb butter.
Chicken Alternatives
Not in the mood for chicken? You have options!
– Turkey breasts: Use them just like chicken. They work well in this recipe.
– Plant-based chicken: There are many good brands available. They cook similarly to the real thing.
Both alternatives offer delicious flavors and make this recipe fit various diets.
Storage Info
Leftover Storage
To store your cooked Chicken Kiev, let it cool first. Place the chicken in an airtight container. Keep it in the fridge for up to three days. If you want to keep it longer, consider freezing.
Freezing Instructions
You can freeze both uncooked and cooked Chicken Kiev. For uncooked chicken, wrap each piece tightly in plastic wrap. Then, place them in a freezer bag. They can stay in the freezer for up to three months. For cooked Chicken Kiev, let it cool down. Wrap it well and store it in a freezer-safe container. This can last for about two months.
Reheating Tips
To reheat Chicken Kiev, use the oven for the best taste. Preheat your oven to 350°F (175°C). Place the chicken on a baking sheet and cover it with foil. Heat for about 20 minutes. This keeps the chicken moist and warms it evenly. You can also reheat it in a skillet over low heat. Just be careful not to burn the breading. Enjoy your meal!
FAQs
How can I make Chicken Kiev ahead of time?
You can prepare Chicken Kiev ahead of time by making the herb butter first. Mix the butter, garlic, parsley, dill, lemon zest, salt, and pepper. Form it into a log and chill it until firm. Once ready, pound the chicken breasts and shape them around the chilled butter.
You can then bread the chicken and store it in the fridge for a few hours. Just remember to cook it within 24 hours for the best taste. If you want to prepare it even earlier, you can freeze the unbaked chicken rolls. Just thaw them overnight in the fridge before frying.
Can I use frozen chicken breasts?
Yes, you can use frozen chicken breasts. Just make sure to thaw them completely before you start. You can thaw the chicken in the fridge overnight or use the microwave for quick thawing.
Once thawed, pound the chicken to the right thickness. This will help it cook evenly and keep it juicy. Remember to check the internal temperature when cooking to ensure it reaches 165°F (75°C).
What is the best side dish for Chicken Kiev?
Chicken Kiev pairs well with many side dishes. A fresh garden salad adds a nice crunch. Roasted vegetables like carrots and broccoli also complement the rich flavors of the chicken.
For a heartier option, you can serve it with mashed potatoes or rice. These sides soak up the tasty butter that leaks from the chicken. You could also add a side of garlic bread for an extra treat. Enjoy!
In this article, we explored the key ingredients and steps to make Chicken Kiev. We discussed the essential ingredients like chicken and herbs, cooking essentials, and substitutions for your needs. You learned how to prepare herb butter, bread the chicken, and achieve a golden crust.
Remember, resting your chicken is crucial for juiciness. You have many ways to vary this dish, whether by choosing different proteins or cooking methods. With proper storage and reheating tips, you can enjoy Chicken Kiev days later. You now have the tools to impress at your next mea
