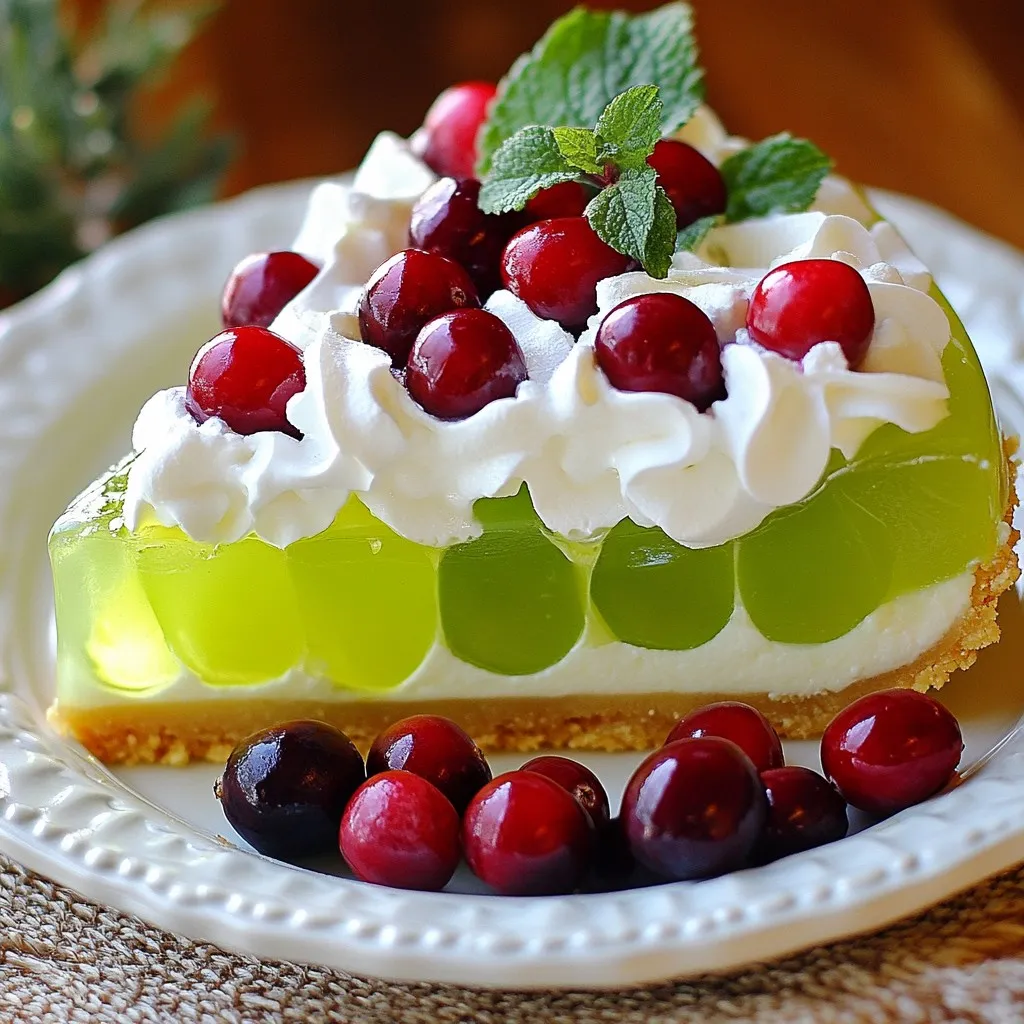
Looking for a fun and festive dessert this holiday season? You’ve found it! This Christmas Jello Pie is colorful, creamy, and perfect for any gathering. It’s easy to make and sure to impress your guests. From selecting the right ingredients to layering the gelatin, I’ll guide you step-by-step. Get ready to brighten your holiday table with this tasty treat that’s as delightful to look at as it is to eat!
Why I Love This Recipe
- Festive Colors: The vibrant green and red layers make this pie a beautiful centerpiece for any holiday table.
- Easy Preparation: With a pre-made crust and simple steps, this pie comes together quickly, leaving you more time to enjoy the festivities.
- Creamy and Fruity Layers: The combination of creamy cream cheese and fruity gelatin layers creates a delightful contrast in flavors and textures.
- Perfect for Sharing: This pie serves 8-10 slices, making it an ideal dessert for gatherings with family and friends.
Ingredients
Main Ingredients for Christmas Jello Pie
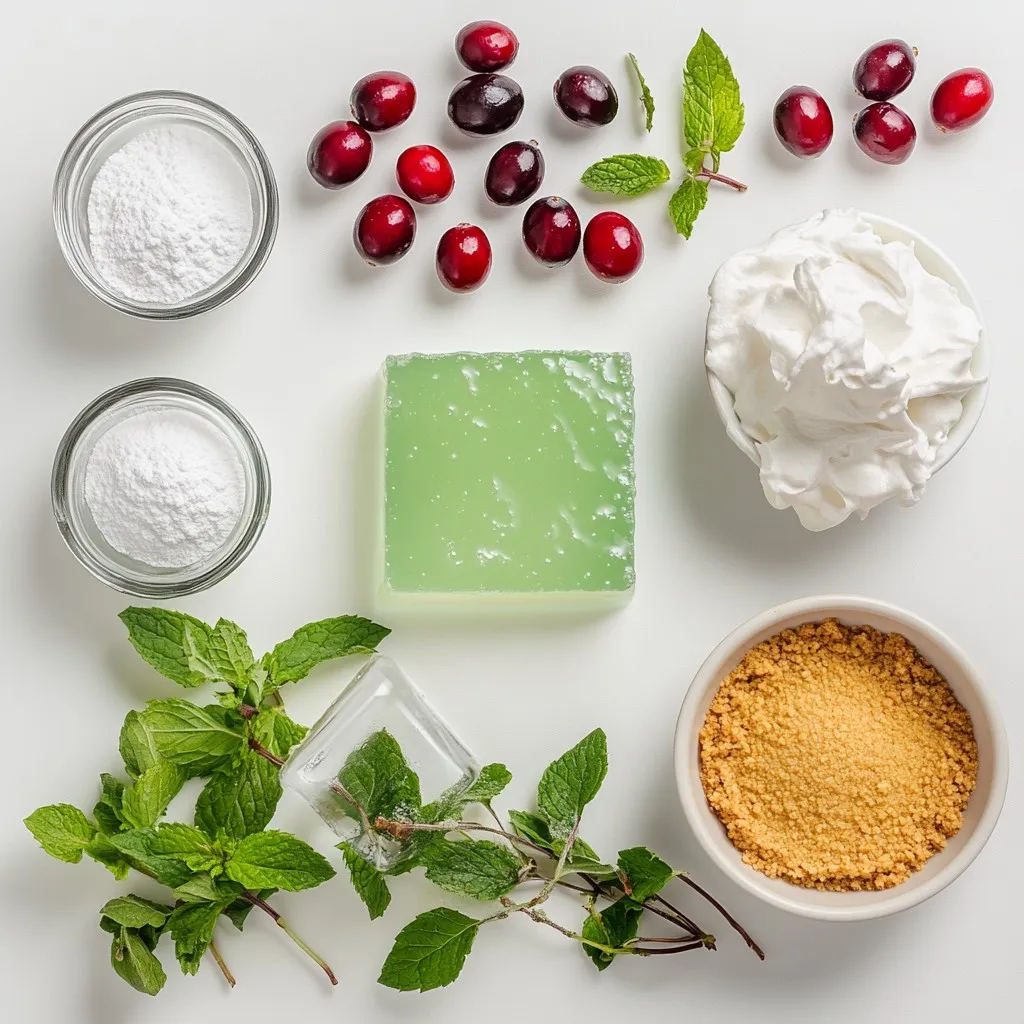
To make this festive treat, gather these main ingredients:
– 1 pre-made graham cracker crust
– 1 box (3 oz) of green grape or lime gelatin
– 1 box (3 oz) of cherry gelatin
– 1 cup boiling water
– 1 cup cold water
– 1 cup whipped cream (or whipped topping)
– 1 cup cream cheese, softened
– 1/2 cup powdered sugar
These ingredients create a colorful pie that looks great on any table. The crust adds crunch, while the gelatin gives a fun jiggle. The cream cheese layer adds a smooth, creamy touch.
Optional Garnishes
For a special finish, consider these optional garnishes:
– Fresh cranberries
– Mint leaves
These fresh toppings add color and a burst of flavor. You can also use whipped cream to decorate the top. This makes the pie look even more delightful!
Notes on Ingredient Substitutions
You can make some changes if you need to. Here are a few ideas:
– Use a gluten-free crust if you want.
– Replace cream cheese with a dairy-free option for a vegan pie.
– Try different flavored gelatins, like orange or blue raspberry.
These swaps keep the taste and fun while meeting your needs. Always choose what works best for you!
Step-by-Step Instructions
Preparing the Gelatin Layers
Start by making the gelatin. Take two bowls. In the first bowl, pour 1 cup of boiling water over the green grape or lime gelatin. Stir until it dissolves completely. Do the same in the second bowl with the cherry gelatin. After both are ready, add 1 cup of cold water to each bowl. Stir well. Now, place both bowls in the fridge. Let them chill for about 30 minutes until they get slightly thick.
Making the Cream Cheese Mixture
While the gelatin cools, it’s time to make the cream cheese layer. Grab an electric mixer and beat the softened cream cheese in a bowl. Mix until it’s smooth and creamy. Slowly add in 1/2 cup of powdered sugar. Keep mixing until well combined. Now, gently fold in 1 cup of whipped cream. This makes the mixture light and fluffy.
Assembling the Pie
Once the gelatin layers are ready, take the graham cracker crust. First, pour the green gelatin mixture into the bottom of the crust. Place the pie back in the fridge for about 20 minutes. It needs to set. After that, spread the cream cheese mixture over the green layer evenly. Refrigerate again for another 20 minutes. Lastly, pour the cherry gelatin over the cream cheese layer. Return the pie to the fridge and let it set completely for at least 2 hours. When it’s time to serve, top it with fresh cranberries and mint leaves for a pretty finish.
Tips & Tricks
Achieving the Perfect Gelatin Texture
To get the best texture, make sure to dissolve the gelatin well. Use boiling water first. Stir each gelatin until it is completely clear. This step is key for smooth layers. After adding cold water, chill the mixtures until slightly thickened. This takes about 30 minutes. Don’t rush this part; it helps the layers hold together better.
Best Practices for Layering
For great layers, work carefully. Pour the green gelatin in first. Let it set for about 20 minutes before adding the cream cheese layer. This waiting time helps keep the layers from mixing. When spreading the cream cheese, do it gently. Use a spatula and spread evenly. After this, chill it again before adding the cherry layer.
Presentation Tips for a Festive Look
To make your pie look festive, use fresh cranberries and mint leaves for garnish. Place them on top right before serving. You can also use a pie server to create slices that show off the layers. This way, each slice looks as good as it tastes. Adding a sprinkle of powdered sugar over the top gives it a snowy look. These simple touches make your Christmas Jello Pie shine at any holiday table.
Pro Tips
- Chill Your Ingredients: Make sure all your ingredients, especially the cream cheese and whipped cream, are well chilled to achieve a smooth and light texture for the cream layer.
- Layering Technique: Allow each layer to set slightly before adding the next for a cleaner separation between colors, enhancing the visual appeal of your pie.
- Garnish for Presentation: Fresh cranberries and mint leaves not only add a festive touch but also provide a refreshing contrast to the sweetness of the pie.
- Make Ahead: This pie can be made a day in advance. Just cover it well and store it in the refrigerator for a convenient and delicious dessert option.
Variations
Flavor Combinations for Festive Jello
You can mix and match flavors for your Christmas Jello Pie. Try using blue raspberry for a cool twist. You can also consider pineapple or strawberry for a bright and fruity taste. Mixing flavors adds fun colors and new tastes. Just remember to use two flavors that work well together.
Alternative Toppings and Decorations
Toppings make your pie even more festive. You can use crushed candy canes for a minty crunch. Fresh berries like strawberries or blueberries add sweetness and color. You can also try coconut flakes for a snowy look. For a fun finish, drizzle some chocolate syrup over the top. Each topping can make your dessert look unique!
Gluten-Free and Dairy-Free Options
You can easily make this pie gluten-free. Just use a gluten-free graham cracker crust. For a dairy-free option, swap cream cheese with vegan cream cheese. Use coconut whipped cream instead of regular whipped cream. These swaps keep the fun while fitting different diets. Enjoy your pie without worry!
Storage Info
How to Store Leftover Jello Pie
To store leftover Christmas Jello Pie, cover it well. Use plastic wrap or a lid for the pie dish. This keeps the pie fresh and stops it from drying out. Place it in the fridge. The cool air will help keep the flavors bright for up to three days.
Freezing Tips for Long-Term Storage
You can freeze Jello Pie for later enjoyment. First, make sure it is fully set. Wrap the pie in plastic wrap, then in aluminum foil. This double layer keeps it safe from freezer burn. Label it with the date. You can keep it in the freezer for up to two months. When ready to eat, thaw it in the fridge overnight.
Shelf Life of Ingredients Post-Preparation
The shelf life of your pie depends on its ingredients. The gelatin layers stay good for about three days in the fridge. The cream cheese layer lasts about the same time. If you notice any changes in color or smell, it’s best to throw it away. Always check for freshness before serving.
FAQs
Can I make Christmas Jello Pie in advance?
Yes, you can make Christmas Jello Pie in advance. This pie tastes great when chilled. Make it the day before your event. Just keep it in the fridge. The flavors will blend, and the pie will be even better. Make sure you cover it well. This will keep it fresh.
What can I use instead of whipped cream?
If you want a substitute for whipped cream, try using whipped topping. You can also use coconut cream. This will give a nice flavor. Another option is to blend silken tofu with a bit of sweetener. It creates a creamy layer without dairy. Each option will keep your pie light and tasty.
Can I use other flavored gelatins?
Absolutely! You can use different flavored gelatins to change the taste. Try orange or berry flavors for a twist. Mix and match to find your favorite combo. Just remember to use colors that look festive. The more colorful, the better for the holiday season!
You now know how to create a delightful Christmas Jello Pie. This fun dessert includes key ingredients, layer preparation, and storage tips. With options for flavors and garnishes, you can customize your pie to impress your guests. Don’t forget to consider variations for different diets. Enjoy making this festive treat and share it with family and friends. Your holiday gatherings will be brighter with this colorful pie on the table. Happy bakin