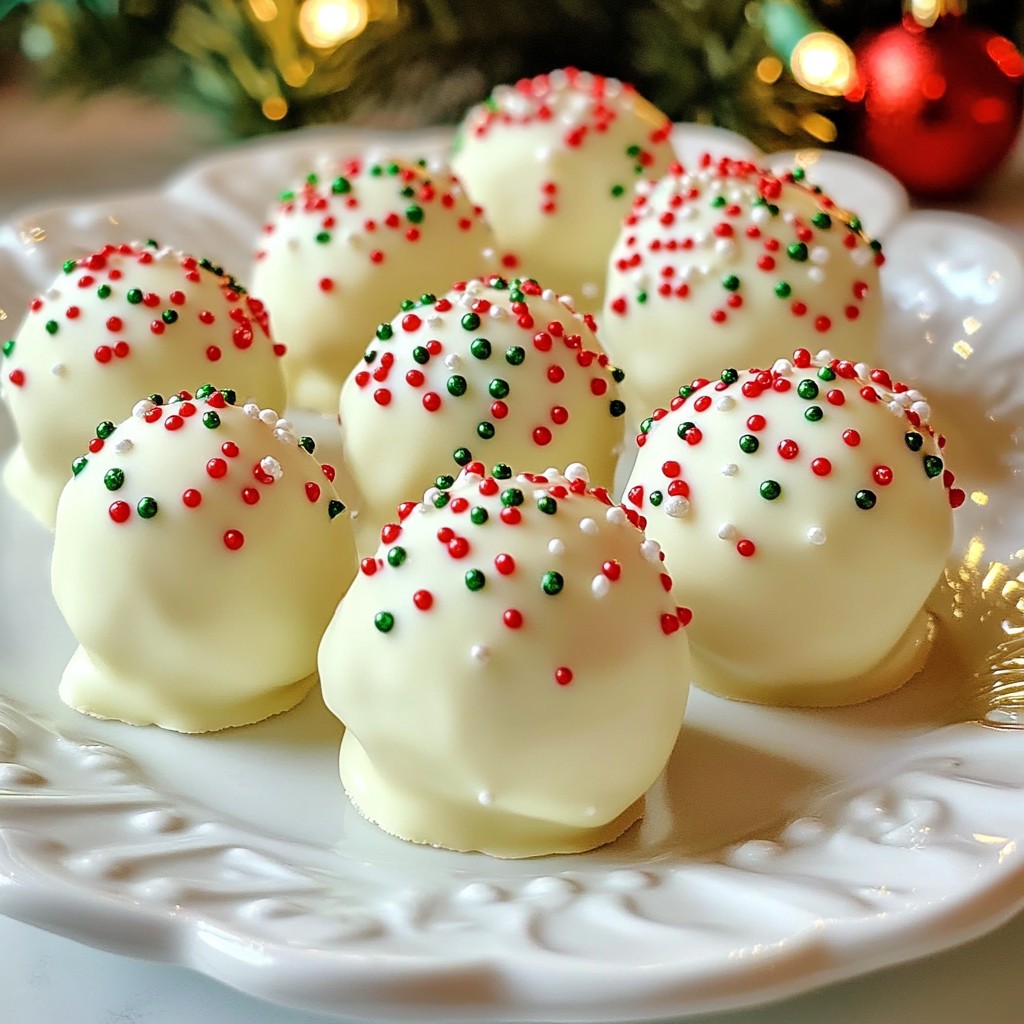
Get ready to spread some holiday cheer with my favorite treat: Christmas Oreo Balls! These easy, no-bake delights mix crunchy Oreos with creamy goodness, perfect for sharing or enjoying yourself. With just a handful of ingredients, you can whip up this festive dessert in no time. Let’s dive into how you can make these delicious treats that will impress everyone at your holiday gatherings!
Why I Love This Recipe
- Festive Flavor: The addition of peppermint extract adds a delightful holiday twist that enhances the classic Oreo taste.
- Easy to Make: With just a few simple steps, you can whip up these truffles in no time, making them perfect for last-minute holiday treats.
- Customizable: You can easily switch up the decorations or use different flavorings to suit your taste or occasion.
- Perfect for Sharing: These truffles are great for parties, gifting, or serving at holiday gatherings, making them a hit with everyone!
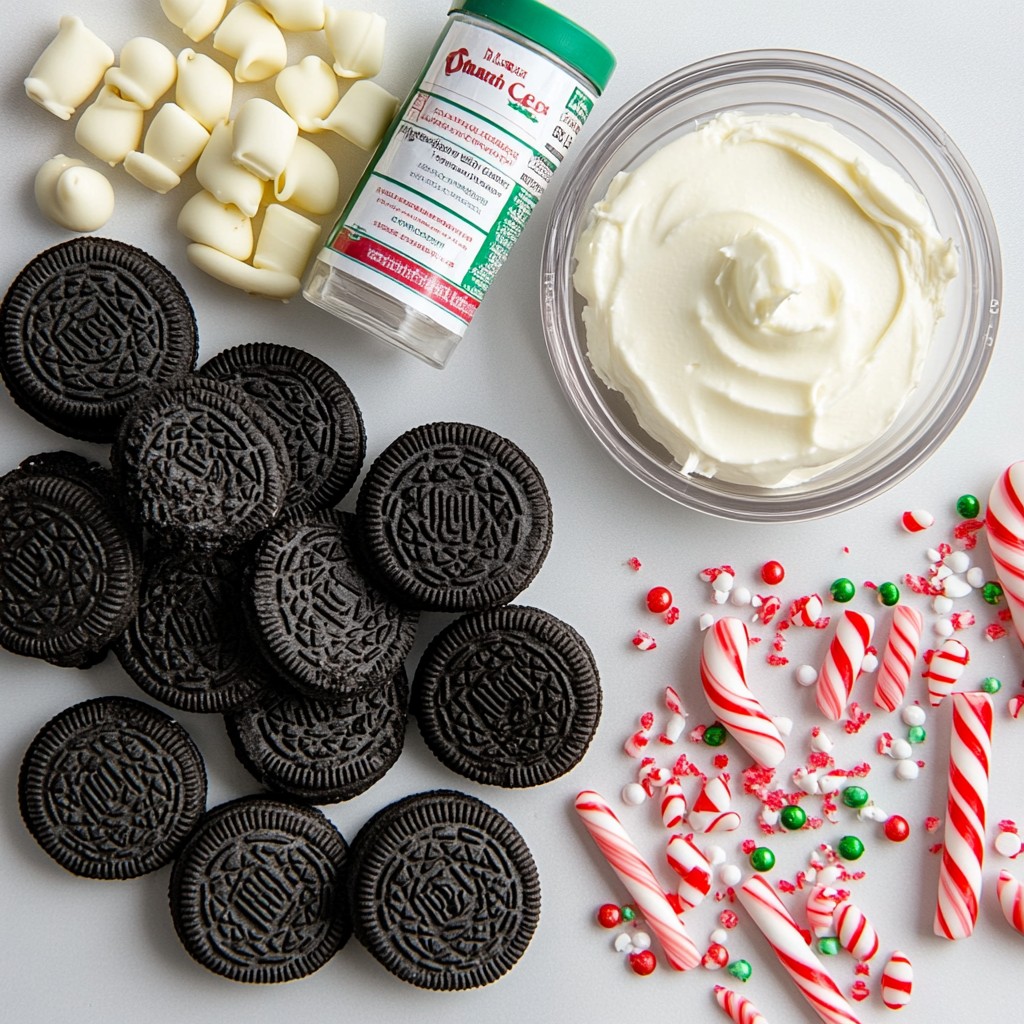
Ingredients
- 1 package (15.25 oz) Oreo cookies
- 8 oz cream cheese, softened
- 2 cups white chocolate chips
- 1 teaspoon peppermint extract
- Red and green sprinkles for decoration
- Mini candy canes, crushed (optional)
These simple ingredients come together to create a festive treat. I love how the rich Oreo flavor mixes with cream cheese. This base makes the truffles creamy and delicious. The white chocolate adds sweetness. The peppermint extract gives a refreshing twist. It’s a flavor that screams holiday cheer!
You can add sprinkles to make these treats even more fun. The bright colors are perfect for any holiday table. If you want some crunch, crushed candy canes work well. They add a bit of texture and a pop of flavor. You can also skip the candy canes if you prefer a smoother bite.
With just six items, you can whip up these delights. Let your creativity shine with decorations! Enjoy the process and have fun making these treats.
Step-by-Step Instructions
Preparation Steps
- Crush the Oreos: Start by crushing the Oreo cookies. Use a food processor for fine crumbs. If you don’t have one, place the cookies in a zip-top bag and crush them with a rolling pin.
- Mix with Cream Cheese: In a large bowl, mix the crushed Oreos with softened cream cheese. You want them to blend well, forming a thick dough.
- Shape into Balls: Roll the mixture into small balls, about 1 inch wide. Place these on a baking sheet lined with parchment paper.
- Chill the Balls: Put the baking sheet in the fridge for at least 30 minutes. This helps the balls firm up nicely.
Coating the Oreo Balls
- Melt the Chocolate: In a microwave-safe bowl, melt the white chocolate chips. Heat in 30-second bursts, stirring in between. Stop when the chocolate is smooth.
- Add Peppermint: Stir in peppermint extract into the melted chocolate. This adds a festive flavor to your treats.
- Coat the Balls: Dip each chilled Oreo ball in the melted chocolate. Use a fork for a nice even coat. Let the excess chocolate drip off before placing them back on the baking sheet.
Finishing Touches
- Decorate: While the chocolate is still wet, sprinkle red and green sprinkles or crushed candy canes on top. This gives a fun holiday look.
- Set the Chocolate: Put the baking sheet back in the fridge for about 15 minutes. This helps the chocolate set completely.
- Serve and Enjoy: Once set, transfer the Oreo truffle delights to a festive platter. Enjoy these treats with friends and family during the holidays!
Tips & Tricks
Perfecting Your Oreo Balls
Achieving the right consistency To get the best texture, mix the crushed Oreos and cream cheese well. You want a dough-like feel. If it's too dry, add a little more cream cheese. If it’s too wet, add more crushed Oreos.
How to avoid chocolate clumping When melting chocolate, do it in short bursts. Use a microwave-safe bowl. Heat in 30-second intervals. Stir between each interval until smooth. This way, the chocolate won’t clump or burn.
Best cooling methods After shaping your Oreo balls, chill them in the fridge for at least 30 minutes. This helps them hold their shape when you dip them in chocolate. You can also speed this up by placing them in the freezer for about 10 minutes.
Tools for Success
Recommended kitchen tools You will need a food processor for easy crushing. A microwave-safe bowl is essential for melting chocolate. Grab a fork for dipping and a baking sheet lined with parchment paper for cooling.
Using a food processor vs. manual methods A food processor is quick and easy for crushing Oreos. If you don’t have one, you can use a zip-top bag and a rolling pin. Just make sure to crush them into fine crumbs for the best texture.
Pro Tips
- Use Room Temperature Cream Cheese: Make sure your cream cheese is softened to room temperature for easier mixing and a smoother texture.
- Chill for Extra Firmness: If your truffles are too soft to roll, chill the mixture for an additional 15 minutes before shaping.
- Choose Quality Chocolate: Opt for high-quality white chocolate for a creamier and richer coating that melts perfectly.
- Experiment with Flavors: Feel free to add different extracts like vanilla or almond to customize the flavor of your truffles.
Variations
Flavor Alternatives
You can change the flavor of your Christmas Oreo balls in fun ways. First, try adding different extracts. For a sweet twist, use vanilla or almond extract. Just one teaspoon will give your truffles a nice depth. You can also swap white chocolate for dark chocolate. Dark chocolate adds a rich taste that many love. Melt it the same way as the white chocolate.
Fun Add-ins
Want to make your treats extra special? You can add nuts or dried fruits. Chopped walnuts, almonds, or cranberries work well. They give a nice crunch and flavor. Another fun idea is to decorate your Oreo balls for the holidays. Use colored sprinkles, like red and green, or even crushed candy canes. Get creative and make your treats festive and bright!
Storage Info
How to Store
To keep your Christmas Oreo balls fresh, store them in the fridge. Use an airtight container. This helps prevent them from drying out. You can also line the container with parchment paper for added protection. If you want to keep them longer, freezing is an option. Place the Oreo balls in a single layer on a baking sheet. Once frozen, transfer them to a freezer-safe bag or container. Make sure to label it with the date.
Shelf Life
These treats last about one week in the fridge. After that, they may start to lose their flavor. Watch for signs of spoilage. If you see any mold or an off smell, it’s best to throw them away. When frozen, they can last up to three months. Just remember to thaw them in the fridge before serving. This keeps their texture nice and creamy.
FAQs
Common Questions
Can I use regular cream cheese? Yes, you can use regular cream cheese. Just make sure it's softened. This helps it mix well with the Oreos.
How to make these gluten-free? To make gluten-free Oreo balls, use gluten-free Oreo cookies. They taste just as good!
Can I use homemade cookies? Yes, you can use homemade cookies. Just crush them to a fine crumb. The flavor will be unique!
Troubleshooting
What to do if they fall apart? If your Oreo balls fall apart, try adding more cream cheese. It helps bind the mixture. You can also chill them longer before coating.
How to fix chocolate that isn’t melting correctly? If the chocolate isn’t melting well, try a lower power setting in the microwave. Stir often to help it melt evenly. If it’s too thick, add a bit of coconut oil. This will help it smooth out.
You now have a complete guide to making delicious Oreo balls. We covered all the ingredients and steps needed for success. From adding flavors to finding the best storage methods, you can create a treat perfect for any occasion. Remember to experiment with flavors and decorations to tailor them to your taste. Enjoy making and sharing these tasty treats with friends and family. Have fun and get creative!