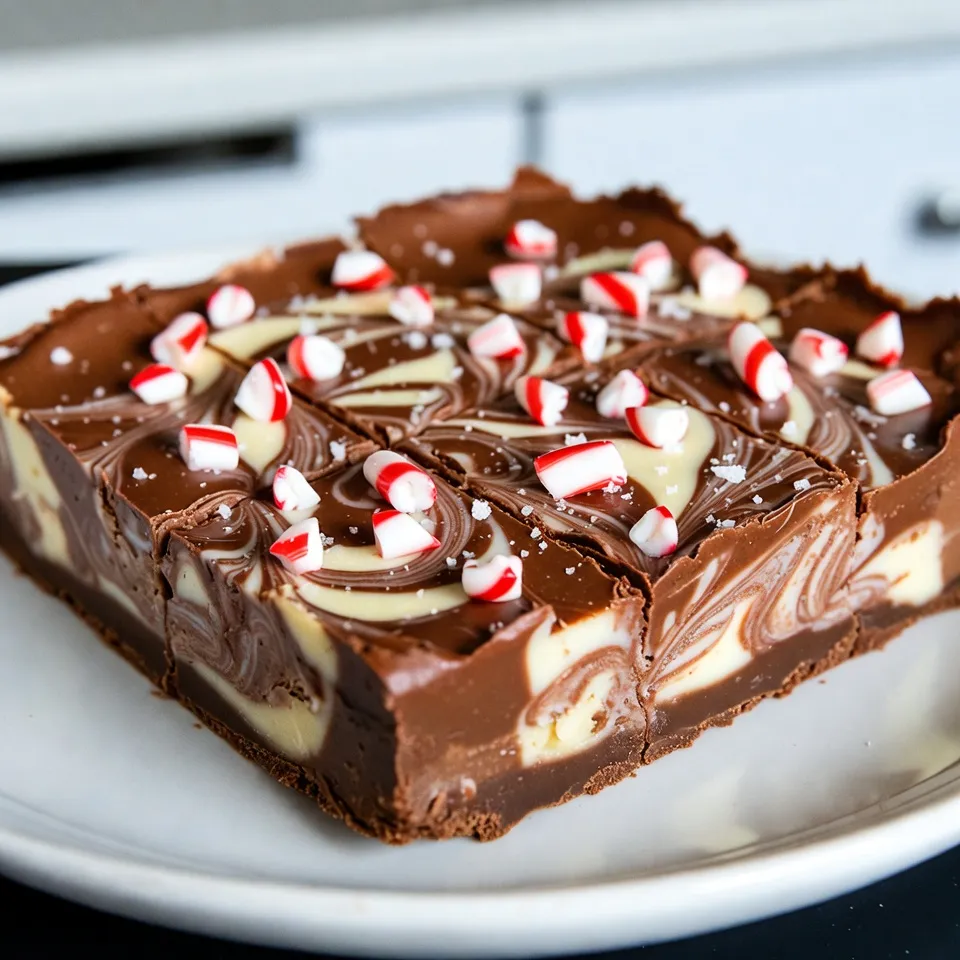
Ready to make your holiday treats stand out? This Christmas Swirl Fudge is a fun and festive delight that will impress friends and family alike. With rich layers of chocolate, a splash of peppermint, and colorful swirls, it’s sure to be a hit! Dive into my step-by-step guide for a sweet dessert that captures the spirit of the season. Let’s create some holiday magic together!
Why I Love This Recipe
- Festive Flavor Combination: This fudge combines rich chocolate and creamy white chocolate with a hint of peppermint, making it a delightful holiday treat.
- Easy to Make: With simple ingredients and straightforward steps, this recipe is perfect for both novice and experienced cooks.
- Perfect for Gifting: Cut into squares and packaged nicely, this fudge makes a wonderful homemade gift for friends and family during the holiday season.
- Customizable: Feel free to adjust the colors and toppings to fit your personal style, making each batch unique and special.
Ingredients
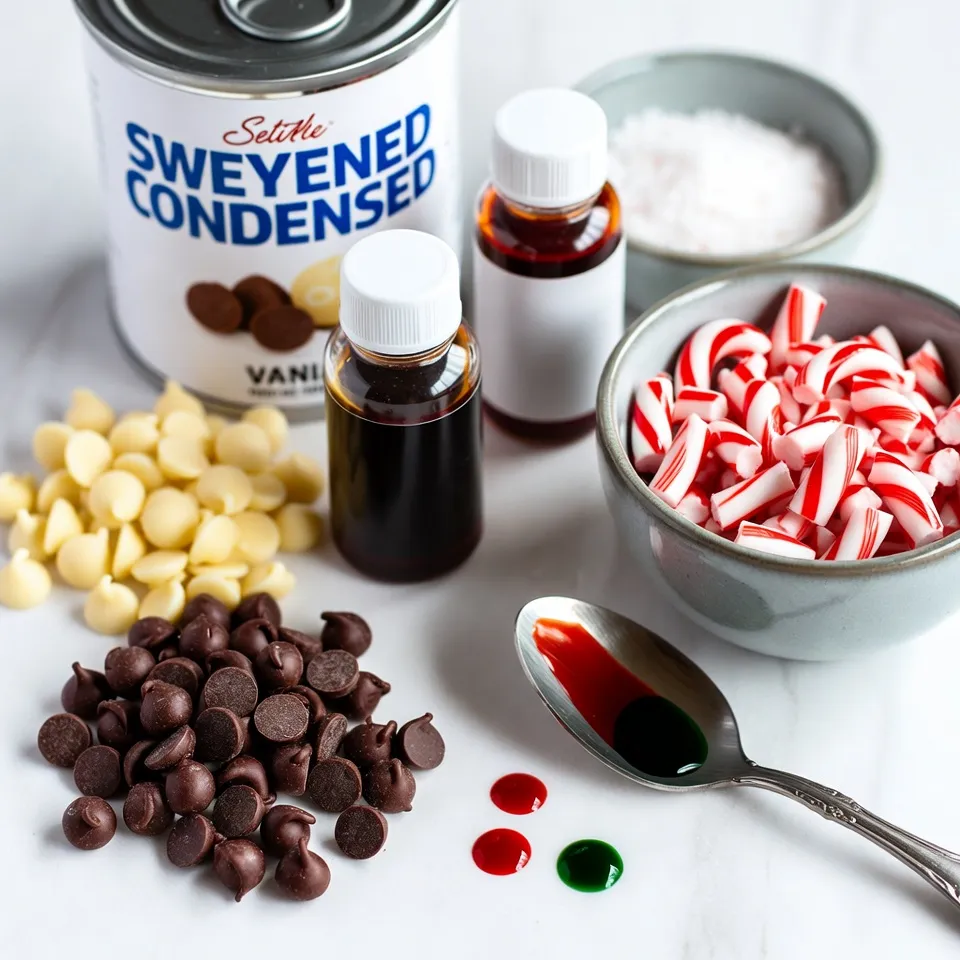
Detailed List of Ingredients
– 2 cups semi-sweet chocolate chips
– 1 cup white chocolate chips
– 1 can (14 ounces) sweetened condensed milk
– 1 teaspoon vanilla extract
– 1/4 teaspoon peppermint extract
– 1/2 cup crushed candy canes
– Red and green food coloring (optional)
– Sea salt for garnish
When making Christmas Swirl Fudge, the ingredients are key. You need high-quality chocolate chips to get that rich flavor. The semi-sweet chocolate chips create a deep, sweet taste.
White chocolate chips add creaminess. Sweetened condensed milk gives the fudge its smooth, chewy texture. It’s a must-have in this recipe.
The vanilla extract brings warmth, while the peppermint extract gives that festive touch. Crushed candy canes are not just for taste; they add a lovely crunch and a pop of color.
To make your fudge extra festive, consider using red and green food coloring. A sprinkle of sea salt on top balances the sweetness and makes it even better.
With these ingredients, you’re ready to create a delicious holiday treat that everyone will love!
Step-by-Step Instructions
Preparation of the Baking Dish
To start, grab an 8×8-inch baking dish. Line it with parchment paper. Leave some paper hanging over the sides. This makes it easy to lift the fudge out later.
Melting the Chocolate
Next, we need to melt the semi-sweet chocolate. In a medium saucepan, mix 2 cups of chocolate chips and 1 can of sweetened condensed milk. Use low heat and stir constantly until it melts. The mix should be smooth and creamy. Once done, take it off the heat and add 1 teaspoon of vanilla extract.
Creating the White Chocolate Layer
Now, let’s make the white chocolate layer. In another saucepan, repeat the melting process with 1 cup of white chocolate chips and the rest of the sweetened condensed milk. Stir until smooth. Add in 1/4 teaspoon of peppermint extract for a festive touch. If you want color, mix in a few drops of red and green food coloring.
Layering the Fudge
Pour the melted semi-sweet chocolate into the lined baking dish. Spread it evenly. Then, spoon dollops of the white chocolate mixture on top of the dark layer. Use a toothpick or knife to swirl the two together gently. This creates a nice marbled pattern.
Final Touches
Sprinkle the remaining crushed candy canes on top of the fudge. Add a light sprinkle of sea salt for a nice contrast. This step makes your fudge look and taste great.
Chilling and Serving
Place the fudge in the fridge for at least 2 hours. This helps it set properly. Once firm, lift it out using the parchment paper. Cut it into squares for serving. For a fun touch, arrange the fudge on a festive platter. You can also gift it in cute bags or boxes for friends and family.
Tips & Tricks
How to Perfect the Swirl Effect
To make a great swirl in your fudge, use a toothpick or a knife. These tools help create a nice marbled look. Start by gently swirling the two layers together. Avoid over-mixing; this can blend the colors too much. You want to see both chocolate and white fudge.
Measuring Ingredients Accurately
Measuring your ingredients is key in baking. If you are off by a little, it can change the fudge. For sticky ingredients like sweetened condensed milk, use a liquid measuring cup. Pour it in slowly to get the correct amount. You can also spray the cup with a bit of cooking spray. This helps the milk slide out easily.
Storing Leftover Fudge
To keep your fudge fresh, store it in an airtight container. Place parchment paper between layers to stop sticking. You can keep it at room temperature for about a week. If you want it to last longer, put it in the fridge. Fudge can stay fresh for up to two weeks when chilled.
Pro Tips
- Choose Quality Chocolate: For the best flavor, use high-quality chocolate chips. They melt better and provide a richer taste.
- Swirl Technique: When swirling the chocolate layers, use a gentle hand to avoid mixing them too much. You want a marbled effect, not a blended one.
- Chill Properly: Make sure to chill the fudge for the full 2 hours or until it’s completely set. This will help maintain its shape when cutting.
- Customize Toppings: Feel free to get creative with toppings! Consider adding festive sprinkles, nuts, or even different flavored extracts for a unique twist.
Variations
Customizing Flavors
You can make your fudge even better by adding different flavors. Try using almond or vanilla extract for a twist. Just a teaspoon can change the whole taste. You can also mix in nuts or dried fruits. Chopped walnuts or dried cranberries add crunch and sweetness. Experiment with what you love!
Color Swirls
Adding color makes your fudge look festive. Use red and green food coloring for Christmas. Just a few drops can create fun swirls. For other holidays, change the colors to match. Think of pastel shades for Easter or bright colors for a summer party. Get creative!
Vegan or Dairy-Free Alternatives
Want a plant-based option? You can use dairy-free chocolate chips instead. Substitute the sweetened condensed milk with coconut cream. Adjust the amount slightly, as coconut cream can be thicker. This way, everyone can enjoy your fudge without worry!
Storage Info
Proper Storage Techniques
To keep your Christmas swirl fudge fresh, use an airtight container. Glass or plastic containers work well. Layer parchment paper between fudge squares to prevent sticking. Store fudge at room temperature for up to five days. If you want it to last longer, put it in the fridge.
Freezing Fudge
You can freeze fudge for up to three months. To freeze, wrap each piece in plastic wrap. Then place them in a freezer bag. When you want to eat it, take it out and let it thaw in the fridge overnight. This keeps the texture nice and creamy.
Avoiding Common Storage Mistakes
Avoid storing fudge in a warm place. Heat can make it sticky and change the texture. Also, do not leave it uncovered, as this can dry it out. If you see any white spots or a grainy texture, it has spoiled. Trust your senses—if it smells off, it’s best to toss it.
FAQs
Can I customize the type of chocolate used?
Yes, you can customize the chocolate. Use dark chocolate for a rich taste. You may also try milk chocolate for a sweeter fudge. Each choice gives a unique flavor.
How long does the fudge take to set?
The fudge takes about 2 hours to set in the fridge. For best results, let it chill until firm. Check it after 2 hours before cutting.
What can I substitute for sweetened condensed milk?
You can use coconut milk or homemade condensed milk as a substitute. Make sure it is sweetened to match the flavor and texture. This keeps the fudge creamy and rich.
Is this recipe suitable for gifting during the holidays?
Absolutely! This fudge makes a great gift. It looks festive and tastes amazing. Place the squares in decorative boxes, and your friends will love them.
How can I make the fudge firmer or softer?
For firmer fudge, add more chocolate. You can also chill it longer. To make it softer, reduce the chocolate or use less cooling time. Adjust based on your preference for texture.
This fudge recipe is simple and fun. You learned about key ingredients like chocolate chips and candy canes. We covered step-by-step instructions to melt the chocolate and achieve that lovely swirl. Remember, precision matters in baking, so measure carefully. Consider adding your favorite flavors for a twist. Store your fudge properly to keep it fresh. With these tips, you can enjoy delicious fudge at home or share it as gift