Are you ready to impress your friends with a sweet twist on a classic dessert? Cream Soda Tiramisu Jars combine creamy goodness with a fizzy kick, creating a delightful treat that’s simple to make. With easy steps and fun variations, you’ll have a stunning dessert that’s perfect for any occasion. Grab your ingredients, and let’s dive into this yummy recipe that is sure to be a hit!
Ingredients
To create these delightful Cream Soda Tiramisu Jars, you will need the following ingredients:
– 1 cup heavy cream
– 1 cup mascarpone cheese
– 1/2 cup granulated sugar
– 1 teaspoon vanilla extract
– 1 cup cream soda (chilled)
– 1 package ladyfinger cookies
– 1/4 cup chocolate shavings (for garnish)
– Extra cream soda for soaking
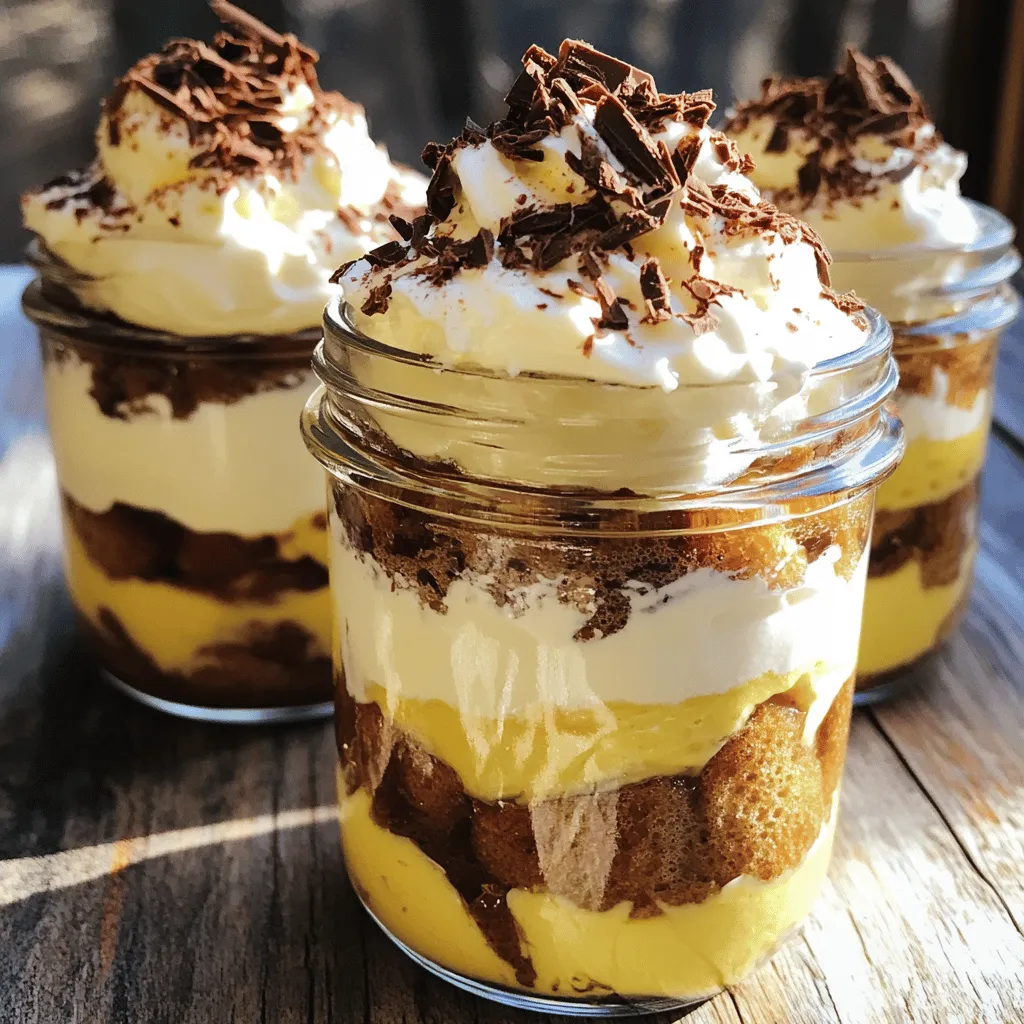
These ingredients blend perfectly. The heavy cream and mascarpone cheese give a rich, creamy base. Granulated sugar adds sweetness, while vanilla extract brings warmth. Chilled cream soda gives a fun twist, making this dessert bubbly and refreshing. Ladyfinger cookies soak up the cream soda, adding a soft texture. Finally, chocolate shavings add a delightful finish.
Using quality ingredients is key. Fresh heavy cream and mascarpone cheese elevate the flavor. I recommend using a good brand of cream soda for the best taste. This recipe is simple, and gathering these ingredients will set you up for a sweet success.
Step-by-Step Instructions
Preparation Steps
– Whip cream and mascarpone mixture
Start by gathering your ingredients. In a mixing bowl, add 1 cup of heavy cream, 1 cup of mascarpone cheese, 1/2 cup of granulated sugar, and 1 teaspoon of vanilla extract. Mix these together using a hand mixer. Whip until you see soft peaks. The mixture should be smooth and fluffy.
– Soak ladyfingers in cream soda
Next, pour 1 cup of chilled cream soda into a shallow dish. Quickly dip each ladyfinger into the cream soda. Make sure they soak but do not get too soggy. You want them soft but still firm enough to hold their shape.
– Layering in jars
Now it’s time to layer the ingredients in your jars. Start by placing the soaked ladyfingers at the bottom of each jar. Then, spoon a layer of the whipped mascarpone mixture over the ladyfingers. Smooth it out with a spatula. Repeat this process for 2 to 3 layers. Finish with a final layer of the mascarpone mixture on top.
– Refrigeration time
Once you finish layering, it’s time to chill. Cover the jars and place them in the refrigerator. Let the jars sit for at least 4 hours. For the best taste, chill them overnight. This allows the flavors to blend nicely.
Tips & Tricks
Achieving Perfect Consistency
To get the best cream and mascarpone mix, start with cold tools. Use a chilled bowl for whipping. Whip the heavy cream until soft peaks form. Then, add the mascarpone and sugar. Mix until smooth and fluffy. This will give your tiramisu a light texture.
Soaking ladyfingers is key. Pour extra cream soda into a shallow dish. Dip each ladyfinger quickly. Make sure they are wet but not soggy. If they are too wet, your layers will fall apart. Place the soaked ladyfingers neatly at the bottom of your jars.
For layering, use a spatula to spread the mascarpone mix evenly. Create two or three layers. Each layer should be distinct, making it look beautiful. Make sure the top layer is smooth for a nice finish.
Serving Suggestions
Pair these jars with a sweet drink like iced tea or coffee. Cream soda can also work well for a fun twist. These jars fit any occasion, from birthdays to casual dinners. They are fun and easy to serve.
For a festive touch, try serving them at parties. Your guests will love the unique flavor. You can make them ahead of time. Just be sure to chill them for at least four hours.

Variations
Flavor Customizations
You can change the flavor of your Cream Soda Tiramisu Jars easily. Here are some fun ideas:
– Using different sodas: Try root beer or orange soda. Each soda brings a new twist. The flavor will change, but the dessert will still be creamy and delicious.
– Adding flavored extracts: Experiment with almond or coconut extract. Just a drop can change the taste. It adds a nice surprise to each bite.
– Incorporating fruits or nuts: Add berries or chopped nuts between the layers. Strawberries or pistachios give great crunch and taste. This makes the dessert more exciting and colorful.
Dietary Adaptations
You can also make this dessert fit different diets. Here are some options:
– Vegan options: Use coconut cream instead of heavy cream. Swap mascarpone with cashew cream. This keeps the dessert creamy without dairy.
– Gluten-free alternatives: Look for gluten-free ladyfingers. Many brands make these, so you can enjoy the dessert without worry.
Storage Info
Best Practices for Storage
To keep your leftover tiramisu jars fresh, store them in the fridge. Use an airtight container to prevent drying out. If you have already opened the jars, cover them tightly with plastic wrap. This keeps the flavors intact. Aim to eat the jars within 3 to 5 days for the best taste.
Freezing Tips
Can you freeze Cream Soda Tiramisu Jars? Yes, you can freeze them, but the texture may change. To freeze, wrap each jar well in plastic wrap and then in aluminum foil. This helps avoid freezer burn.
For proper thawing, move the jars to the fridge. Let them thaw slowly for about 6 to 8 hours. Avoid thawing at room temperature, as this can lead to soggy layers. Enjoy your delicious dessert even after freezing!
FAQs
Common Questions
What is the best way to whip heavy cream?
To whip heavy cream, use a cold mixing bowl and cold beaters. Pour the cream into the bowl. Turn the mixer on medium speed, then increase to high speed. Whip until soft peaks form. This may take about 3 to 5 minutes.
How long can I keep the tiramisu jars in the refrigerator?
You can keep the tiramisu jars in the refrigerator for up to 3 days. Just make sure to cover them well to keep them fresh.
Can I make Cream Soda Tiramisu Jars ahead of time?
Yes! You can make these jars a day in advance. This allows the flavors to mix well.
What can I substitute for ladyfingers?
If you don’t have ladyfingers, use sponge cake or pound cake. Cut them into small pieces to fit in the jars.
How do I know when the tiramisu is set properly?
The tiramisu is set when it is firm to the touch and holds its shape. The layers should look distinct, and it should not be runny.
Related Queries
Can I use diet soda in the recipe?
Yes, you can use diet soda if you prefer. It will still give a nice flavor to the dessert.
Do the layers need to be even in height?
The layers do not need to be perfectly even. Just aim for a nice balance for a pretty look. It’s all about enjoying the taste!
In this blog post, I walked you through making Cream Soda Tiramisu Jars. We covered ingredients like heavy cream, mascarpone cheese, and ladyfinger cookies. You learned the steps to whip the cream, soak the ladyfingers, and layer everything beautifully. Tips on achieving the right consistency and serving ideas rounded out the post.
Enjoy experimenting with flavors and customizations. Whether for a party or family night, these jars will impress. Now, it’s time to make your own delicious treat!