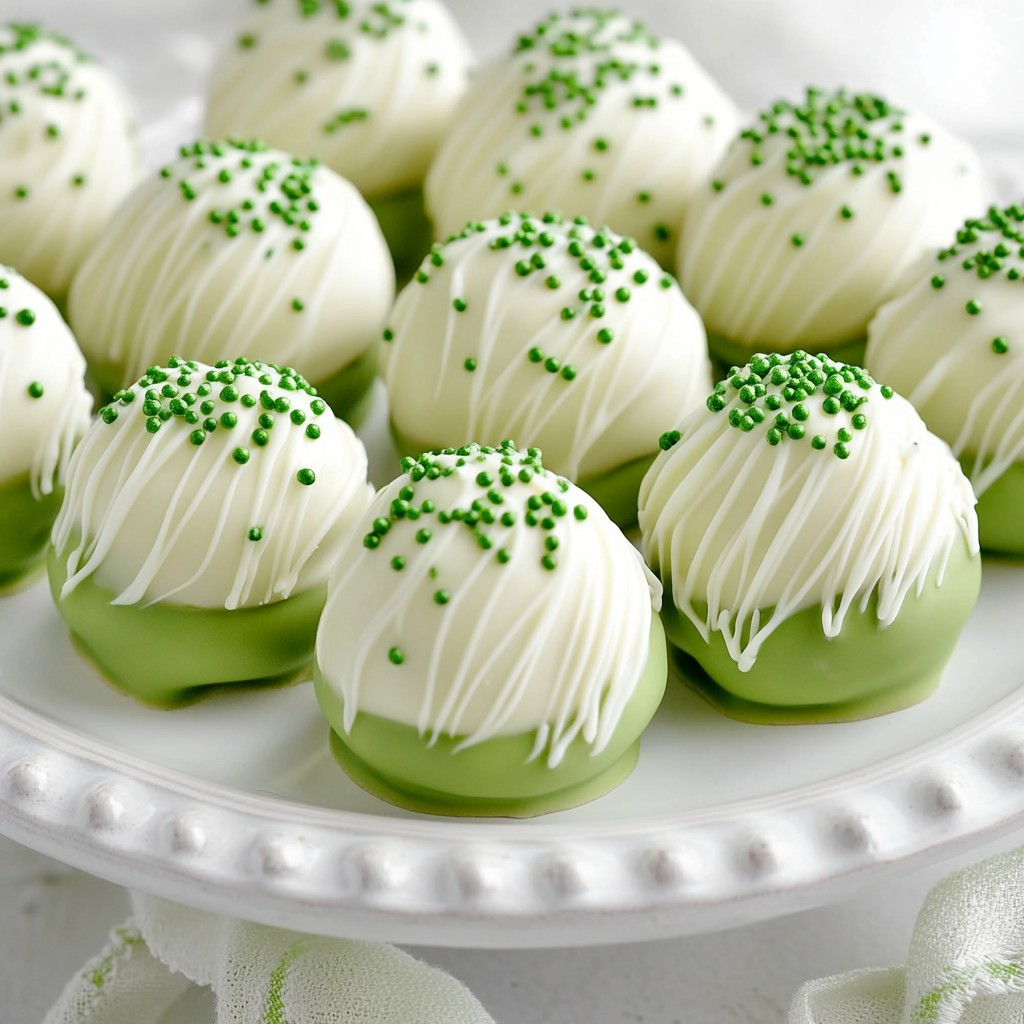
Looking for a sweet treat that’s both fun and easy to make? You’ll love these Green Velvet Cake Balls! With bright colors and rich flavors, they’re perfect for any gathering. In this post, I’ll guide you through simple steps to create these tasty bites. We’ll cover everything from ingredients to tips and tricks for the best cake balls. Let’s dive in and make your dessert game shine!
Why I Love This Recipe
- Festive Flavor: The unique green velvet flavor adds a fun twist to traditional cake balls, making them perfect for celebrations.
- Easy to Make: With simple ingredients and straightforward steps, these cake balls are beginner-friendly and quick to prepare.
- Customizable: You can easily customize the sprinkles and coatings to match any occasion or theme.
- Deliciously Indulgent: The combination of cream cheese and white chocolate makes each bite rich and satisfying.
Ingredients
List of Required Ingredients
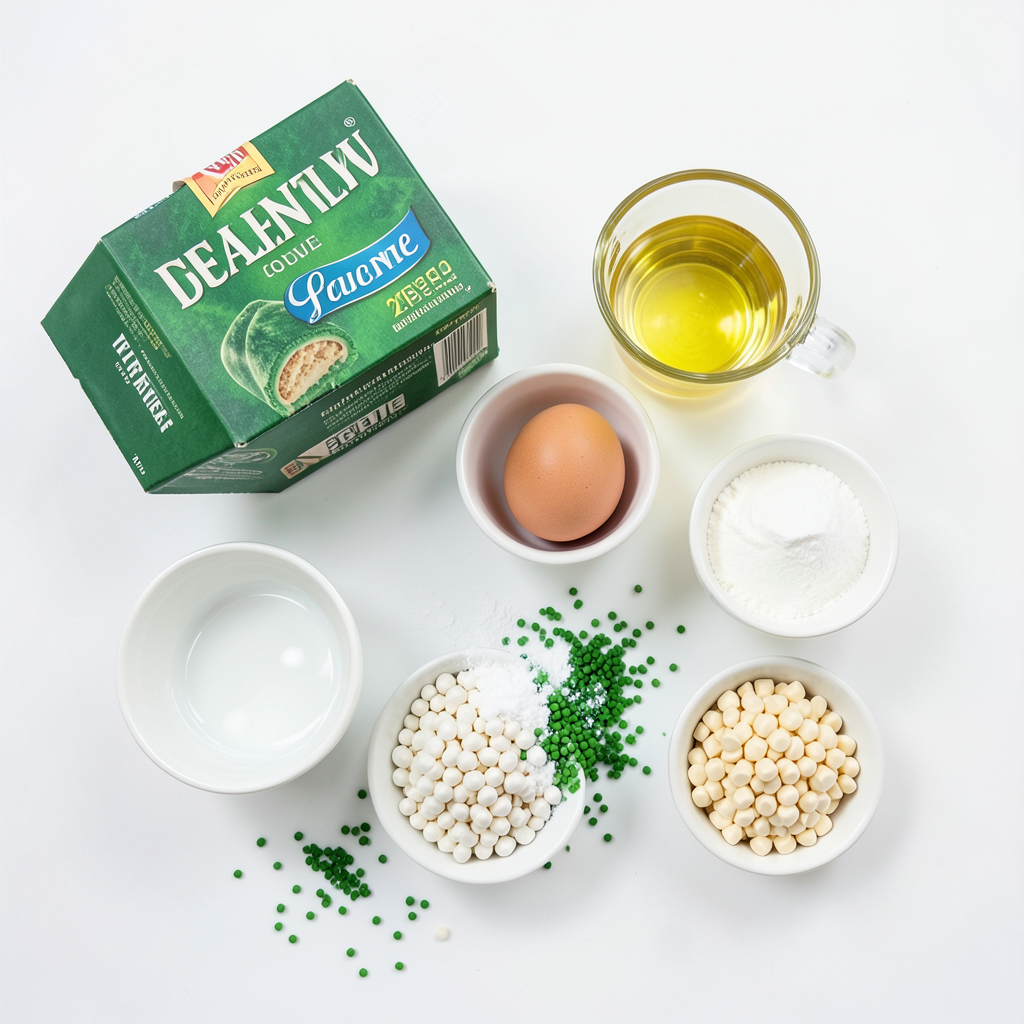
To make green velvet cake balls, you need the following items:
- 1 box of green velvet cake mix
- 3 large eggs
- 1 cup water
- 1/3 cup vegetable oil
- 1 cup cream cheese, softened
- 1/2 cup powdered sugar
- 1 teaspoon vanilla extract
- 2 cups white chocolate chips (for coating)
- Green sprinkles (for garnish)
These ingredients work together to create a fun and tasty treat. The green velvet cake mix gives the cake its vibrant color and unique flavor. The cream cheese adds a delightful creaminess.
Alternative Ingredients
If you want to switch things up, here are some alternatives:
- Use homemade green velvet cake instead of a box mix.
- Substitute the cream cheese with Greek yogurt for a lighter option.
- Replace white chocolate chips with dark chocolate or milk chocolate chips.
- Try coconut flakes or colored sugar instead of green sprinkles for garnish.
These options can help you customize the cake balls to your taste or dietary needs.
Suggested Tools and Equipment
To make your green velvet cake balls, gather these tools:
- Large mixing bowls
- Electric mixer
- 9x13 inch baking pan
- Parchment paper
- Baking sheet
- Microwave-safe bowl for melting chocolate
- Cookie scoop or tablespoon for portioning cake balls
Having the right tools makes the process smoother. It helps you create perfect little cake balls with ease.
Step-by-Step Instructions
Preparation Steps
First, gather your ingredients. You will need:
- 1 box of green velvet cake mix
- 3 large eggs
- 1 cup water
- 1/3 cup vegetable oil
- 1 cup cream cheese, softened
- 1/2 cup powdered sugar
- 1 teaspoon vanilla extract
- 2 cups white chocolate chips (for coating)
- Green sprinkles (for garnish)
Next, preheat your oven to 350°F (175°C). Grease a 9x13 inch baking pan to keep the cake from sticking.
Baking the Cake
In a large bowl, combine the green velvet cake mix, eggs, water, and vegetable oil. Use an electric mixer to mix for 2-3 minutes, until smooth. Pour this batter into the prepared pan. Bake for 30-35 minutes. To check, insert a toothpick in the center. If it comes out clean, your cake is ready. Let it cool completely in the pan.
Mixing and Rolling the Cake Balls
Once the cake is cool, crumble it in a large mixing bowl. Use your hands or a fork to break it into fine crumbs. In a separate bowl, mix the softened cream cheese, powdered sugar, and vanilla extract until smooth. Gradually add this mixture to the crumbled cake. Mix well until the cake is fully combined with the cream cheese.
Now, scoop out portions of the mixture, about 1 tablespoon each. Roll them into balls and place them on a parchment-lined baking sheet. Freeze these cake balls for about 30 minutes, until they are firm.
While they freeze, melt the white chocolate chips in a microwave-safe bowl. Heat them in 30-second intervals, stirring until smooth. Dip each cake ball into the melted chocolate. Allow any excess chocolate to drip off. Place the coated cake balls back on the parchment sheet and sprinkle with green sprinkles. Let them set at room temperature for about 15-20 minutes, or refrigerate for quicker setting.
Tips & Tricks
How to Achieve the Perfect Cake Balls
To make the best cake balls, ensure your cake is fully cooled. Warm cake can lead to sticky balls. Crumble the cake finely for smooth mixing. When combining with the cream cheese, mix until just blended. Over-mixing can make them dense.
Melting Chocolate Techniques
When melting white chocolate, use a microwave-safe bowl. Heat the chocolate in 30-second bursts. Stir it well between each round. This helps prevent burning. If the chocolate is too thick, add a teaspoon of vegetable oil. This will thin it out and make dipping easier.
Presentation Suggestions
For a fun look, place your cake balls on a colorful platter. You can add extra green sprinkles or edible glitter for flair. Arrange them in a circle or a tower for a festive feel. For a touch of elegance, use cupcake liners to hold each ball.
Pro Tips
- Chill for Best Results: Make sure to freeze the cake balls for at least 30 minutes before dipping them in chocolate. This helps maintain their shape and makes them easier to coat.
- Use Quality Chocolate: Opt for high-quality white chocolate chips for coating. They melt better and provide a smoother, more delicious finish on your cake balls.
- Experiment with Flavors: Feel free to add a dash of peppermint or almond extract to the cream cheese mixture for an extra flavor twist that complements the green velvet.
- Decorate Creatively: Use a variety of sprinkles or edible glitter to decorate the cake balls. This adds a fun pop of color and makes them visually appealing for any occasion.
Variations
Flavor Variations
You can play with flavors when making green velvet cake balls. Try using chocolate cake mix for a rich twist. Mix in cocoa powder for an extra chocolate flavor. You could also use red velvet cake mix for a classic look. The red adds a festive touch to your treats!
Dietary Adjustments
If you need gluten-free options, use a gluten-free cake mix. There are many great choices available. For vegan cake balls, swap eggs with flax eggs and use plant-based cream cheese. Choose dairy-free chocolate chips for coating. These small changes keep everyone happy!
Seasonal Garnishes and Themes
Seasonal themes add fun to your cake balls. For Halloween, use orange and black sprinkles. In winter, add white and silver decorations for a snowy look. You could even use themed cupcake liners for a festive display. No matter the season, you can make these treats shine!
Storage Info
Best Storage Practices
Store your green velvet cake balls in an airtight container. This helps keep them fresh. Line the container with parchment paper to avoid sticking. You can also separate layers with wax paper. This method is great for keeping the cake balls intact.
How Long Do They Last?
When stored correctly, cake balls last about five days at room temperature. If you keep them in the fridge, they can last up to a week. Check for any signs of spoilage before eating. If they look or smell off, it’s best to toss them.
Freezing Tips
To freeze cake balls, place them on a baking sheet in a single layer. Freeze them for about one hour until firm. Once frozen, transfer them to a freezer-safe bag or container. They can last for up to three months in the freezer. When you're ready to eat them, let them thaw in the fridge overnight. Enjoy your tasty treat!
FAQs
Can I use homemade green velvet cake instead of cake mix?
Yes, you can use homemade green velvet cake. Just make sure it's cooled first. Crumble it into fine pieces like you would with a cake mix. Mix it with the cream cheese blend as shown in the recipe. This adds a personal touch and may enhance the flavor.
How do I make cake balls without cream cheese?
You can substitute cream cheese with buttercream frosting. Use about 1 cup of buttercream for every 2 cups of crumbled cake. Mix it in the same way. This keeps the cake balls moist and tasty. You can also use a store-bought frosting if you prefer.
Where can I buy green velvet cake balls?
You can find green velvet cake balls at bakeries or specialty dessert shops. Some grocery stores may also carry them. If you want a specific flavor or look, making them at home is the best way to enjoy them fresh!
We covered the ingredients needed, tools, and step-by-step instructions for cake balls. You learned tips for perfect texture and fun variations to try. Remember to store cake balls properly for lasting freshness. Have fun experimenting with flavors or seasonal themes! The joy of baking lies in creativity, and I hope you feel inspired to make your own delicious treats. Enjoy your cake ball journey!