The holidays are here, and that means it’s time for some homemade eggnog! This creamy and rich delight brings warmth and joy to any gathering. I’ll guide you step-by-step on how to make the perfect version, complete with tips, variations, and storage info. Let’s dive in and create a festive treat that your family and friends will love. Ready to impress your guests with delicious eggnog? Let’s get started!
Why I Love This Recipe
- Rich and Creamy Flavor: This eggnog is incredibly rich and creamy, making it the perfect festive drink to enjoy during the holiday season.
- Customizable Ingredients: You can easily adjust the spices and sweetness to suit your taste, making this recipe versatile for everyone.
- Perfect for Gatherings: This recipe serves 6-8 people, making it ideal for holiday parties and gatherings with family and friends.
- Simple Preparation: With just a few steps, you can create a delicious homemade eggnog that beats store-bought versions any day.
Ingredients
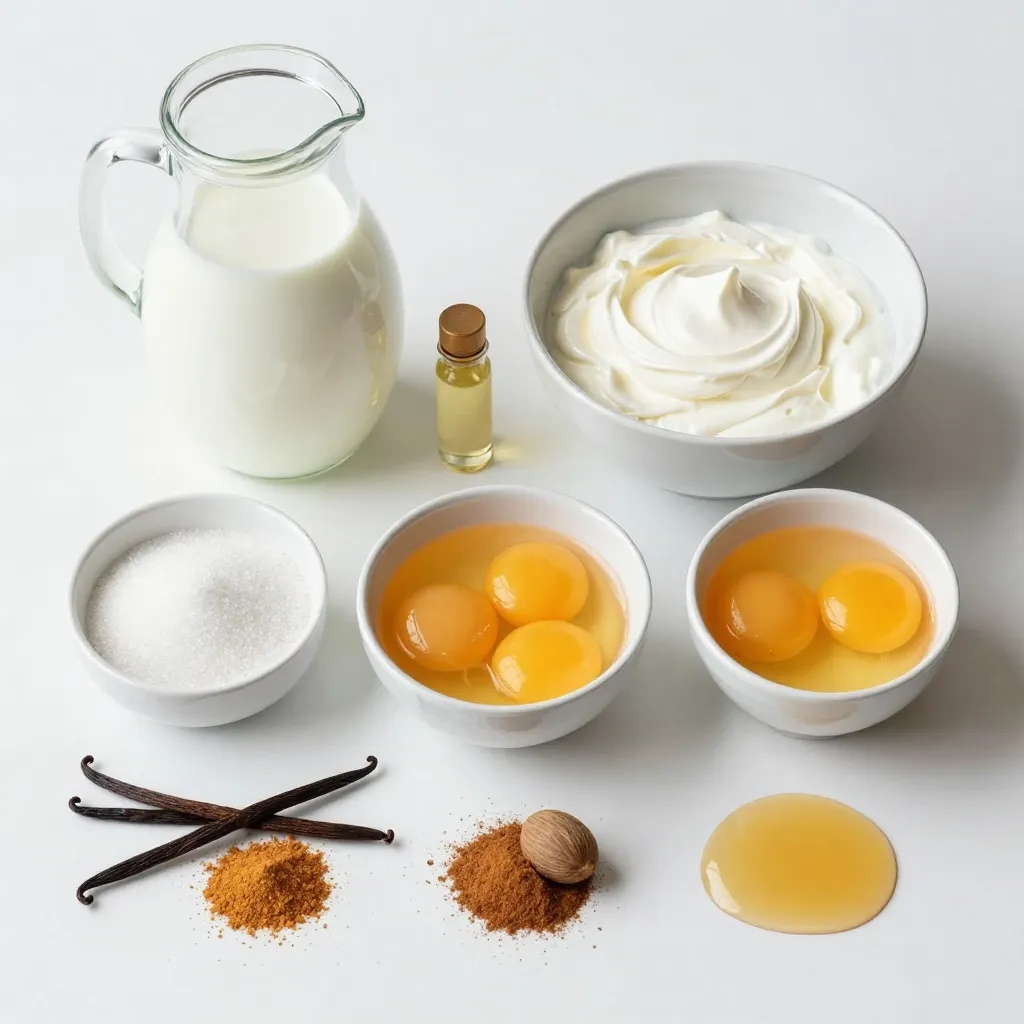
Complete List of Ingredients for Homemade Holiday Eggnog
To make homemade holiday eggnog, gather these ingredients:
– 4 cups whole milk
– 1 cup heavy cream
– 3/4 cup granulated sugar
– 4 large egg yolks
– 1 teaspoon vanilla extract
– 1/2 teaspoon ground nutmeg (plus extra for garnish)
– 1/4 teaspoon ground cinnamon
– 1 teaspoon maple syrup (optional for extra depth)
– Whipped cream for topping (optional)
These simple ingredients blend together to create a creamy and rich delight.
Substitutions and Alternatives
You can swap ingredients if you need to.
– Use almond milk instead of whole milk for a dairy-free option.
– Coconut cream can replace heavy cream for a unique twist.
– Try brown sugar in place of granulated sugar for a deeper flavor.
– If you want a lighter version, use low-fat milk.
– For a non-dairy option, use silken tofu blended for a creamy base.
These swaps can give your eggnog a new flavor while keeping it rich.
Optional Toppings and Garnishes
Toppings can make your eggnog even better.
– Add whipped cream on top for a fluffy touch.
– Sprinkle extra ground nutmeg for warmth and spice.
– Try a dash of chocolate shavings for a sweet twist.
– A few cinnamon sticks can add a festive look and flavor.
– You can even use a drizzle of caramel for extra sweetness.
These toppings can elevate your eggnog and make it look pretty for your guests.
Step-by-Step Instructions
Preparation Overview
Making eggnog is easy and fun. You will need just a few simple steps. First, gather all your ingredients. You will use whole milk, heavy cream, egg yolks, and sugar. Don’t forget the spices! You will add nutmeg and cinnamon for warmth.
Detailed Cooking Steps
1. Start by pouring the whole milk and heavy cream into a medium saucepan. Heat it over medium heat. Stir it often until it gets hot but does not boil.
2. In a separate bowl, whisk the egg yolks and granulated sugar together. Do this for about 2-3 minutes until it gets thick and light in color.
3. Next, slowly pour the hot milk mixture into the egg yolk mixture. While pouring, whisk quickly. This step is very important. It prevents the egg yolks from scrambling.
4. After mixing, put everything back into the saucepan. Cook it over medium-low heat. Stir it all the time. Heat until it thickens enough to coat the back of a spoon. This should take about 7-10 minutes. Do not let it boil.
5. When it is thick, take the saucepan off the heat. Stir in the vanilla extract, ground nutmeg, ground cinnamon, and maple syrup if you want extra flavor.
6. Let the eggnog cool a bit. Then pour it into a pitcher or bowl. Cover it and put it in the fridge for at least 2 hours.
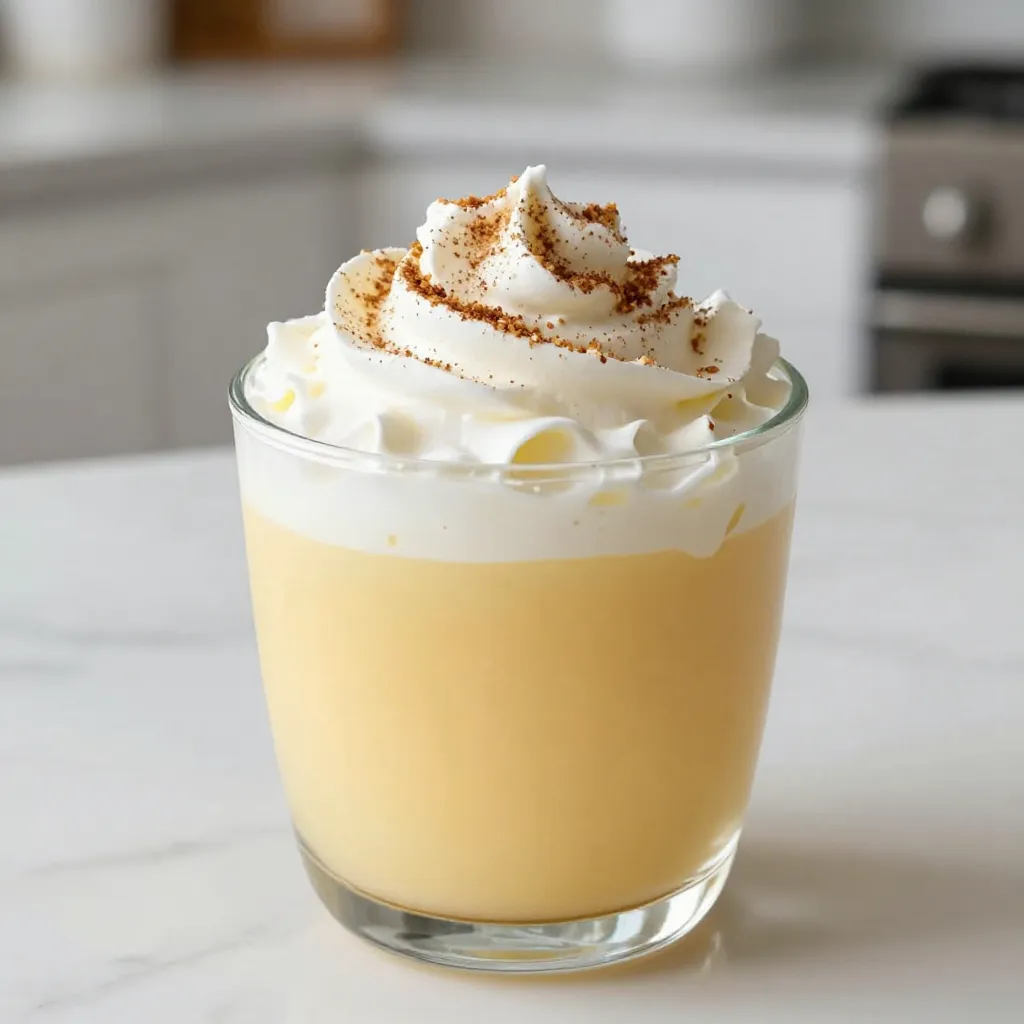
7. When you are ready to serve, stir the eggnog well. Pour it into chilled glasses and add whipped cream on top. Finish with a sprinkle of extra nutmeg for a festive touch.
Tips for Proper Tempering of Egg Yolks
Tempering egg yolks is key for a smooth eggnog. Always pour hot liquid slowly into the yolks. This step helps to warm them gradually. If you pour too fast, you risk cooking the eggs. Keep whisking while you pour. This keeps the mixture nice and smooth. With practice, you will master this technique.
Tips & Tricks
How to Achieve the Perfect Creamy Consistency
To get that rich and creamy eggnog, start with whole milk and heavy cream. The mix of these two gives the best texture. Heat them gently, but don’t let them boil. When you whisk the egg yolks and sugar, beat them until they are thick and light. This helps the eggnog stay smooth. When you combine the hot milk with the egg yolk mix, pour slowly while whisking. This step is key to avoid cooking the yolks. Cook the mixture on low heat until it thickens. It should coat the back of a spoon.
Storing and Reheating Homemade Eggnog
After making your eggnog, let it cool down. Pour it into a pitcher or bowl. Cover it and put it in the fridge. It can chill for up to two days. When you’re ready to serve, stir it well. If your eggnog is too thick after chilling, add a little milk to thin it out. Never microwave it to reheat; this can cause it to curdle. Instead, warm it gently on the stove over low heat, stirring often.
Enhancements for Flavor
To boost the flavor of your eggnog, try adding maple syrup. It gives a nice depth. Also, you can use extra spices. A pinch more nutmeg or cinnamon can make a big difference. For a twist, consider adding a splash of rum or bourbon if you want an alcoholic version. If you prefer a non-alcoholic treat, try blending in some peppermint extract for a festive touch.
Pro Tips
- Use Fresh Eggs: Fresh eggs yield a richer flavor and creamier texture in your eggnog, enhancing the overall experience.
- Chill Thoroughly: Allow the eggnog to chill for at least 2 hours; this helps meld the flavors and results in a more refreshing drink.
- Spice It Up: Feel free to adjust the spices according to your taste; adding a pinch of cloves or allspice can give it a unique twist.
- Presentation Matters: Serve in chilled glasses and garnish with a sprinkle of nutmeg or a cinnamon stick for a festive touch.
Variations
Alcoholic vs. Non-Alcoholic Eggnog
You can make eggnog with or without alcohol. For a festive touch, add rum, bourbon, or brandy. This gives the drink a warm kick. If you prefer a non-alcoholic version, simply skip the spirits. You still get creamy, rich flavor without the buzz. Both options bring joy to holiday gatherings.
Vegan Eggnog Options
If you want a vegan eggnog, there are great swaps. Use almond milk or coconut milk instead of whole milk. For creaminess, try coconut cream or cashew cream. Instead of egg yolks, blend silken tofu or a banana. These options keep the drink rich and smooth. You won’t miss the dairy at all.
Flavor Variations (e.g., peppermint, chocolate)
You can also shake things up with fun flavors. Add peppermint extract for a holiday twist. This gives eggnog a refreshing taste. For a chocolate version, mix in cocoa powder or chocolate syrup. Both options add a unique flair. Customize your eggnog to match your taste. Enjoy exploring these delicious variations!
Storage Info
Best Practices for Refrigeration
To keep your eggnog fresh, store it in a clean, airtight container. A glass pitcher works great. Make sure the lid fits tightly. This keeps out air and helps keep flavors strong. Place it in the coldest part of your fridge. Avoid the door since it has warmer air. Chill the eggnog for at least 2 hours before serving.
Freezing Homemade Eggnog
You can freeze eggnog for later. Use freezer-safe containers that won’t crack. Leave some space at the top. This allows for expansion when it freezes. Thaw frozen eggnog in the fridge overnight. Once thawed, stir well before serving. Keep in mind that the texture may change a bit after freezing.
How Long Does Eggnog Last?
Homemade eggnog lasts about 3 to 5 days in the fridge. If it smells sour or looks off, toss it. For frozen eggnog, use it within 3 months for the best taste. Always check for freshness before enjoying. Your safety and taste are most important.
FAQs
Can I use pasteurized eggs in eggnog?
Yes, you can use pasteurized eggs in eggnog. Pasteurized eggs have been heated to kill germs. This makes them safe to eat raw or lightly cooked. Many people prefer them for eggnog. They give the same rich flavor and texture. Using pasteurized eggs also eases food safety concerns. If you can find them, I recommend using them for your eggnog.
How can I thicken my eggnog?
To thicken your eggnog, cook it gently. Use low heat and stir often. This helps the mixture thicken without boiling. You can also add more egg yolks. The yolks add creaminess and body to the drink. If you want a thicker texture, let it chill longer in the fridge. The cold will help it set up nicely.
What’s the history of eggnog during the holidays?
Eggnog has a long history. It dates back to the medieval times in Europe. People made a drink with eggs, milk, and spices. It was a drink of the rich. They used fine spirits like brandy or sherry. In America, it became popular during the holidays. People now enjoy it for Christmas and New Year’s. Today, eggnog is a festive drink loved by many. It brings warmth and cheer to the holiday season.
Homemade holiday eggnog is a joy to make and share. We covered key ingredients, cooking steps, and tips for a smooth texture. You learned about tasty variations and how to store it. Don’t forget to try new flavors and toppings to make it your own. Whether with or without alcohol, eggnog can fit any holiday party. Enjoy making it this season and share it with friends and famil