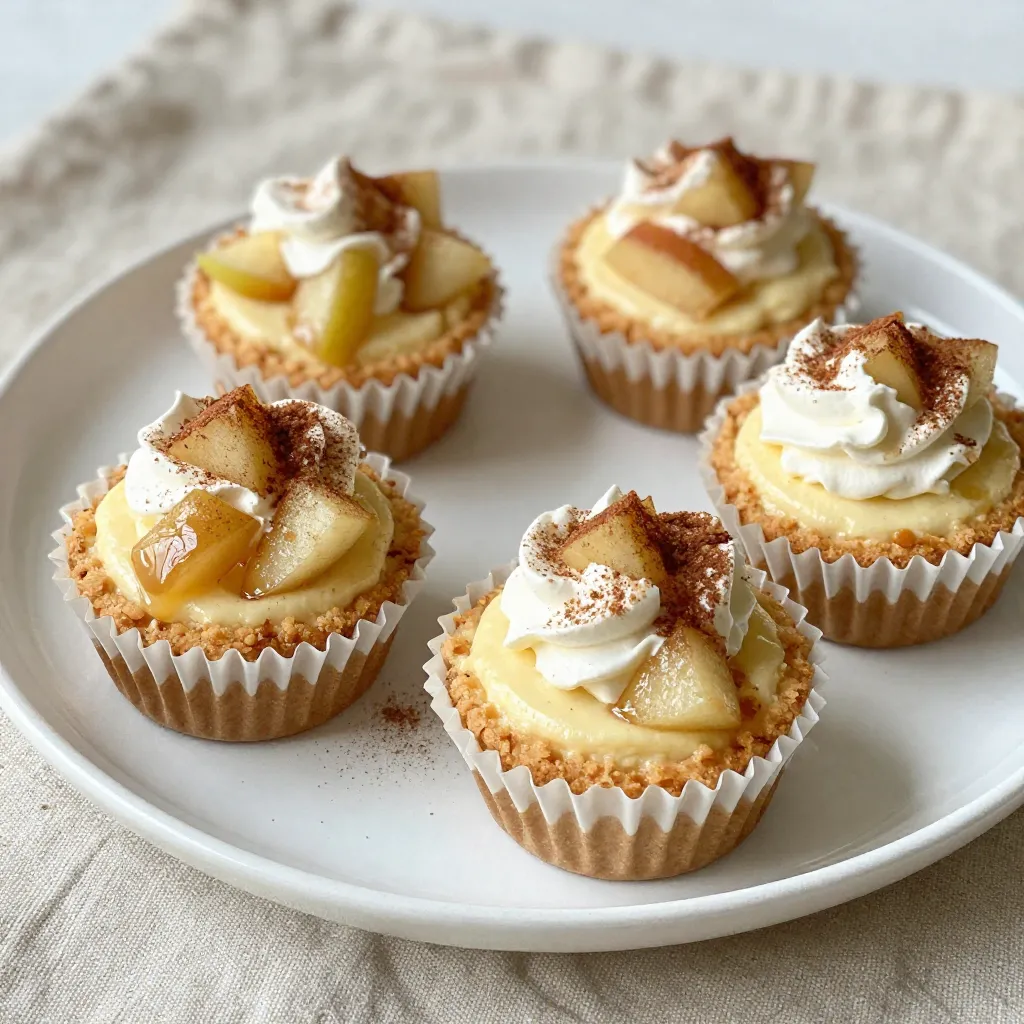
Are you ready to indulge in a sweet treat that screams fall? My Mini Apple Cheesecakes are not only easy to make, but they also offer the perfect balance of creamy cheesecake and tart apples. In this article, I’ll guide you through each step, from choosing the best apple varieties to perfecting the crust. Let’s dive in and create mini desserts that will wow your friends and family!
Why I Love This Recipe
- Delicious Flavor Combination: The sweetness of the apples paired with the creamy cheesecake creates a delightful balance that everyone loves.
- Perfect for Any Occasion: These mini cheesecakes are great for parties, holidays, or just a cozy night in. They’re sure to impress!
- Easy to Make: With simple steps and readily available ingredients, even novice bakers can whip these up with ease.
- Customizable: Feel free to experiment with different types of apples or add nuts and spices to make this recipe your own!
Ingredients
List of Ingredients
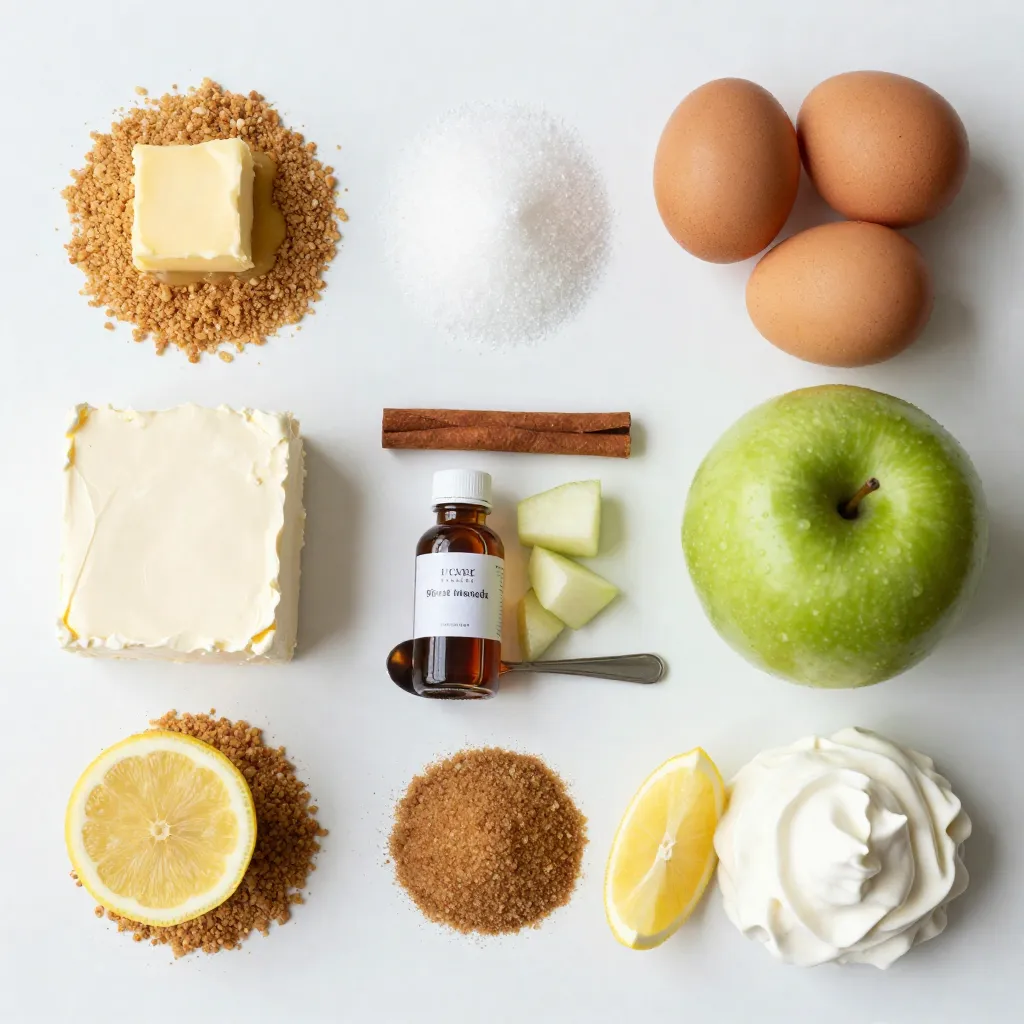
To make mini apple cheesecakes, gather these items:
– 1 cup graham cracker crumbs
– ¼ cup unsalted butter, melted
– 2 cups cream cheese, softened
– ¾ cup granulated sugar
– 2 large eggs
– 1 teaspoon vanilla extract
– 1 teaspoon cinnamon
– 2 cups peeled, diced apples (preferably Granny Smith)
– 2 tablespoons brown sugar
– 1 tablespoon lemon juice
– Whipped cream for topping (optional)
These ingredients create a creamy filling and a crunchy crust. The apples add a sweet and tart flavor that makes each bite special.
Recommended Apple Varieties
I suggest using Granny Smith apples. They have a tart taste that pairs well with the sweet cheesecake. Their firm texture holds up during baking, giving your mini cheesecakes a nice bite. Other good options include Honeycrisp and Fuji apples, as they provide a sweet flavor and juicy texture.
Optional Add-ins
You can get creative with add-ins! Here are some ideas:
– Caramel Sauce: Drizzle it on top before serving for a sweet touch.
– Chopped Nuts: Walnuts or pecans add a nice crunch.
– Dried Cranberries: These can add a tart twist to the flavor.
– Spices: Try adding nutmeg or ginger for extra warmth.
These add-ins can enhance your mini apple cheesecakes and make them unique. Feel free to mix and match!
Step-by-Step Instructions
Preparation
First, preheat your oven to 325°F (160°C). This step is crucial. It ensures your cheesecakes bake evenly. Next, take a muffin tin and line it with paper liners. This makes for easy removal later.
Making the Crust
In a medium bowl, combine 1 cup of graham cracker crumbs and ¼ cup of melted unsalted butter. Mix these two until every crumb is coated. This will give your crust a nice flavor. Press about 1 tablespoon of the mixture into the bottom of each muffin liner. Bake this crust in the oven for about 8 minutes. After baking, let it cool.
Cheesecake Filling Preparation
Now, let’s make the filling. In a large bowl, beat 2 cups of softened cream cheese with ¾ cup of granulated sugar. Mix until it becomes smooth and creamy. Add in 2 large eggs, one at a time. Make sure to mix well after each egg. Stir in 1 teaspoon of vanilla extract and 1 teaspoon of cinnamon. This will add a lovely warmth to your cheesecake.
Apple Preparation
Time to prepare the apples. Take 2 cups of peeled and diced apples, preferably Granny Smith. In a bowl, toss these apples with 2 tablespoons of brown sugar and 1 tablespoon of lemon juice. This step boosts their flavor and prevents browning.
Combining and Baking
Gently fold the apple mixture into your cheesecake batter. Make sure they are evenly mixed. Now, spoon the cheesecake mixture into the crusts, filling each cup almost to the top. Bake them for 18 to 20 minutes. They should set but still be slightly jiggly in the center. Once done, remove them from the oven and let them cool in the pan for 10 minutes.
Cooling and Serving
Carefully take the mini cheesecakes out of the muffin tin. Let them cool completely on a wire rack. Once they are cool, refrigerate them for at least 2 hours, but overnight is best. This helps them set properly. Before serving, feel free to top them with whipped cream if you like. Enjoy your delightful mini apple cheesecakes!
Tips & Tricks
Perfecting the Cheesecake Texture
To avoid cracks, keep the oven temperature steady. Bake at 325°F for even cooking. Overmixing can add air, causing cracks too. Mix until just combined. Use room temperature cream cheese for a smooth filling. This helps create a creamy texture that melts in your mouth.
Common Mistakes to Avoid
Watch out for overbaking! The centers should jiggle slightly. If they look firm, they may be dry. Don’t skip cooling in the pan for ten minutes. This helps them set properly. Also, remember to chill them for at least two hours. This allows the flavors to meld and the texture to firm up.
Storing Leftovers
To keep your mini apple cheesecakes fresh, cover them with plastic wrap. Store them in the fridge for up to five days. If you want to save some for later, they freeze well. Just wrap each one in plastic, then place in a freezer bag. When you’re ready to enjoy, thaw them in the fridge overnight.
Pro Tips
- Use Cold Cream Cheese: Ensure your cream cheese is softened at room temperature for easy mixing. If you’re short on time, cut it into cubes and microwave for 10-15 seconds.
- Apple Selection Matters: Granny Smith apples are ideal for this recipe due to their tartness, which balances the sweetness of the cheesecake.
- Chill Time is Key: Allowing the mini cheesecakes to chill for at least 2 hours helps them set properly and improves the flavor.
- Customize Your Toppings: Feel free to experiment with different toppings like caramel sauce, nuts, or spices to enhance the flavor profile of your cheesecakes.
Variations
Different Crust Options
You can change up the crust for your mini apple cheesecakes. Instead of using graham cracker crumbs, you can try these options:
– Oreo cookies: Use crushed Oreo cookies for a chocolate twist.
– Shortbread cookies: These add a rich, buttery flavor.
– Almond flour: For a gluten-free base, mix almond flour with melted butter.
Each crust brings a unique taste and texture. You can pick what you love most.
Flavor Variations
Adding different flavors can take your mini cheesecakes to new heights. Here are some fun ideas:
– Caramel sauce: Drizzle caramel on top or mix it into the batter.
– Chopped nuts: Add walnuts or pecans for a crunchy bite.
– Spices: Try nutmeg or ginger for a warm flavor boost.
Each of these flavors pairs well with apples, making your dessert even more special.
Serving Suggestions
Presentation is key when serving your mini cheesecakes. Here are some ideas:
– Garnish: Add a sprinkle of cinnamon on top for extra flair.
– Plating: Serve on a colorful plate to make it pop.
– Pairing: Enjoy with a scoop of vanilla ice cream or a cup of hot tea.
These tips will impress your guests and make your desserts shine!
Storage Info
Short-Term Storage
You can keep mini apple cheesecakes in the fridge for up to 5 days. Store them in an airtight container. This keeps them fresh and tasty. If you leave them out, they may spoil. Always remember to cover them well.
Freezing Instructions
To freeze mini cheesecakes, first let them cool completely. Then, wrap each cheesecake in plastic wrap. After that, place them in a freezer-safe bag or container. They can last for about 2 to 3 months in the freezer. This is a great way to save leftovers for later.
Thawing Tips
When you’re ready to eat your frozen cheesecakes, take them out of the freezer. Place them in the fridge for a few hours or overnight. This is the best way to thaw them slowly. Avoid using a microwave, as it can change their texture. Once thawed, enjoy your mini apple cheesecakes chilled!
FAQs
How do I know when mini cheesecakes are done?
To check if your mini cheesecakes are done, look for a few signs. The edges should be set, but the center will still jiggle slightly. This means they are ready to come out. You can also insert a toothpick in the center. If it comes out mostly clean, they are done.
Can I make these ahead of time?
Yes, you can make these mini apple cheesecakes ahead of time. I recommend preparing them the day before you plan to serve. Once baked, let them cool completely. Then, refrigerate them for at least two hours. This chilling time helps the flavors meld together and improves the texture.
What can I substitute for cream cheese?
If you want a healthier or dairy-free option, you can use alternatives. Silken tofu can replace cream cheese and still offer a creamy texture. You can also try vegan cream cheese for a similar taste. Greek yogurt is another option, but it may change the flavor slightly.
In this post, we covered how to make delicious mini cheesecakes. You learned about the essential ingredients, from crust to fillings, and discovered the best apple varieties to use. I walked you through step-by-step instructions, shared useful tips, and suggested fun variations. Remember, perfecting your cheesecake is all about practice. Keep trying new flavors and techniques. A little creativity goes a long way. Enjoy your baking journey, and treat yourself to these tasty mini cheesecake