If you love dessert, you’re in for a treat! Today, I’m sharing my easy recipe for Mini Pineapple Upside Down Cheesecakes. These cute little bites blend creamy cheesecake with sweet pineapple, making a perfect snack or party dish. Plus, they’re simple to make and fun to serve! Ready to impress your family and friends with these delightful cheesecakes? Let’s dive into the ingredients and get started!
Ingredients
Main Ingredients List
– 1 cup crushed graham crackers
– 1/4 cup granulated sugar
– 1/2 teaspoon ground cinnamon
– 1/4 cup unsalted butter, melted
– 8 oz cream cheese, softened
– 1/2 cup powdered sugar
– 1 teaspoon vanilla extract
– 1 cup heavy whipping cream
– 1 can (8 oz) pineapple slices, drained
The main ingredients for mini pineapple upside down cheesecakes create a lovely blend of flavors. The crushed graham crackers form a sweet crust. The cream cheese provides a smooth and creamy filling. Heavy whipping cream adds fluffiness, and pineapple slices give that classic upside-down taste.
Optional Garnishes
– Maraschino cherries, for garnish
– Fresh mint leaves, for garnish (optional)
Garnishes can elevate your cheesecakes. Maraschino cherries add a pop of color and sweetness. Fresh mint leaves bring a bright, fresh flavor. You can skip these if you want, but they make your mini cheesecakes look fancy!
Key Substitutes
– Alternatives for cream cheese: Use Greek yogurt or silken tofu for a lighter option.
– Gluten-free graham crackers: Look for gluten-free options at the store.
If you want to make substitutions, consider Greek yogurt for cream cheese. It cuts calories while keeping creaminess. Silken tofu is a great dairy-free choice. For those avoiding gluten, gluten-free graham crackers work well. These swaps help everyone enjoy this delightful treat!
Step-by-Step Instructions
Preparing the Crust
To start, gather your ingredients. You need crushed graham crackers, sugar, cinnamon, and melted butter. Mix these in a medium bowl until they form a crumbly texture. This takes just a minute or two. Next, take 12 cupcake liners and place them in a muffin tin. Press the crust mixture evenly into the bottoms of the liners. This creates a nice base for your mini cheesecakes. Once done, put the muffin tin in the fridge while you make the filling.
Making the Cheesecake Filling
Now, grab a large mixing bowl for the cheesecake filling. Beat the softened cream cheese until it’s smooth. You can use an electric mixer for this. Once smooth, add powdered sugar and vanilla extract. Mix until everything blends well. This should take about two minutes. This filling is rich and creamy, which is perfect for our mini cheesecakes.
Whipping the Cream and Folding
In a separate bowl, pour in the heavy whipping cream. Beat it on high speed until stiff peaks form. You want it to be thick and fluffy. This step is key to getting a light texture. After that, gently fold the whipped cream into the cream cheese mixture. Be careful not to deflate the whipped cream. This helps keep your filling airy and light.
Assembling the Cheesecakes
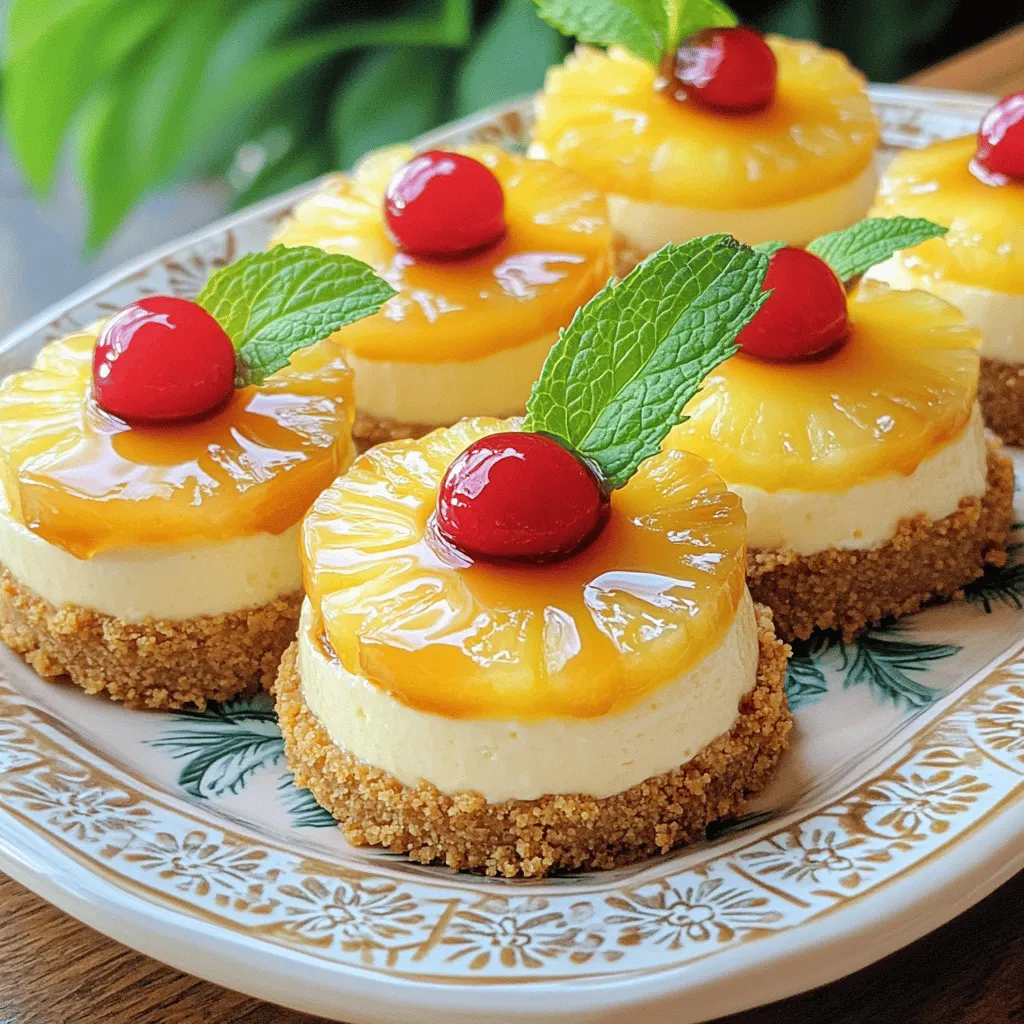
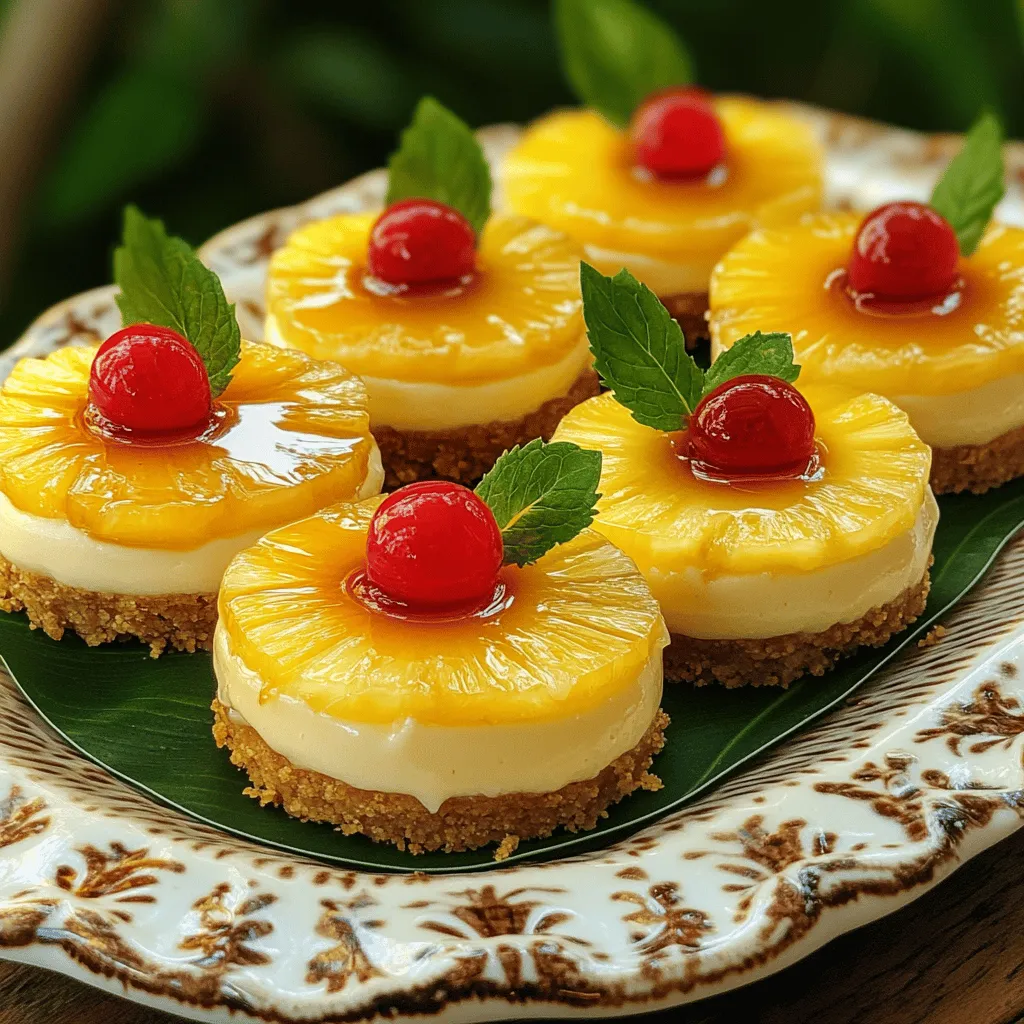
Now, it’s time to put everything together! Take the muffin tin out of the fridge. Place a pineapple slice on top of each crust. Make sure the pineapple is well-drained to avoid sogginess. Next, carefully spoon the cheesecake mixture over the pineapple slices. Fill each liner to the top. This layering makes your mini cheesecakes look stunning.
Chilling Instructions
Cover the muffin tin with plastic wrap. Then, refrigerate it for at least 4 hours. This step is crucial. The cheesecakes need time to set properly. You can tell they are ready when they feel firm to the touch.
Serving Suggestions
After chilling, remove the mini cheesecakes from the muffin tin. Gently peel off the cupcake liners. For a nice touch, top each cheesecake with a maraschino cherry and a fresh mint leaf. You can also drizzle some caramel sauce around the plate for extra flair. Serve them on a decorative platter to impress your guests.
Tips & Tricks
Achieving the Perfect Texture
Softening cream cheese is key to a smooth filling. It helps mix easily and avoids lumps. Take your cream cheese out of the fridge early. Let it sit for about 30 minutes before you start. This step makes a big difference in texture.
Common Mistakes to Avoid
Many home cooks make a few common mistakes. Overmixing can add too much air and make the cheesecake too light. Undermixing leaves lumps that ruin the smoothness. Mix just until combined. Also, don’t skip the chilling time. It helps the cheesecakes set properly. If you take them out early, they may collapse.
Enhancing Flavor Profiles
To elevate your cheesecakes, consider adding flavor. Citrus zest brightens the dish. A little lemon or lime zest gives a fresh twist. Coconut extract adds a tropical note. Just a teaspoon can bring a new depth. Experiment with these ideas to create your perfect mini cheesecakes.
Variations
When I make mini pineapple upside down cheesecakes, I love to mix it up. Here are some fun variations to try.
Alternative Fruit Toppings
You can swap pineapple for other fruits. Peaches add a sweet twist. Berries like strawberries or blueberries bring a tart flavor. Mango gives a tropical touch. Each fruit changes the taste while keeping the cheesecake creamy.
Dietary Modifications
Got dietary needs? You can make these cheesecakes vegan or low-sugar. For a vegan version, use dairy-free cream cheese and coconut whipped cream. For low-sugar, try a sugar substitute in the filling. These changes keep the treats tasty for everyone.
Flavor Infusions
Want to kick it up a notch? Add chocolate or caramel layers. Swirl melted chocolate into the filling for a rich flavor. Drizzle caramel on top for that sweet touch. These additions make each bite even more delightful.
Storage Info
Short-Term Storage
Keep your mini cheesecakes in the fridge. Use an airtight container to seal them. They will stay fresh for up to five days. If you have leftovers, cover them well. This helps to keep out moisture and odors.
Freezing Mini Cheesecakes
You can freeze these treats too! First, let them chill in the fridge until firm. Then, wrap each cheesecake in plastic wrap. Place them in a freezer bag or container. They can last for up to three months. To thaw, move them to the fridge overnight. This keeps them creamy and delicious.
Shelf Life and Freshness Tips
Check for signs of spoilage. If you see water on top or a sour smell, it’s time to toss them. These mini cheesecakes taste best within a few days. Enjoy them cold for a refreshing treat. For the best flavor, serve them fresh from the fridge!
FAQs
Can I make these cheesecakes ahead of time?
Yes, you can make these cheesecakes a day in advance. Just chill them until you’re ready to serve. This helps the flavors blend well. Chilling overnight makes them taste even better!
How do I fix a runny cheesecake filling?
A runny filling often means the cream cheese was not mixed well. Make sure it’s softened completely before mixing. If it’s still runny, add a bit more powdered sugar to thicken it. This helps achieve the right texture.
What is the best way to remove the cheesecakes from the liners?
To remove the cheesecakes, gently pull the edges of the liners away. Use a small knife to help lift them out if needed. Be careful not to break them as you take them out.
Can I use fresh pineapple instead of canned?
Yes, fresh pineapple works great! Just slice it into rounds and use it like canned. Be sure to drain any excess juice to keep the crust firm.
How long can I keep leftovers in the fridge?
You can keep leftovers in the fridge for up to three days. Just cover them well to prevent drying out. Enjoy them cold for a refreshing treat!
In this blog post, we covered the basics of making mini cheesecakes. We discussed the main ingredients like cream cheese and heavy cream, along with optional garnishes that can enhance your dessert. I shared step-by-step instructions to guide you through every stage, from preparing the crust to serving suggestions.
Remember to adjust for texture and avoid common mistakes for the best results. Enjoy experimenting with flavors and toppings to make your cheesecakes unique. Happy baking!


