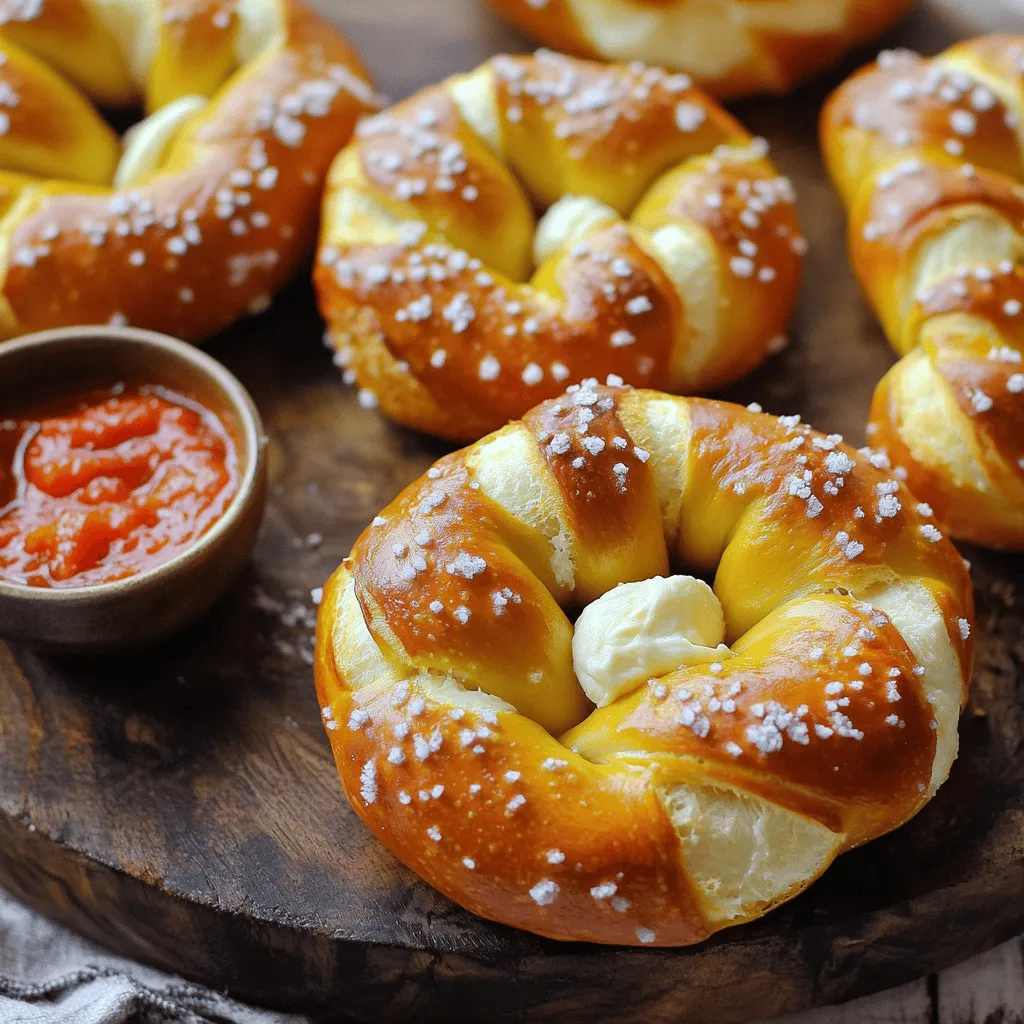
Craving a snack that’s warm, gooey, and impossible to resist? Look no further than Mozzarella Stuffed Soft Pretzels! Imagine biting into a soft, warm pretzel only to discover a delicious surprise of melted mozzarella inside. In this post, I’ll guide you through making them from scratch, ensuring every bite is full of cheesy goodness. Let’s dive into the fun of creating your new favorite snack treat!
Ingredients
To make mozzarella stuffed soft pretzels, you will need some simple ingredients. Here’s the list:
– 1 cup warm water (110°F to 115°F)
– 2 tablespoons granulated sugar
– 2 teaspoons active dry yeast
– 4 cups all-purpose flour
– 1 teaspoon salt
– 2/3 cup baking soda
– 1 large egg (for egg wash)
– Coarse sea salt (for sprinkling)
– 8 ounces fresh mozzarella, cut into small cubes
– 1 tablespoon olive oil (for greasing)
– Optional: 1 teaspoon garlic powder or Italian seasoning
Each ingredient plays an important role in giving the pretzels their unique taste and texture. The warm water and sugar activate the yeast, which makes the dough rise. The flour provides structure, while the salt enhances flavor. Baking soda is key for that classic pretzel taste and color. The mozzarella adds a gooey surprise in the center. You can also add garlic powder or Italian seasoning for extra flavor.
When you gather these ingredients, make sure everything is fresh. This will help your pretzels taste their best.
Step-by-Step Instructions
Activating the Yeast
Start by mixing 1 cup of warm water, 2 tablespoons of sugar, and 2 teaspoons of yeast in a bowl. The water should be between 110°F to 115°F. Let it sit for 5 to 10 minutes. You want it to look frothy. This means your yeast is alive and ready to work.
Making and Kneading the Dough
In a large bowl, combine 4 cups of flour and 1 teaspoon of salt. After the yeast mixture is frothy, pour it into the flour mix. Stir until a dough begins to form. Then, move the dough to a floured surface. Knead for about 5 to 7 minutes until it is smooth and elastic.
Shaping the Pretzels
Now, preheat your oven to 450°F (230°C). After kneading, place the dough in a greased bowl. Cover it with a damp cloth. Let it rise for about 1 hour until it doubles in size. Once risen, punch it down and divide it into 8 equal pieces. Roll each piece into a long rope, about 24 inches. Flatten each rope slightly and place a cube of mozzarella in the center. Fold the dough over the cheese and seal the edges tightly. Twist the ends and fold them back to form the pretzel shape.
Boiling and Baking
Next, prepare a baking soda bath. In a large pot, bring 10 cups of water to a boil and add 2/3 cup of baking soda. Carefully drop 2-3 pretzels at a time into the boiling water for about 30 seconds. Use a slotted spoon to remove them and place them on a baking sheet lined with parchment paper. Beat 1 large egg in a bowl and brush it over each pretzel. Sprinkle with coarse sea salt and optional garlic powder or Italian seasoning. Finally, bake the pretzels for 12 to 15 minutes until they are golden brown. Enjoy them warm!
Tips & Tricks
Perfecting the Dough
Kneading dough is key to soft pretzels. I start by mixing all the ingredients well. Once combined, I knead for about 5-7 minutes. This makes the dough smooth and elastic. If the dough sticks, add a little flour. After kneading, let it rise in a warm place. I cover it with a damp cloth to keep it moist. Wait until the dough doubles in size, which takes about an hour.
Achieving the Best Pretzel Shape
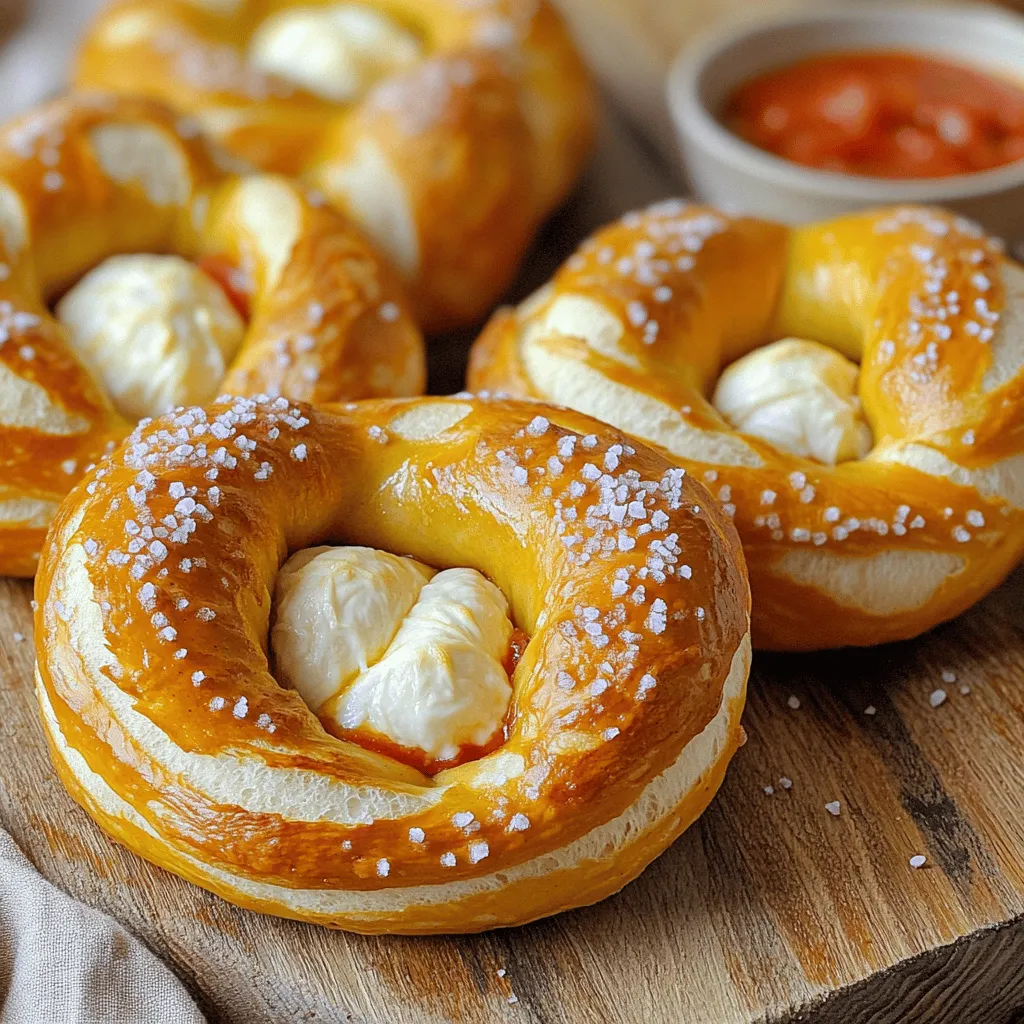
Twisting and sealing the pretzels is fun! First, divide the risen dough into 8 equal pieces. Roll each piece into a long rope, about 24 inches. To stuff, flatten the rope and place a cube of mozzarella in the center. Fold the dough over the cheese and seal the edges tightly. Then, twist the ends and fold them back to form a classic pretzel shape. This step is all about practice. The more you do it, the better they look!
Flavor Enhancements
Want to kick up the flavor? I often add garlic powder or Italian seasoning. Just mix one teaspoon of either into the dough before kneading. This tiny change makes a big difference. When brushing the pretzels with egg wash, sprinkle more garlic powder or Italian seasoning on top. This adds not just flavor but also a lovely aroma when baking.
Variations
Different Cheese Fillings
You can change the cheese for even more fun. Try sharp cheddar for a rich taste. Pepper jack adds a spicy kick. For a twist, use gouda or a creamy brie. Each cheese brings a new flavor to your pretzels. It’s a great way to switch things up!
Sweet Pretzel Option
Want a treat instead? Make sweet pretzels! Use a mix of cream cheese and sugar for the filling. You can also try Nutella or peanut butter. Roll the dough into a circle, add your filling, and fold it over. Dust with cinnamon sugar before baking. It’s a fun dessert everyone will love!
Dipping Sauce Suggestions
No pretzel is complete without a good dip. Marinara sauce pairs well with cheesy pretzels. A cheese sauce makes each bite even more special. Mustard, especially spicy brown, brings a tangy taste. You can even try a sweet honey mustard for a mix of flavors. Serving with dips makes your snack even more enjoyable!
Storage Info
Storing Leftovers
To keep your mozzarella stuffed soft pretzels fresh, store them in an airtight container. You can place a paper towel inside to absorb moisture. This helps them stay soft and tasty. They will last for about 2-3 days in the fridge. If you want to keep them longer, freezing is a great option.
Reheating Instructions
When you want to enjoy your pretzels again, reheating is key. The best way to reheat them is in the oven. Preheat your oven to 350°F (175°C). Place the pretzels on a baking sheet. Heat for about 5-10 minutes. This keeps them soft and warm. You can also use a microwave. Just heat for 10-15 seconds. Be careful not to overheat, as they can get tough.
Freezing Pretzels
If you want to freeze your pretzels, here’s how. First, let them cool completely. Then, wrap each pretzel tightly in plastic wrap. Place them in a freezer bag. They can last up to 3 months in the freezer. When you’re ready to eat them, thaw in the fridge overnight. Reheat as mentioned above for the best taste. This way, you can enjoy a delicious snack anytime!
FAQs
Can I make the dough in advance?
Yes, you can make the dough ahead of time. Prepare the dough as directed and let it rise. Once it’s ready, you can wrap it tightly in plastic wrap. Store it in the fridge for up to 24 hours. When you’re ready to use it, let the dough sit at room temperature for about 30 minutes. This helps it regain its warmth and rise a bit more before shaping.
What can I use if I don’t have active dry yeast?
If you don’t have active dry yeast, you can use instant yeast instead. Instant yeast doesn’t need to be activated in water. Just mix it directly with the dry ingredients. You can also use fresh yeast, but you’ll need about three times more. If you prefer a sourdough flavor, you can make a sourdough starter and use it instead.
How do I get the perfect crust?
To achieve a crunchy pretzel crust, boil the pretzels in a baking soda bath before baking. This step helps develop that signature pretzel flavor and texture. Make sure your water is at a rolling boil when you add the pretzels. Keep them in the bath for about 30 seconds. Also, brush them with an egg wash before baking to get a nice golden color. Sprinkle coarse sea salt on top right before they go in the oven for extra crunch.
Making pretzels at home is fun and rewarding. I covered the key ingredients, step-by-step instructions, and helpful tips. You now have a solid grasp of how to create delicious pretzels tailored to your taste, whether cheesy or sweet. Remember, practice makes perfect, especially for shaping and boiling. With a few variations and storage tips, you can enjoy these treats any time. Dive in, experiment with flavors, and share with friends. Your homemade pretzels will be a hit, guaranteed!
