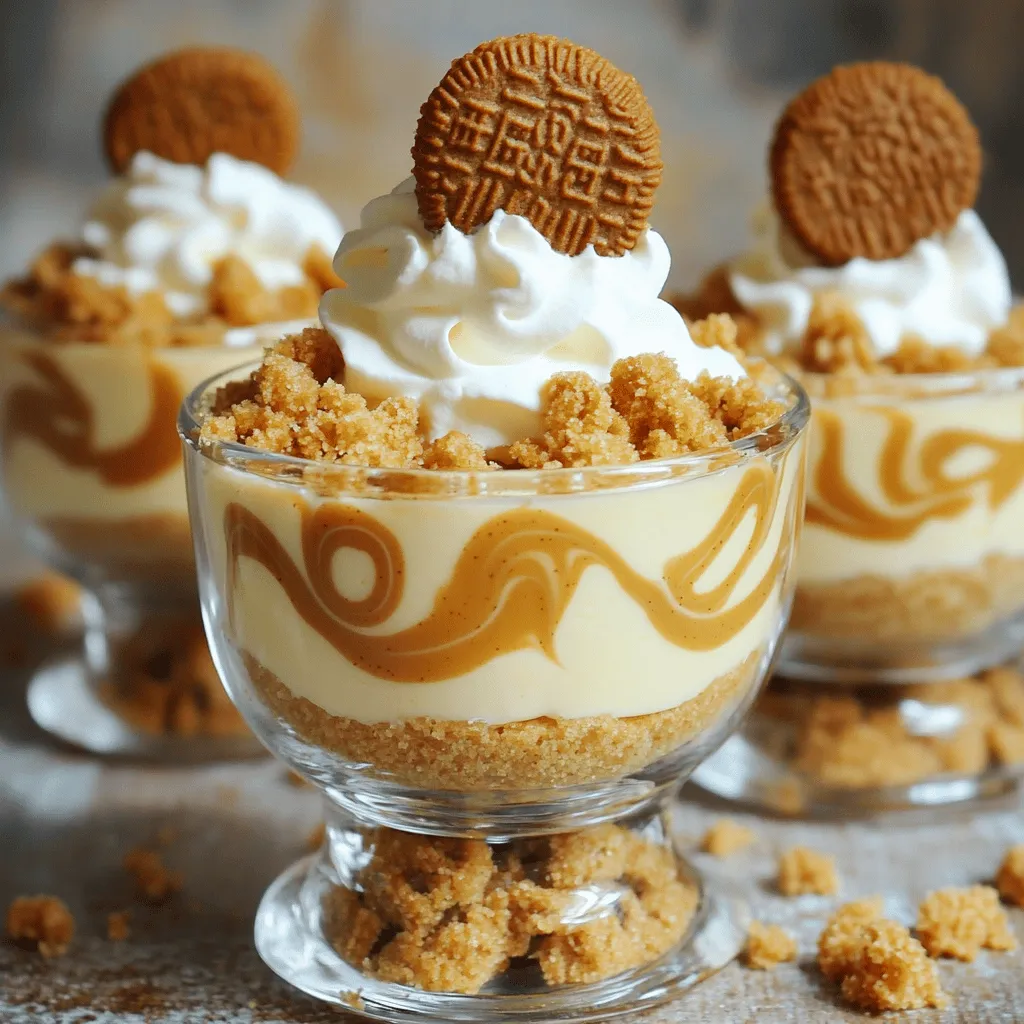
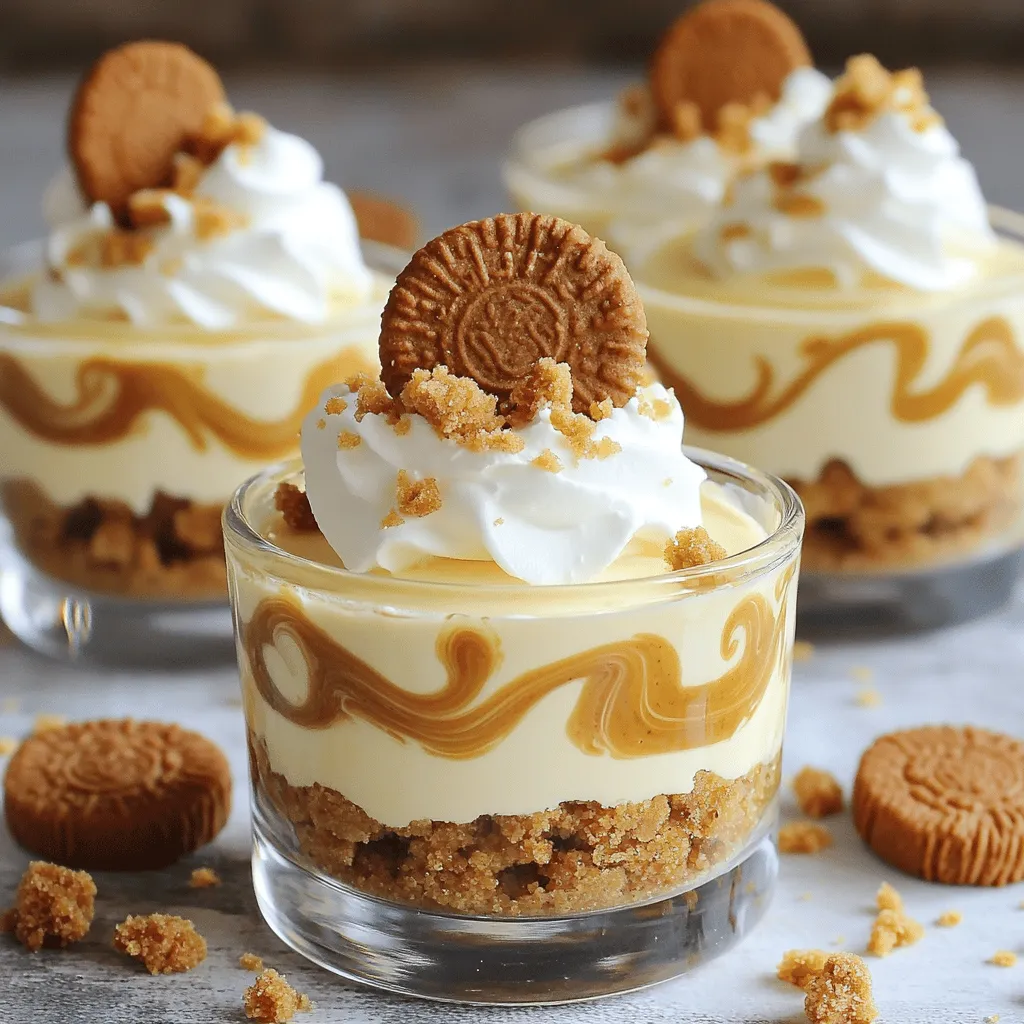
Craving a sweet treat that’s quick and easy? You’ll love these No-Bake Biscoff Cheesecake Cups! With rich cheesecake and a crunchy cookie base, they’re perfect for anyone. I’ll walk you through simple steps to create these delightful desserts. Plus, I’ll share tips for making the best texture and fun variations. Get ready to impress your friends and family with this tasty recipe that anyone can master!
Ingredients
Main Ingredients for No-Bake Biscoff Cheesecake Cups
To make these tasty cheesecake cups, you need a few key items. Here’s what you will need:
– 200g Biscoff cookies, crushed
– 100g unsalted butter, melted
– 400g cream cheese, softened
– 200ml heavy whipping cream
– 100g powdered sugar
– 100g Biscoff spread
– 1 teaspoon vanilla extract
– A pinch of salt
– Extra Biscoff cookies for topping
These ingredients create a rich, creamy treat. The Biscoff cookies give a nice crunch. The cream cheese and heavy cream make it smooth and fluffy.
Optional Garnishes and Toppings
You can make your cheesecake cups even better with some fun toppings. Here are some ideas:
– Crushed Biscoff cookies for extra crunch
– Chocolate shavings or drizzle for a sweet touch
– Fresh fruit like berries for a pop of color
– Whipped cream for a fluffy finish
Using these toppings can make your dessert look stunning. They also add fun flavors.
Ingredient Substitutions
Sometimes you may not have all the ingredients. Here are some swaps you can try:
– Use graham crackers instead of Biscoff cookies for the base.
– Swap the cream cheese for mascarpone for a different taste.
– Try coconut cream instead of heavy whipping cream for a dairy-free option.
– Maple syrup can replace powdered sugar for a natural sweetener.
These substitutions let you enjoy the cheesecake cups in new ways. You can make it your own!
Step-by-Step Instructions
Preparing the Cookie Base
First, take 200g of Biscoff cookies and crush them finely. You can use a food processor or put them in a bag and smash them with a rolling pin. Then, melt 100g of unsalted butter. In a mixing bowl, combine the crushed cookies and melted butter. Mix them well until the cookies are coated. This mixture will be the base for your cheesecake cups. Next, divide the cookie mixture evenly into your serving cups. Press it down gently to form a flat layer. Now, place the cups in the fridge for about 15 minutes to help them set.
Making the Creamy Cheesecake Filling
In a large bowl, take 400g of softened cream cheese. Use an electric mixer to beat it until it is creamy and smooth. Next, add 200ml of heavy whipping cream, 100g of powdered sugar, 100g of Biscoff spread, 1 teaspoon of vanilla extract, and a pinch of salt. Start mixing on low speed until all ingredients are combined. After that, increase the speed to high and whip it for 3-4 minutes. This step will make your filling light and fluffy.
Assembling the Cheesecake Cups
Take the cups out of the fridge. Spoon the cheesecake filling on top of the cookie base in each cup. Fill them halfway, leaving some space at the top. Then, take extra Biscoff spread and add dollops on top of each cheesecake layer. Use a toothpick to swirl the Biscoff spread lightly for a marbled look. It adds a nice touch to your dessert.
Chilling and Setting the Cups
Now, cover the cups with plastic wrap and place them in the fridge. Let them chill for at least 4 hours, or until they are set. This step is key for the texture. Before serving, crumble extra Biscoff cookies on top for garnish. Serve them chilled and enjoy this delightful treat!
Tips & Tricks
How to Achieve the Perfect Cheesecake Texture
To get a great cheesecake texture, start with room-temperature cream cheese. This helps it mix well. Beat it until smooth and creamy. Then, add the heavy whipping cream slowly. Whip the mixture until it’s light and fluffy. This will give you that dreamy, rich texture. Remember, if it’s too dense, it won’t set right.
Best Practices for Crumbling Biscoff Cookies
Crumbling Biscoff cookies can be fun! Place them in a zip-top bag and crush them with a rolling pin. You want fine crumbs, not chunks. If you prefer, you can use a food processor for a quicker method. Just pulse until you reach the right size. Make sure to mix the crumbs well with melted butter for a tasty base.
Serving Suggestions for Extra Flavor
For extra flavor, try adding a dollop of Biscoff spread on top before serving. You can also sprinkle some crushed cookies for a crunchy finish. For a twist, drizzle melted chocolate or caramel sauce over the top. This adds flavor and makes it look fancy. Serve chilled, and enjoy every creamy bite!
Variations
Alternative Flavors for Cheesecake Filling
You can switch up the flavors in your cheesecake cups. Instead of Biscoff spread, try using Nutella or peanut butter. These choices add a unique twist. You can also mix in fruit purees or chocolate for added taste. Imagine the creamy filling with strawberry or caramel flavors! It’s a fun way to make this dessert your own.
Different Types of Cookie Crusts
While Biscoff cookies make a great base, other cookies work well too. You can use Oreos for a classic flavor. Graham crackers are another great option. They give a nice, crunchy texture. For a healthier twist, try using crushed almonds or oats. Each crust brings its own special touch to the dessert.
Vegan or Dairy-Free Options
You can make these cheesecake cups vegan or dairy-free with some easy swaps. Use vegan cream cheese and coconut cream instead of regular cream cheese and heavy cream. For the Biscoff spread, check for dairy-free brands. The cookie crust can be made with vegan cookies. This way, everyone can enjoy a delicious treat!
Storage Info
How to Properly Store No-Bake Cheesecake Cups
To keep your No-Bake Biscoff Cheesecake Cups fresh, store them in the fridge. Use airtight containers or cover the cups with plastic wrap. This helps prevent any odors from the fridge affecting the flavor. Make sure they stay cool until you’re ready to serve.
Tips for Freezing the Cheesecake Cups
You can freeze these cheesecake cups if you want to save some for later. First, let the cups chill in the fridge for at least four hours. Then, place them in the freezer. Wrap each cup in plastic wrap or foil. This keeps them fresh and prevents freezer burn. When you’re ready to enjoy them, move the cups to the fridge for a few hours to thaw.
Shelf Life and Best Practices
These cheesecake cups stay fresh in the fridge for about 4-5 days. If you freeze them, they can last up to a month. Keep an eye on them. If you notice any changes in smell or color, it’s best to toss them. For the best taste and texture, enjoy them within the first few days after making.
FAQs
How do I know when the cheesecake cups are set?
You will know the cheesecake cups are set when they feel firm to the touch. After chilling for at least four hours, gently press the top. If it holds its shape, it’s ready. You can also check if the filling is no longer jiggly. The top should look smooth and slightly glossy.
Can I use a different cookie instead of Biscoff?
Yes, you can use other cookies! Graham crackers or Oreo cookies work well as substitutes. Each cookie will give a different flavor. Choose a cookie you enjoy, and crush it into fine crumbs for the base.
What can I use instead of heavy whipping cream?
If you need a substitute, try using coconut cream or whipped coconut milk. Both options give a creamy texture. You can also use a non-dairy whipping cream for a vegan option. Just make sure it can whip up nicely.
How long can I store leftovers?
You can store leftovers in the fridge for up to three days. Keep them covered to prevent drying out. If you want to keep them longer, you can freeze them for up to a month. Just thaw them in the fridge before serving.
You now know all about making no-bake Biscoff cheesecake cups. From choosing key ingredients to optional garnishes, you can create a delicious treat. I shared tips to make your cheesecake perfect and variations to suit your taste. Remember, proper storage can keep them fresh longer. Enjoy making these easy desserts, and don’t hesitate to experiment with flavors and crusts. Your baking journey can be fun and rewarding with these simple steps!