
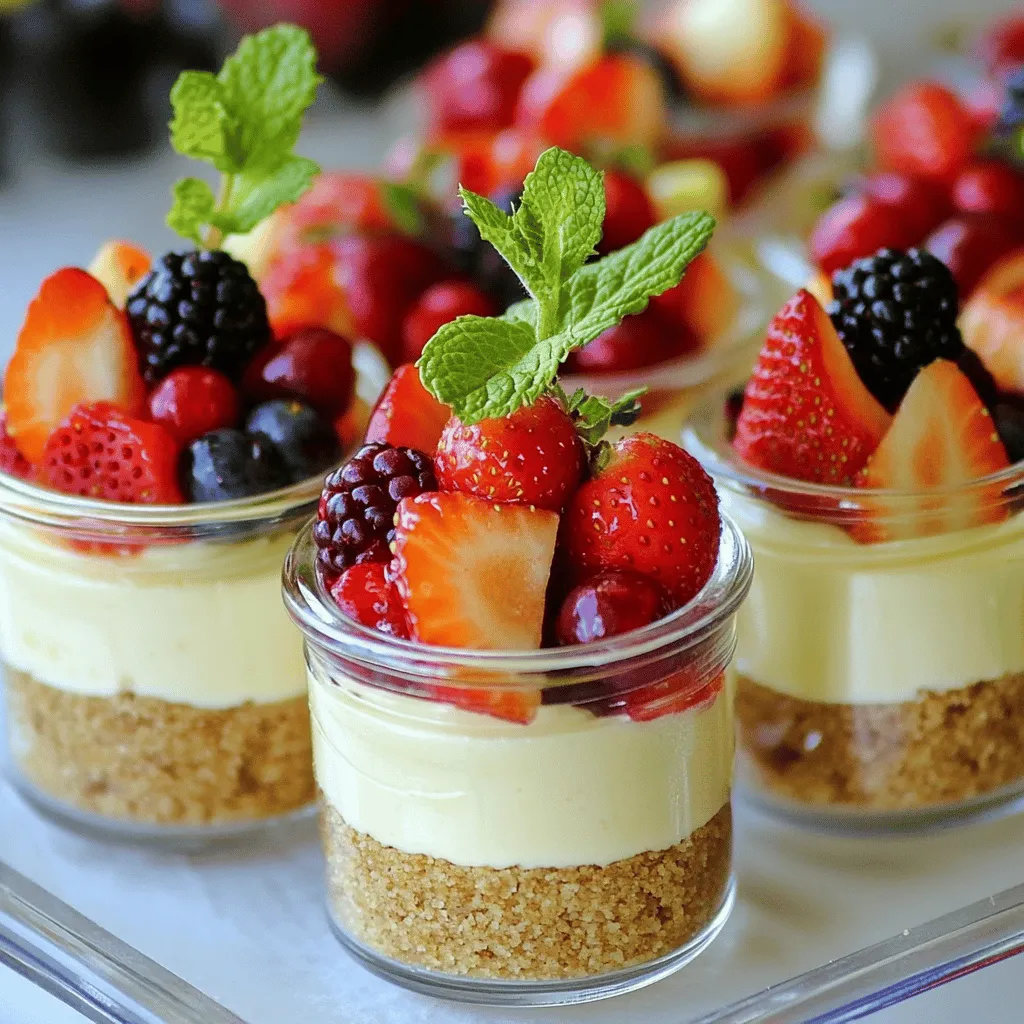
Looking for a quick and tasty dessert that impresses? You’ve found it! These No-Bake Cheesecake Cups are easy to make and bursting with flavor. With simple ingredients like cream cheese, graham crackers, and fresh berries, you can whip up a delightful treat in no time. Plus, I’ll share tips, tricks, and variations to make these cups your own. Let’s dive into this delicious recipe!
Ingredients
Main Ingredients
– 1 cup graham cracker crumbs
– 1/4 cup granulated sugar
– 1/2 cup unsalted butter, melted
– 1 cup cream cheese, softened
– 1/2 cup powdered sugar
– 1 teaspoon vanilla extract
– 1 cup heavy whipping cream
– Fresh strawberries or mixed berries for topping
– Mint leaves for garnish (optional)
For my no-bake cheesecake cups, I choose each ingredient with care. The graham cracker crumbs form a sweet and crunchy base. I love the taste of granulated sugar mixed with melted butter. It brings a rich flavor to the crust. Cream cheese adds that creamy texture we all crave. Powdered sugar makes the filling sweet without being gritty. Vanilla extract gives the dessert a warm, inviting aroma as it bakes.
Heavy whipping cream is key for a light and airy filling. I often top these cups with fresh strawberries or mixed berries. They add color and a burst of flavor. If you want a touch of green, mint leaves make a lovely garnish.
Possible Substitutions
– Use alternative sweeteners like honey or agave syrup.
– Choose gluten-free options for graham crackers if needed.
– Look for dairy-free cream cheese alternatives for a vegan option.
These substitutions can help you tailor the recipe to your taste and needs. You can keep the same texture and taste while making it work for everyone.
Step-by-Step Instructions
Preparation Overview
To make no-bake cheesecake cups, I start with the crust. First, I combine graham cracker crumbs, sugar, and melted butter in a bowl. I mix until it looks like wet sand. This creates a tasty crust that holds everything together.
Next, I mix the cheesecake filling. I beat softened cream cheese with an electric mixer until smooth. Then, I add powdered sugar and vanilla extract. This step gives the cheesecake its sweet flavor.
Detailed Steps
How to prepare the crust
1. In a medium bowl, add one cup of graham cracker crumbs.
2. Add a quarter cup of granulated sugar.
3. Pour in half a cup of melted unsalted butter.
4. Mix until the crumbs are well coated.
5. Divide the mixture into serving cups, pressing it down firmly.
How to make the cream cheese mixture
1. In a large bowl, beat one cup of softened cream cheese until smooth.
2. Gradually add half a cup of powdered sugar and one teaspoon of vanilla extract.
3. Mix until the filling is creamy and well combined.
4. In another bowl, whip one cup of heavy cream until stiff peaks form.
5. Gently fold the whipped cream into the cream cheese mixture.
Filling the cups and chilling
1. Spoon the cheesecake mixture over the crust in each cup.
2. Fill each cup about three-quarters full.
3. Cover the cups with plastic wrap.
4. Refrigerate for at least four hours, or overnight for best results.
Chilling and Serving
I recommend chilling the cups for at least four hours. This helps the cheesecake set properly. For a beautiful presentation, top each cup with fresh berries. You can add a mint leaf if you like. This adds a nice touch to your dessert.
Tips & Tricks
Perfecting the Cheesecake Cups
To ensure a smooth filling texture, start with softened cream cheese. If the cream cheese is cold, it can cause lumps. Beat it well until creamy before adding sugar. Gradually mix in the powdered sugar and vanilla extract. This keeps the mixture smooth.
The right consistency of whipped cream is key. Whip the heavy cream until you see stiff peaks. Don’t rush this step. Fold the whipped cream gently into the cream cheese mixture. This keeps your cheesecake light and fluffy.
Presentation Ideas
Garnishing with fruits can make your cheesecake cups pop. Fresh strawberries or mixed berries add color and flavor. Place them on top just before serving. You can also add mint leaves for a nice touch.
Using decorative serving cups can elevate your dessert. Clear glass cups let you show off the layers. You can use small jars or even fancy glasses. The right cup can make your treat look more appealing.
Common Mistakes to Avoid
One common mistake is overmixing the cheesecake filling. If you mix too much, it can become dense. Just mix until combined and smooth.
Not letting it chill long enough is another mistake. The cheesecake needs time to set. Chill for at least four hours, but overnight is best. This helps the flavors meld and gives the right texture.
Variations
Flavor Variations
You can make chocolate no-bake cheesecake cups by adding cocoa powder. Use about 1/4 cup of unsweetened cocoa powder in the cream cheese mixture. This adds a rich, chocolatey taste. You can also melt chocolate and mix it in for an even deeper flavor.
For fruit-infused options, blend fresh fruits into the cream cheese mixture. Strawberries, blueberries, or mango work well. You can also use fruit puree. This gives your cheesecake a fresh twist and bright color.
Different Base Options
If you want a different base, try using crushed cookies instead of graham crackers. Oreos or vanilla wafers can create a tasty change. Just mix them with melted butter, like you do with graham crackers.
Nut-based crusts add a fun flavor too. Use crushed almonds or pecans mixed with butter. This gives a nutty crunch that pairs well with the creamy filling.
Unique Toppings
You can use many toppings for your cheesecake cups. Fresh fruit like raspberries or kiwi adds color and taste. You can also use a mix of fruits for a fun look.
Drizzles of chocolate or caramel sauce make these cups even better. Just warm the sauce slightly for easy pouring. This adds sweetness and makes each cup look fancy.
Storage Info
Proper Storage Guidelines
To keep your no-bake cheesecake cups fresh, store them in the fridge. Cover each cup with plastic wrap or a lid. This helps them stay moist and tasty. If you want to freeze them, wrap each cup tightly in plastic wrap and then in aluminum foil. They can last longer this way.
Shelf Life
In the fridge, these cheesecake cups last about 3 to 5 days. Keep an eye on them. If you see any discoloration or a strange smell, it’s best to throw them out. Always trust your senses!
Reheating or Serving After Storage
When you are ready to serve, take the cups out of the fridge. If they feel too firm, let them sit at room temperature for a few minutes. This helps bring back the creamy texture. Add fresh berries or mint leaves right before serving for a nice touch. Enjoy your delicious dessert!
FAQs
Can I use low-fat cream cheese?
Yes, you can use low-fat cream cheese. It will still taste good. The texture may be a bit different. Low-fat cream cheese can make the filling less creamy. If you want a lighter dessert, it’s a good choice.
How long do these cheesecake cups need to set?
These cheesecake cups need at least 4 hours to set. For the best flavor and texture, chill them overnight. This wait helps the flavors blend well. The longer they chill, the firmer they become.
Can I make these no-bake cheesecake cups ahead of time?
Absolutely! You can make these cups a day or two ahead. Just store them in the fridge. This makes them perfect for parties or gatherings. They taste even better when made in advance.
What can I substitute for heavy whipping cream?
You can use coconut cream as a great substitute. It adds a nice flavor and creaminess. You can also use whipped topping for a lighter option. Just remember, the taste might change a bit. For a dairy-free option, almond or soy cream works well too.
In this post, I covered how to make delicious no-bake cheesecake cups. We explored the main ingredients like cream cheese, granulated sugar, and fresh fruit. I shared step-by-step instructions to help you create the perfect dessert. Plus, I gave tips to avoid common mistakes and variations to try.
For the best results, always chill your cups long enough for the flavors to meld. Feel free to experiment with toppings and flavors. Enjoy your cheesecake cups, and share them with friends and family!


