Get ready for a fun holiday treat! These No-Bake Grinch Oreo Truffles are easy to make and perfect for festive gatherings. With just a few simple ingredients like Oreo cookies and green candy melts, you can whip up these delicious bites in no time. Join me as I share tips, tricks, and creative ideas to impress your friends and family. Let’s dive in and spread some holiday cheer!
Why I Love This Recipe
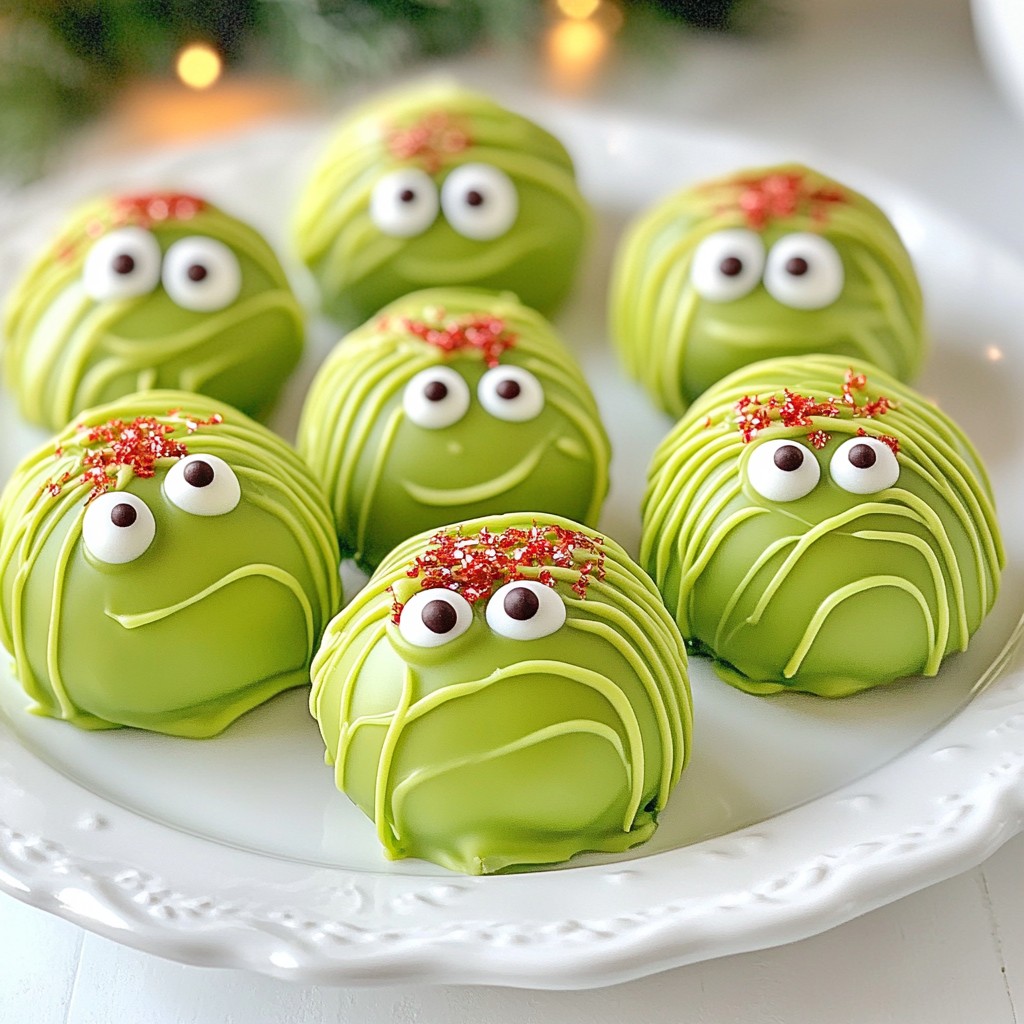
- Festive Appearance: These truffles are bright green and decorated with red sprinkles, making them perfect for holiday gatherings.
- No Baking Required: Skip the oven and enjoy a quick and easy treat that comes together in no time.
- Customizable Flavors: With the option to add peppermint extract, you can make these truffles uniquely yours.
- Fun Activity: Rolling the truffles is a great activity to do with kids or as a fun holiday project with friends.
Ingredients
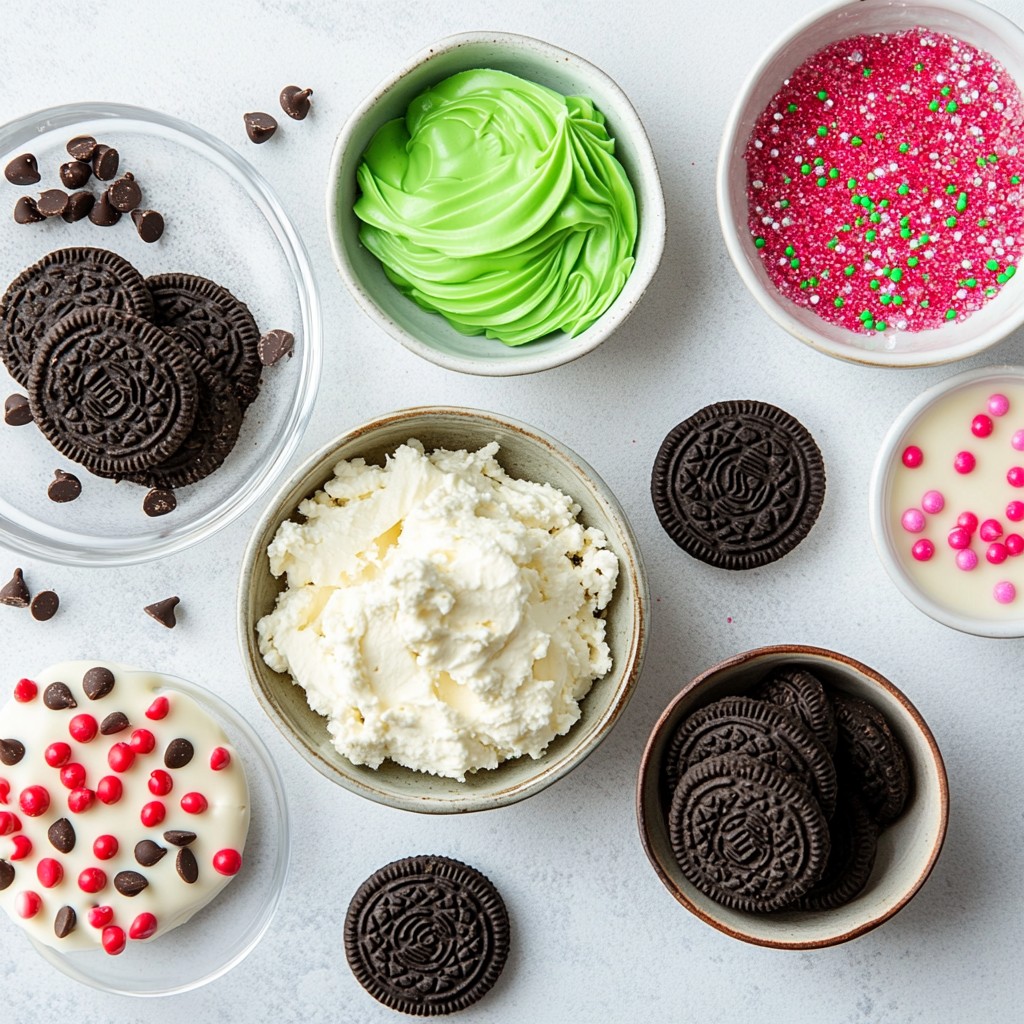
To make No-Bake Grinch Oreo Truffles, you need a few simple ingredients. Each one adds to the fun and flavor. Here’s what you will need:
- 20 Oreo cookies, crushed into fine crumbs
- 8 oz cream cheese, softened
- 1 cup green candy melts
- 1/4 cup red sprinkles or edible glitter
- 1/2 teaspoon peppermint extract (optional for added flavor)
- Mini chocolate chips for eyes
Each ingredient plays a role in creating these festive treats. The Oreo cookies give a rich, chocolate flavor. Cream cheese adds creaminess and helps bind everything together. Green candy melts create the fun Grinch look. Red sprinkles or edible glitter add a pop of color. If you want a minty taste, add peppermint extract. Finally, mini chocolate chips make cute eyes for your truffles.
Gather these ingredients before you start. This helps your cooking process go smoothly.
Step-by-Step Instructions
Preparation of Oreo Mixture
To start, grab a large mixing bowl. Add 20 crushed Oreo cookies and 8 ounces of softened cream cheese. If you like, pour in 1/2 teaspoon of peppermint extract. Mix everything well until it becomes smooth and creamy. This mixture should feel thick and easy to work with. It’s the base for our tasty truffles.
Rolling the Truffles
Now, take a small scoop of the Oreo mixture. Roll it into a ball about 1 inch wide. Place each ball on a parchment-lined baking sheet. Keep rolling until you finish the entire mixture. This should give you about 20 truffles. Once done, pop the baking sheet into the fridge for 30 minutes. This helps the truffles firm up nicely.
Melting and Coating with Candy Melts
While the truffles cool, prepare to melt your green candy melts. Use a microwave-safe bowl and heat them in 30-second bursts. Stir in between until the melts are smooth. Once your truffles have set, dip each one into the melted green candy. Use a fork to coat them evenly, letting any excess candy drip off. Before the coating hardens, sprinkle red sprinkles or edible glitter on top. For the eyes, place mini chocolate chips on the truffles. You can use a bit of melted candy as glue if needed. Finally, chill the truffles again for 15 to 20 minutes to let everything set. Enjoy your festive treats!
Tips & Tricks
Achieving the Perfect Texture
To get the right texture, mix the crushed Oreo cookies with softened cream cheese well. You want it creamy but firm enough to roll into balls. If your mixture feels too soft, chill it for a few minutes before rolling. This helps the truffles hold their shape.
Decorating Ideas
Make your truffles fun and festive! After coating the truffles in melted green candy, sprinkle red sprinkles or edible glitter on top. This gives them a pop of color. For eyes, use mini chocolate chips. You can even use melted candy to help them stick. Place a small dot of candy where you want each eye.
Flavor Customization
Want to change it up? You can add peppermint extract to give a minty twist. If you prefer a different flavor, try almond or vanilla extract instead. For a richer taste, mix in some peanut butter or Nutella with the cream cheese. This way, you can create a unique treat that suits your taste!
Pro Tips
- Use Fresh Cream Cheese: Ensure your cream cheese is at room temperature for easy mixing and a smooth texture in your truffles.
- Chill for Better Dipping: Chilling the truffles before dipping them in candy melts helps maintain their shape and makes them easier to coat.
- Customize Your Coating: Feel free to experiment with different colors of candy melts or toppings like crushed candy canes for a festive twist.
- Store Properly: Keep your truffles in an airtight container in the refrigerator for up to a week to maintain freshness.
Variations
Different Flavor Profiles
You can change the flavor of these truffles easily. For a fun twist, swap the Oreo cookies with other cookies like chocolate mint or peanut butter. Use flavored cream cheese for extra taste. You could even add a drop of vanilla or almond extract. This small change makes a big difference!
Alternative Coatings
While green candy melts are festive, you can try other coatings too. Use white chocolate or dark chocolate for a new look. For a unique touch, drizzle melted chocolate over the truffles. You can also roll them in crushed nuts, coconut, or graham cracker crumbs. This adds crunch and flavor.
Dietary Modifications
To make these truffles fit your diet, you have options. Use gluten-free Oreo cookies for a gluten-free treat. For a dairy-free version, choose vegan cream cheese and dairy-free chocolate. If you want to cut sugar, look for sugar-free cookies and candy melts. These changes help everyone enjoy this festive delight!
Storage Info
How to Store Truffles
You can store your No-Bake Grinch Oreo Truffles in an airtight container. Line the container with parchment paper to keep them fresh. Place a layer of truffles, then add more parchment paper before stacking more truffles on top. This helps avoid sticking. Keep the container in the fridge for the best taste.
Freezing and Thawing Tips
If you want to save some for later, freezing is a great option. Place the truffles on a baking sheet and freeze them until solid. Then, transfer them to a freezer-safe container. They can last up to three months in the freezer. When you’re ready to eat them, take them out and let them thaw in the fridge for a few hours.
Shelf Life of No-Bake Truffles
These truffles can stay fresh in the fridge for about one week. If you follow the storage tips, they’ll taste great even after a few days. Just remember, the sooner you enjoy them, the better they taste!
FAQs
Can I make these truffles in advance?
Yes, you can make these truffles up to two days ahead. Just store them in the fridge. Keep them in an airtight container to stay fresh. This will save time during busy holiday prep.
What can I use instead of cream cheese?
If you want a dairy-free option, use vegan cream cheese. You can also try using Greek yogurt for a lighter version. Both choices will keep the truffles creamy and delicious.
How do I fix a runny coating?
If your candy melt coating is runny, try adding more melts to thicken it. You can also let it cool slightly before dipping the truffles. If it stays runny, you might need to start over with fresh melts.
Can I skip the peppermint extract?
Absolutely! The truffles will still taste great without it. If you love chocolate and Oreo flavor, feel free to leave it out. It won’t change the fun look or texture.
How do I make the truffles more festive?
Add more sprinkles or edible glitter on top for a fun touch. You can also use different colors of candy melts for a unique twist. Get creative with your designs to match your holiday theme!
Can I use different types of cookies?
Sure! You can swap Oreo cookies for any other chocolate cookies. Just make sure they are similar in texture. This will keep the truffles from becoming too crumbly.
How long do the truffles last in the fridge?
They can last up to a week in the fridge. Just remember to keep them in an airtight container to avoid drying out. This way, you can enjoy them for days after making them!
Can I freeze these truffles?
Yes, you can freeze them! Just place them in a single layer on a baking sheet first. Once frozen, transfer them to a container. They can last up to three months in the freezer.
You can create delicious no-bake truffles using simple ingredients like Oreos and cream cheese. Follow the step-by-step guide to achieve the perfect texture and flavor. Don’t forget the tips for decorating and customizing your truffles. They offer great options for everyone, even those with dietary needs. Store them properly to enjoy later. These truffles are fun to make and share. Now, gather your ingredients and start creating your own tasty treats!