Are you ready to indulge in a sweet and creamy delight? These No-Bake Oreo Cheesecake Cups are quick to whip up and taste amazing! Whether you’re hosting a party or craving a tasty treat, these cups come together effortlessly. I’ll guide you through the simple steps and share tips to make them even better. Dive in and discover your new favorite dessert today!
Ingredients
List of Required Ingredients
To make No-Bake Oreo Cheesecake Cups, you will need the following:
– 20 Oreo cookies (crushed)
– 4 tablespoons unsalted butter (melted)
– 8 oz cream cheese (softened)
– 1 cup powdered sugar
– 1 teaspoon vanilla extract
– 1 cup heavy whipping cream
– Additional crushed Oreos for topping (optional)
– Fresh mint leaves for garnish (optional)
Suggested Brands for Ingredients
When picking brands, I often choose these:
– Oreo cookies: Nabisco is the classic choice.
– Cream cheese: Philadelphia is well-known for its smooth texture.
– Heavy whipping cream: Land O’Lakes offers a rich flavor.
– Powdered sugar: Domino is reliable and blends well.
Ingredient Substitutes
If you need to swap ingredients, here are some good options:
– For Oreos: Use any chocolate sandwich cookie you like.
– Instead of cream cheese: Try mascarpone for a creamier taste.
– For heavy cream: Use coconut cream for a dairy-free version.
– If you don’t have powdered sugar: Blend regular sugar until fine.
These swaps help keep the recipe fun and flexible while still tasting great!
Step-by-Step Instructions
Preparation of the Oreo Crust
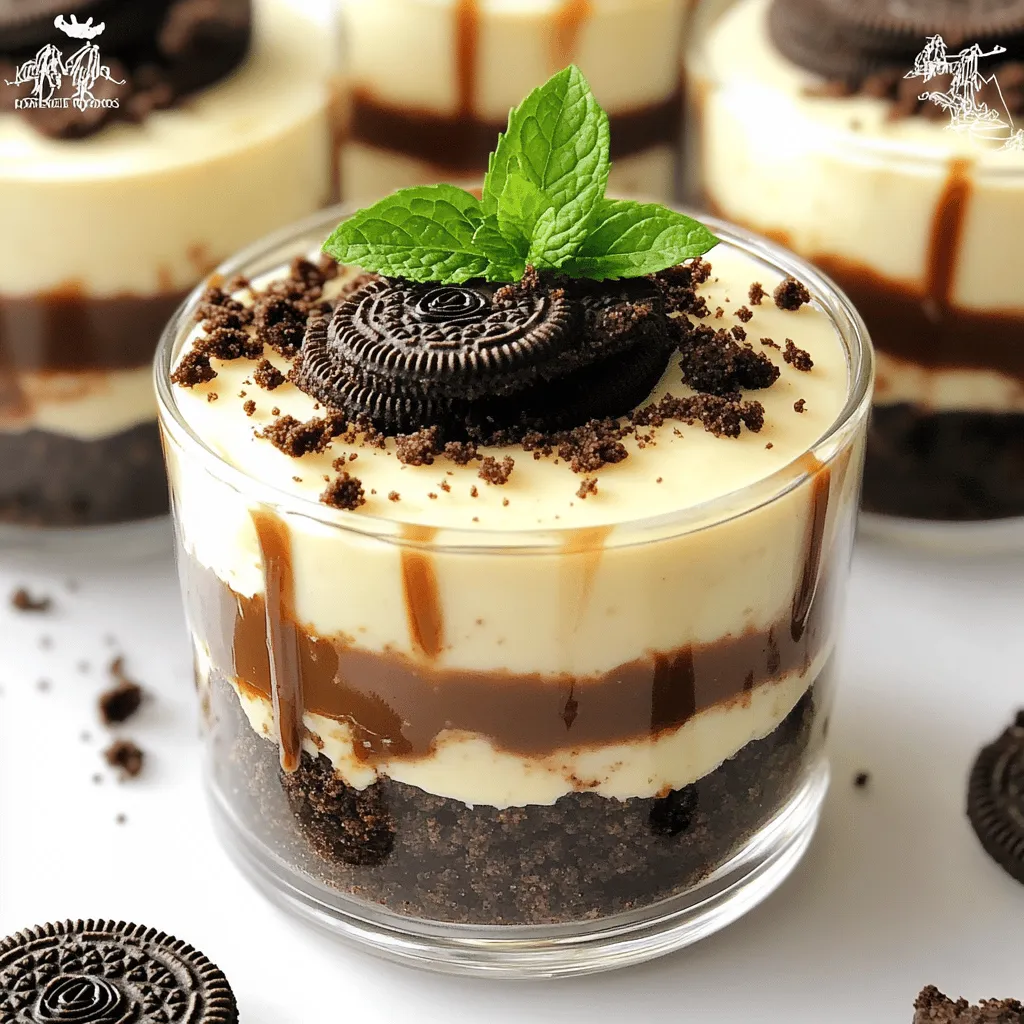
Start by taking 20 Oreo cookies and crush them into fine crumbs. You can use a food processor or place them in a zip-top bag and crush them with a rolling pin. Next, melt 4 tablespoons of unsalted butter in a microwave-safe bowl. Combine the crushed cookies and melted butter in a mixing bowl. Mix until it looks like wet sand. Divide this mixture into 6 dessert cups, pressing it down firmly to create a solid base.
Making the Cream Cheese Mixture
In a separate bowl, take 8 oz of softened cream cheese. Use an electric mixer to beat it for about 1-2 minutes until smooth. Gradually add 1 cup of powdered sugar and 1 teaspoon of vanilla extract. Keep mixing until everything is well blended and creamy. In another bowl, whip 1 cup of heavy cream until stiff peaks form. Carefully fold this whipped cream into the cream cheese mixture. This makes your cheesecake light and fluffy.
Combining and Assembling the Cups
Now, spoon or pipe the cream cheese mixture over the Oreo crust in each cup. Fill them to the top for a nice presentation. Place the cups in the refrigerator for at least 4 hours. This helps the cheesecake firm up. Before serving, sprinkle some crushed Oreos on top for added crunch. You can also add fresh mint leaves if you want a pop of color.
Tips & Tricks
How to Achieve the Perfect Whipped Cream
To get the best whipped cream, start with cold heavy cream. Cold cream whips better. Use a clean bowl and beaters. Make sure they are also cold for the best results. Whip on high speed until you see stiff peaks. This means the cream holds its shape well. Be careful not to over-whip. Otherwise, you might make butter instead!
Best Practices for Mixing Ingredients
When mixing the cream cheese, use an electric mixer. Blend it until it is smooth, about 1-2 minutes. Gradually add the powdered sugar and vanilla while mixing. This helps avoid lumps. When folding in the whipped cream, use a spatula. Gently lift and fold to keep the whipped cream airy. This makes your cheesecake light and fluffy.
Ways to Enhance Flavor and Texture
To boost flavor, consider adding a pinch of salt to the cream cheese mixture. This helps balance the sweetness. You can also mix in a bit of lemon juice for a tangy twist. For texture, sprinkle some crushed Oreos between layers. This adds crunch and makes every bite exciting. If you love chocolate, drizzle some melted chocolate over the top before serving!

Variations
Flavors to Experiment With
You can mix things up with different flavors. Try adding peanut butter to the cream cheese mix. You can also fold in melted chocolate for a richer taste. For a fruit twist, add pureed strawberries or raspberries. Each option gives a unique spin to your cheesecake cups.
Alternative Toppings and Garnishes
Play with toppings to make your cups special. Instead of crushed Oreos, use crushed graham crackers or nuts. Fresh fruit like strawberries or blueberries adds color and flavor. You can also drizzle chocolate or caramel sauce for a sweet touch.
Modifications for Dietary Restrictions
If you need to make this dessert for special diets, you can do that easily. Use gluten-free Oreos for a gluten-free treat. For a vegan version, replace cream cheese with a dairy-free alternative and use coconut whipped cream. These swaps keep the dessert tasty for everyone.
Storage Info
Best Storage Practices
To keep your No-Bake Oreo Cheesecake Cups fresh, store them in the fridge. Use an airtight container. This helps keep the flavor and texture perfect. If you have extra cups, cover them with plastic wrap. This prevents drying out.
How Long Do They Last in the Refrigerator?
These tasty treats can last about 4 to 5 days in the fridge. After this time, the crust can get soggy. The cream may start to lose its creamy texture. So, enjoy them within this time for the best taste!
Freezing Recommendations
You can freeze these cheesecake cups if you want to save some for later. Place them in a freezer-safe container. They can last up to 2 months in the freezer. When you’re ready to eat, thaw them in the fridge overnight. This keeps them smooth and tasty.
FAQs
Can I use different cookies for the crust?
Yes, you can use other cookies for the crust. Some good choices are chocolate sandwich cookies or graham crackers. Just crush them like you do with Oreos. The flavor will change, but it can still be tasty. I like to mix different cookies for a fun twist.
How can I make this recipe gluten-free?
To make this recipe gluten-free, choose gluten-free cookies. Many brands offer gluten-free sandwich cookies. You can also use gluten-free graham crackers. Just ensure all ingredients are gluten-free, especially the powdered sugar and cream cheese. Always check labels to be safe.
What is the best way to serve No-Bake Oreo Cheesecake Cups?
Serve these cups chilled for the best taste. I recommend adding a drizzle of chocolate sauce on top. You can also sprinkle more crushed Oreos for a nice look. Fresh mint leaves add color and flavor. Use a small spoon for easy eating.
You now know all about making No-Bake Oreo Cheesecake Cups. We covered the ingredients needed and even suggested some brands. I shared tips for the perfect whipped cream and the right mixing techniques. You can also explore many flavor variations and find ways to store your dessert for later. With the FAQs answered, you have everything to start baking. Enjoy making this treat and impress your friends and family. You’ll love how easy and delicious it is!