No-Bake Pumpkin Cheesecake Cups Easy Dessert Recipe

WANT TO SAVE THIS RECIPE?

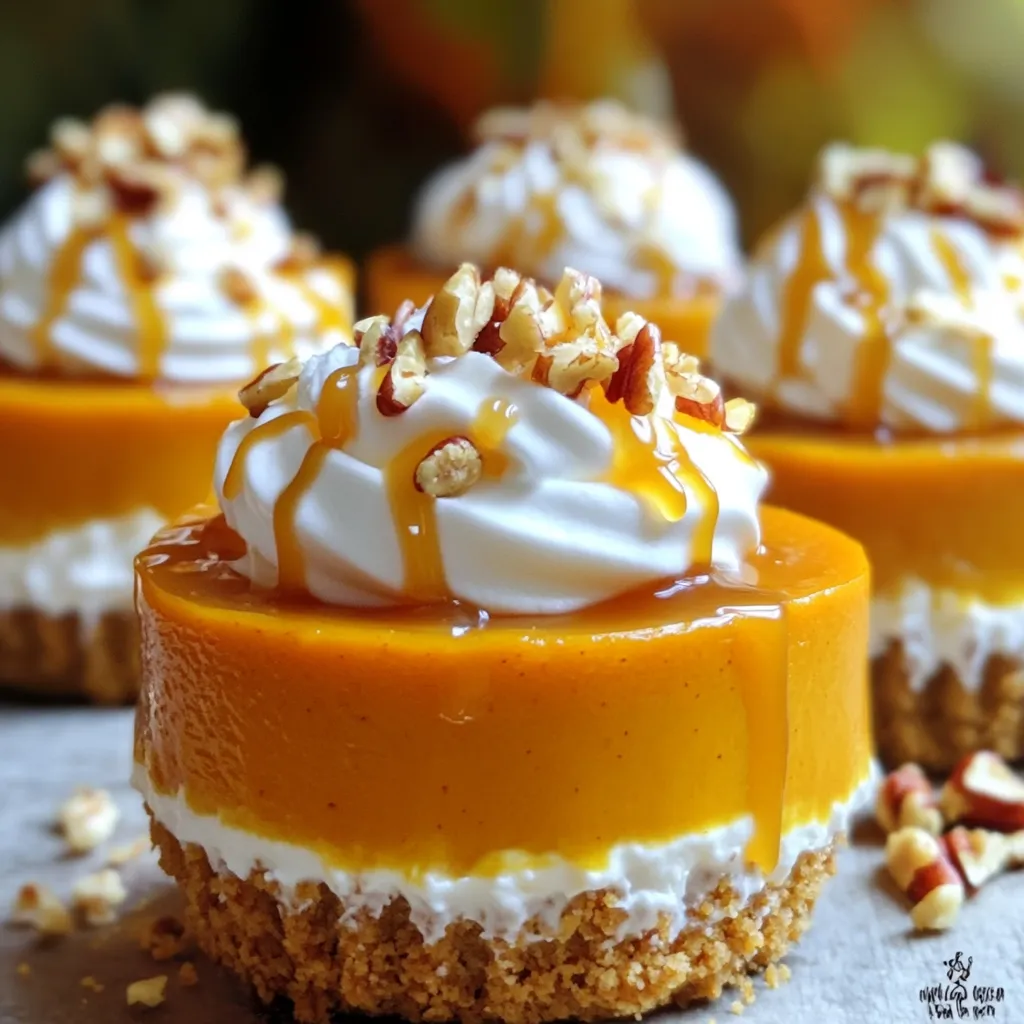
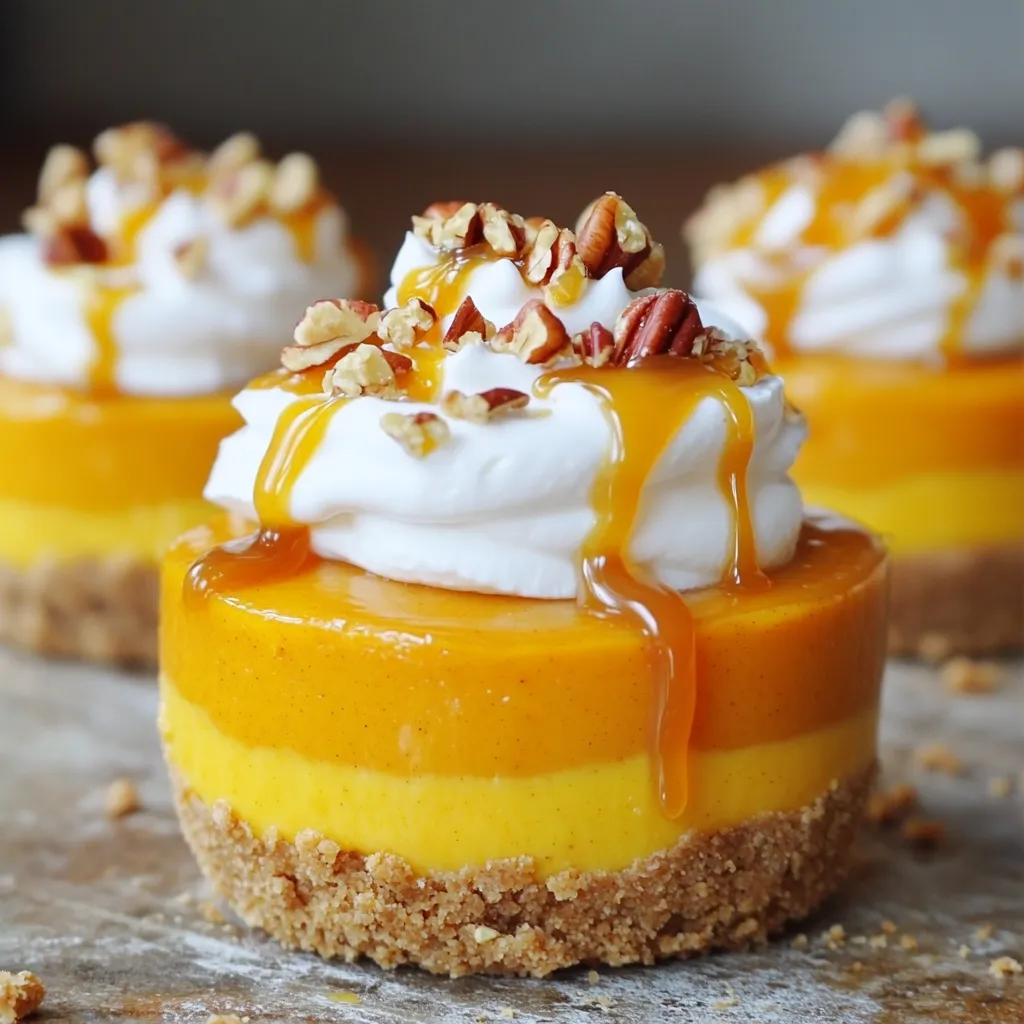
Craving a sweet treat that’s easy and delicious? Look no further! These No-Bake Pumpkin Cheesecake Cups are perfect for any occasion. With a creamy pumpkin filling and a crispy crust, they will delight your taste buds without a lot of fuss. Whether you’re hosting friends or treating yourself, this easy recipe shows you how to create a perfect dessert in just a few simple steps. Let’s get started on this fun and tasty journey!

Ingredients

To make No-Bake Pumpkin Cheesecake Cups, you need simple ingredients that pack a punch. Here’s what you will need:

  • 1 cup graham cracker crumbs
  • 4 tablespoons unsalted butter, melted
  • 2 cups cream cheese, softened
  • 1 cup pumpkin puree
  • 1 cup powdered sugar
  • 1 teaspoon vanilla extract
  • 1 teaspoon pumpkin pie spice
  • 1 cup whipped cream
  • Optional toppings: caramel sauce, crushed pecans

Each ingredient plays an important role. The graham cracker crumbs create that sweet, crunchy base. The melted butter binds the crumbs together for a nice crust. Cream cheese gives the dessert its creamy texture. Pumpkin puree adds that rich flavor we all love. Powdered sugar sweetens the mix, while vanilla and pumpkin pie spice enhance the taste. Whipped cream makes the filling light and fluffy.

You can switch things up with toppings like caramel sauce or crushed pecans. These add extra flavor and texture. Always choose fresh ingredients to get the best results.

Step-by-Step Instructions

Preparing the Crust

To make the crust, start by mixing the graham cracker crumbs with melted butter in a bowl. Stir until the crumbs are well coated. The mixture should feel like wet sand. Next, take 2 tablespoons of this mixture and place it into each serving cup. Press down firmly to form a crust. This step is key for a good base. After you finish, put the cups in the fridge while you work on the filling.

Making the Pumpkin Cheesecake Filling

Now, let’s create the filling. In a large mixing bowl, beat the softened cream cheese with an electric mixer. Mix until it is smooth and creamy with no lumps. Then, add the pumpkin puree, powdered sugar, vanilla extract, and pumpkin pie spice. Blend everything together until it is fully combined and smooth. This mixture should have a nice, rich color and flavor.

Assembling the Cheesecake Cups

The next step is to fold in the whipped cream. Do this gently to keep it light and airy. Use a spatula to fold the whipped cream into the pumpkin mixture. Once combined, spoon the filling into each cup over the crust. Smooth the top with the spatula for a nice finish. Cover the cups with plastic wrap and chill them in the fridge for at least four hours. This helps the cheesecake set and taste great. Enjoy adding caramel sauce and crushed pecans on top before serving!

Tips & Tricks

Achieving the Perfect Texture

To make the best no-bake pumpkin cheesecake cups, start with softened cream cheese. Softening cream cheese helps it mix smoothly. You can leave it out for 30 minutes to an hour before mixing. This step is key for a creamy filling.

When you fold in the whipped cream, do it gently. Use a spatula to lift and turn the mixture. This keeps the filling light and airy. If you mix too hard, it will lose its fluffy texture.

Serving Suggestions

To make your cheesecake cups even better, consider some tasty garnishes. Drizzle caramel sauce on top for a sweet touch. You can also add crushed pecans for crunch and flavor.

When you serve them, try to layer the cups. This makes them look pretty. Place them on a nice plate and add a small dollop of whipped cream on top. Your guests will love the presentation.

Make Ahead Tips

Chilling time is important. After you put the cups together, chill them in the fridge for at least four hours. This helps them set well.

If you want to make them ahead of time, you can store them in the refrigerator for up to three days. Just cover them with plastic wrap to keep them fresh. Enjoy your easy dessert whenever you need a sweet treat!

Variations

Flavor Variations

You can make this dessert even more exciting!

  • Add chocolate or vanilla extract for a twist.
  • Try mixing in spices like ginger or nutmeg.

These changes can create unique tastes. Each variation adds a new layer of flavor.

Dietary Substitutes

Need a gluten-free option?

  • Use gluten-free graham cracker crumbs for the crust.

For vegans, you can swap out ingredients.

  • Use dairy-free cream cheese and whipped topping.

These swaps keep the dessert tasty for everyone.

Serving for Different Occasions

These pumpkin cheesecake cups fit many events.

  • Serve them at Thanksgiving for a festive treat.
  • They are also great for kids’ parties.

You can even decorate them with fun sprinkles!

These cups are sure to impress your guests.

Storage Info

Storing Leftovers

To keep your no-bake pumpkin cheesecake cups fresh, store them in the fridge. Use airtight containers to prevent drying out or picking up odors. You can also cover them tightly with plastic wrap. These cups stay good for about 3 to 5 days. Just remember, the longer they sit, the softer the crust becomes.

Freezing Options

Yes, you can freeze the cheesecake cups! Freezing is a great way to save leftovers. To freeze, place the cups in a single layer in a freezer-safe container. Leave some space between each cup to avoid sticking. They can stay in the freezer for up to 2 months.

When you’re ready to enjoy them, move the cups to the fridge. Let them thaw overnight. This keeps the texture nice and creamy. Avoid thawing them at room temperature as it can make them too soft.

FAQs

Can I use fresh pumpkin instead of canned?

Yes, you can use fresh pumpkin. First, cook the pumpkin until soft. Then, mash it well. Make sure to remove any extra water. Canned pumpkin is already cooked and smoother, which makes it easier to mix. Both options work great, so use what you prefer!

How long do these cheesecake cups need to set?

These cheesecake cups need at least 4 hours to set. This time allows the filling to firm up and flavors to blend. For best results, chill them overnight. This way, they taste even better when you serve them.

What can I use instead of whipped cream?

If you don’t have whipped cream, try using Greek yogurt or coconut whip. Both options add creaminess without losing flavor. You can also use cool whip for a similar taste. Choose what you like best!

Can I make these cheesecake cups in advance?

Absolutely! These cheesecake cups are perfect for making ahead. You can prepare them one or two days before you need them. Just store them in the fridge. This makes them a great choice for parties or gatherings.

How do I make a larger batch of this recipe?

To make a larger batch, simply double all the ingredients. Use a bigger mixing bowl for the filling. You can also use more serving cups. Just keep an eye on the chilling time, as it may change with larger amounts.

You now have a simple and tasty recipe for pumpkin cheesecake cups. We covered ingredients, step-by-step instructions, and tips for perfecting your dessert. Remember to try different flavors and garnishes to make it your own. These cups create a fun treat for any occasion. With easy storage tips, you can enjoy them later, too. Enjoy making these pumpkin cheesecake cups and sharing them with friends and family!

To make No-Bake Pumpkin Cheesecake Cups, you need simple ingredients that pack a punch. Here’s what you will need: - 1 cup graham cracker crumbs - 4 tablespoons unsalted butter, melted - 2 cups cream cheese, softened - 1 cup pumpkin puree - 1 cup powdered sugar - 1 teaspoon vanilla extract - 1 teaspoon pumpkin pie spice - 1 cup whipped cream - Optional toppings: caramel sauce, crushed pecans Each ingredient plays an important role. The graham cracker crumbs create that sweet, crunchy base. The melted butter binds the crumbs together for a nice crust. Cream cheese gives the dessert its creamy texture. Pumpkin puree adds that rich flavor we all love. Powdered sugar sweetens the mix, while vanilla and pumpkin pie spice enhance the taste. Whipped cream makes the filling light and fluffy. You can switch things up with toppings like caramel sauce or crushed pecans. These add extra flavor and texture. Always choose fresh ingredients to get the best results. To make the crust, start by mixing the graham cracker crumbs with melted butter in a bowl. Stir until the crumbs are well coated. The mixture should feel like wet sand. Next, take 2 tablespoons of this mixture and place it into each serving cup. Press down firmly to form a crust. This step is key for a good base. After you finish, put the cups in the fridge while you work on the filling. Now, let’s create the filling. In a large mixing bowl, beat the softened cream cheese with an electric mixer. Mix until it is smooth and creamy with no lumps. Then, add the pumpkin puree, powdered sugar, vanilla extract, and pumpkin pie spice. Blend everything together until it is fully combined and smooth. This mixture should have a nice, rich color and flavor. The next step is to fold in the whipped cream. Do this gently to keep it light and airy. Use a spatula to fold the whipped cream into the pumpkin mixture. Once combined, spoon the filling into each cup over the crust. Smooth the top with the spatula for a nice finish. Cover the cups with plastic wrap and chill them in the fridge for at least four hours. This helps the cheesecake set and taste great. Enjoy adding caramel sauce and crushed pecans on top before serving! To make the best no-bake pumpkin cheesecake cups, start with softened cream cheese. Softening cream cheese helps it mix smoothly. You can leave it out for 30 minutes to an hour before mixing. This step is key for a creamy filling. When you fold in the whipped cream, do it gently. Use a spatula to lift and turn the mixture. This keeps the filling light and airy. If you mix too hard, it will lose its fluffy texture. To make your cheesecake cups even better, consider some tasty garnishes. Drizzle caramel sauce on top for a sweet touch. You can also add crushed pecans for crunch and flavor. When you serve them, try to layer the cups. This makes them look pretty. Place them on a nice plate and add a small dollop of whipped cream on top. Your guests will love the presentation. Chilling time is important. After you put the cups together, chill them in the fridge for at least four hours. This helps them set well. If you want to make them ahead of time, you can store them in the refrigerator for up to three days. Just cover them with plastic wrap to keep them fresh. Enjoy your easy dessert whenever you need a sweet treat! {{image_2}} You can make this dessert even more exciting! - Add chocolate or vanilla extract for a twist. - Try mixing in spices like ginger or nutmeg. These changes can create unique tastes. Each variation adds a new layer of flavor. Need a gluten-free option? - Use gluten-free graham cracker crumbs for the crust. For vegans, you can swap out ingredients. - Use dairy-free cream cheese and whipped topping. These swaps keep the dessert tasty for everyone. These pumpkin cheesecake cups fit many events. - Serve them at Thanksgiving for a festive treat. - They are also great for kids’ parties. You can even decorate them with fun sprinkles! These cups are sure to impress your guests. To keep your no-bake pumpkin cheesecake cups fresh, store them in the fridge. Use airtight containers to prevent drying out or picking up odors. You can also cover them tightly with plastic wrap. These cups stay good for about 3 to 5 days. Just remember, the longer they sit, the softer the crust becomes. Yes, you can freeze the cheesecake cups! Freezing is a great way to save leftovers. To freeze, place the cups in a single layer in a freezer-safe container. Leave some space between each cup to avoid sticking. They can stay in the freezer for up to 2 months. When you're ready to enjoy them, move the cups to the fridge. Let them thaw overnight. This keeps the texture nice and creamy. Avoid thawing them at room temperature as it can make them too soft. Yes, you can use fresh pumpkin. First, cook the pumpkin until soft. Then, mash it well. Make sure to remove any extra water. Canned pumpkin is already cooked and smoother, which makes it easier to mix. Both options work great, so use what you prefer! These cheesecake cups need at least 4 hours to set. This time allows the filling to firm up and flavors to blend. For best results, chill them overnight. This way, they taste even better when you serve them. If you don’t have whipped cream, try using Greek yogurt or coconut whip. Both options add creaminess without losing flavor. You can also use cool whip for a similar taste. Choose what you like best! Absolutely! These cheesecake cups are perfect for making ahead. You can prepare them one or two days before you need them. Just store them in the fridge. This makes them a great choice for parties or gatherings. To make a larger batch, simply double all the ingredients. Use a bigger mixing bowl for the filling. You can also use more serving cups. Just keep an eye on the chilling time, as it may change with larger amounts. You now have a simple and tasty recipe for pumpkin cheesecake cups. We covered ingredients, step-by-step instructions, and tips for perfecting your dessert. Remember to try different flavors and garnishes to make it your own. These cups create a fun treat for any occasion. With easy storage tips, you can enjoy them later, too. Enjoy making these pumpkin cheesecake cups and sharing them with friends and family!

No-Bake Pumpkin Cheesecake Cups

Indulge in the deliciousness of No-Bake Pumpkin Cheesecake Cups, the perfect fall dessert! These easy-to-make treats combine a buttery graham cracker crust with a creamy pumpkin filling, topped with fluffy whipped cream and optional caramel drizzle. Ideal for gatherings or a cozy night in, this recipe takes just 20 minutes of prep. Click through to explore the full recipe and impress your friends and family with this seasonal delight!

Ingredients
  

1 cup graham cracker crumbs

4 tablespoons unsalted butter, melted

2 cups cream cheese, softened

1 cup pumpkin puree

1 cup powdered sugar

1 teaspoon vanilla extract

1 teaspoon pumpkin pie spice

1 cup whipped cream (store-bought or homemade)

Optional: caramel sauce for drizzling, crushed pecans for topping

Instructions
 

In a medium bowl, combine the graham cracker crumbs and melted butter. Mix until the crumbs are evenly coated and have a sandy texture.

    Spoon 2 tablespoons of the crumb mixture into the bottom of each serving cup, pressing down gently to create a crust. Refrigerate the cups while you prepare the filling.

      In a large mixing bowl, beat the softened cream cheese until smooth and creamy using an electric mixer.

        Add the pumpkin puree, powdered sugar, vanilla extract, and pumpkin pie spice to the cream cheese. Continue to blend until fully incorporated and smooth.

          Gently fold in the whipped cream until well combined, ensuring not to deflate the mixture. The filling should be light and airy.

            Distribute the pumpkin cheesecake filling evenly into each cup, layer on top of the graham cracker crust.

              Smooth the top with a spatula for an even finish, then cover the cups with plastic wrap. Chill in the refrigerator for at least 4 hours, or until set.

                Before serving, drizzle with caramel sauce and sprinkle crushed pecans on top for added texture and flavor.

                  Prep Time, Total Time, Servings: 20 mins | 4 hours setting time | 6 servings

                    WANT TO SAVE THIS RECIPE?

                    Leave a Comment

                    Recipe Rating