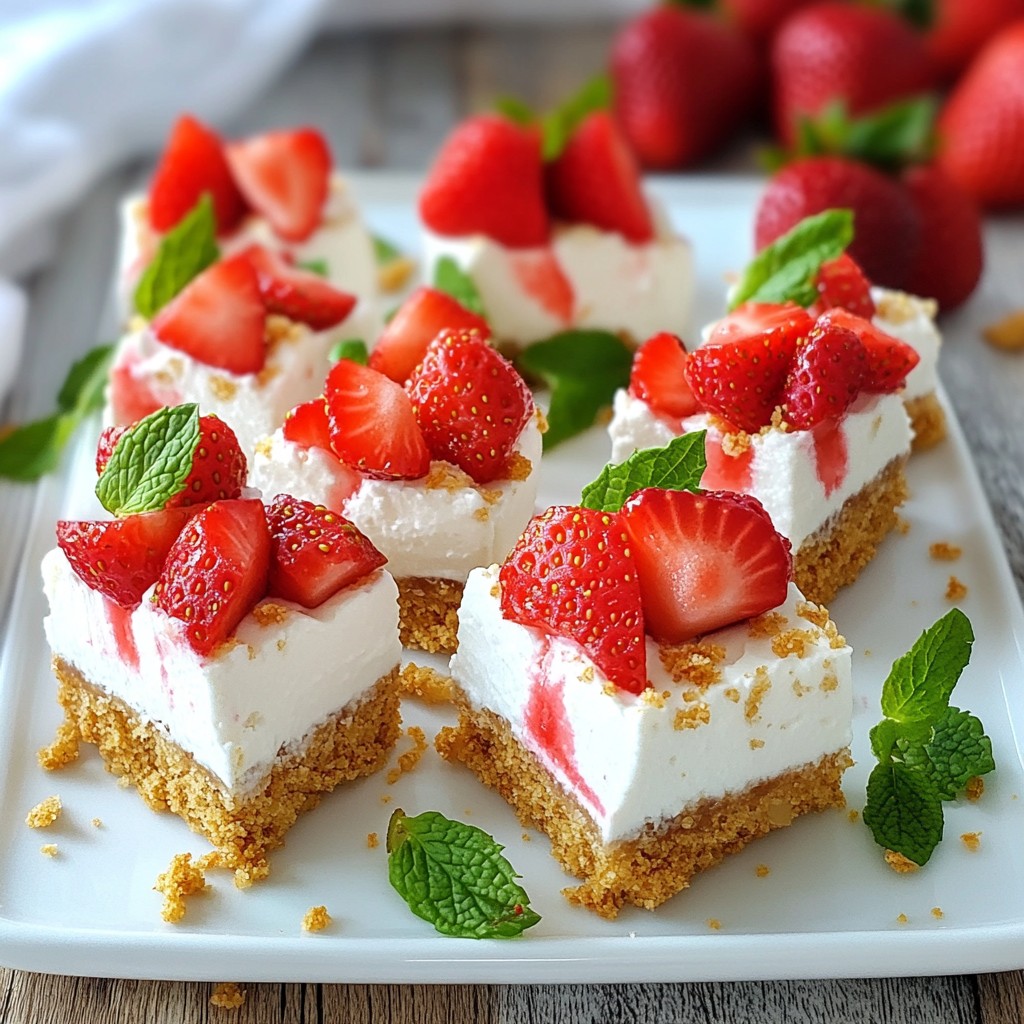
Craving a sweet treat without the oven? You’re in the right place! Today, I’ll show you how to make No Bake Strawberry Crunch Cheesecake Bites. These delightful bites combine creamy cheesecake, fresh strawberries, and a crunchy base that will wow your taste buds. Perfect for parties or a quick snack, they’re easy to make and even easier to eat. Let’s dive into this simple recipe that will impress your friends and family!
Why I Love This Recipe
- Decadent Flavor: These cheesecake bites combine the creamy richness of cheesecake with the freshness of strawberries, creating an irresistible treat.
- No-Bake Convenience: Perfect for warm days or when you're short on time, these bites require no baking, making them easy to whip up.
- Endless Customization: Feel free to swap out strawberries for your favorite fruit or add toppings like chocolate drizzle for a personal touch.
- Impressive Presentation: These bites look stunning on a platter, making them perfect for parties and gatherings.
Ingredients
Required Ingredients
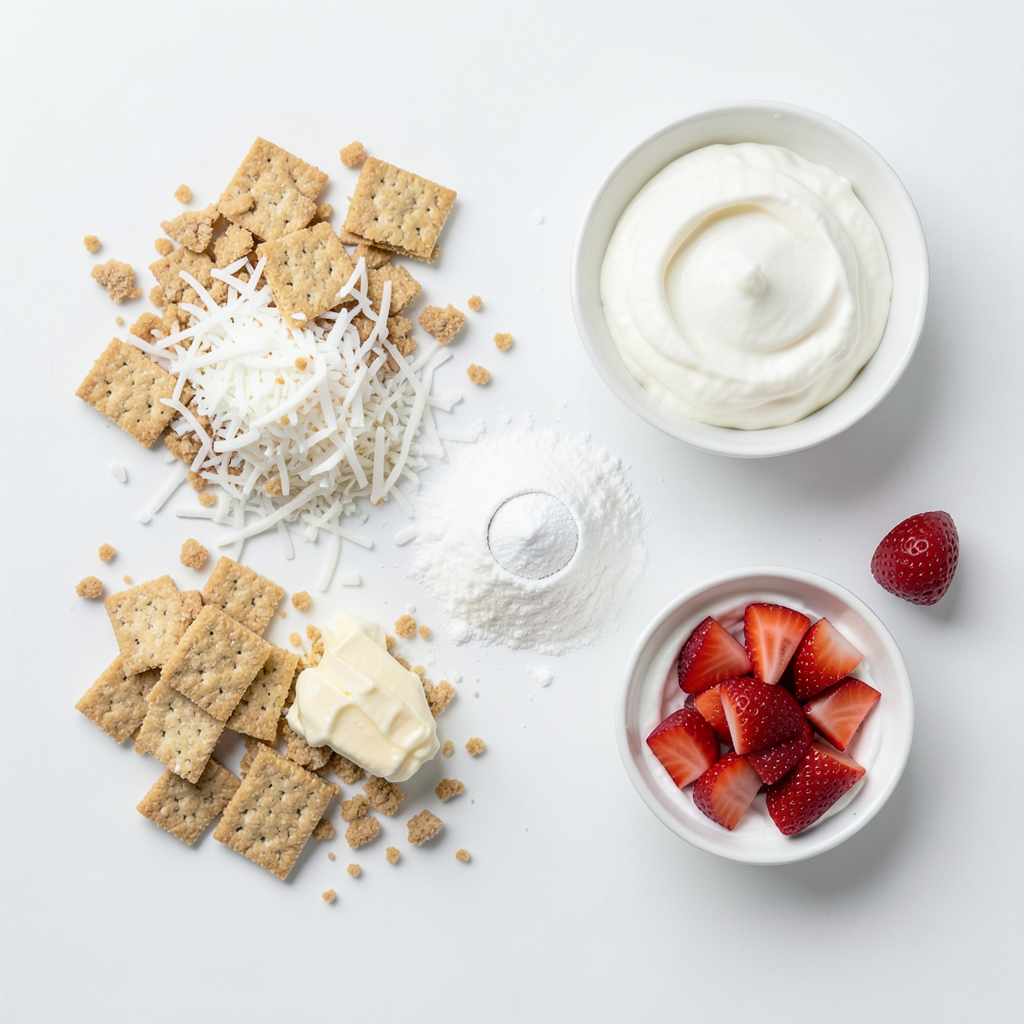
- 1 cup crushed graham crackers
- 1/2 cup unsweetened shredded coconut
- 1/4 cup unsalted butter, melted
- 8 oz cream cheese, softened
- 1/4 cup powdered sugar
- 1 teaspoon vanilla extract
- 1 cup whipped cream (store-bought or homemade)
- 1 cup fresh strawberries, diced
- Extra strawberries for garnish (optional)
- Mint leaves for garnish (optional)
I love using simple, fresh ingredients for this recipe. Each item plays a key role. First, the crushed graham crackers and shredded coconut create a crunchy base. The melted butter binds it together. This mixture gives our bites a delightful texture.
Next, the cream cheese adds a rich and creamy flavor. Make sure it is softened, so it blends well. The powdered sugar sweetens the filling just right. Vanilla extract brings a warm note that complements the strawberries.
Speaking of strawberries, they add freshness and color. I recommend using ripe, sweet strawberries for the best taste. The whipped cream makes the filling light and airy. You can use store-bought or whip your own for extra puffiness.
Finally, for a lovely touch, consider garnishing with extra strawberries or mint leaves. They not only look pretty but also add a fresh taste. Each ingredient works together to make these no-bake bites a real treat!
Step-by-Step Instructions
Prepare the Crunch Base
First, you need to make the crunch base. In a mixing bowl, combine 1 cup of crushed graham crackers and 1/2 cup of shredded coconut. Stir well until mixed. Then, add 1/4 cup of melted unsalted butter. Mix until it looks like wet sand. This texture helps it hold together later.
Form the Base Layer
Next, grab a mini muffin tin. Line each cup with cupcake liners. Take about a tablespoon of your crunch mixture. Press it firmly into the bottom of each liner. Make sure it is compact and even. Now, refrigerate the tin for 10 minutes. This step helps set the base layer.
Make the Cheesecake Filling
For the cheesecake filling, use another bowl. Beat 8 oz of softened cream cheese until it’s smooth. Gradually add 1/4 cup of powdered sugar and 1 teaspoon of vanilla extract. Mix until it is blended well.
Fold in Whipped Cream
Now, gently fold in 1 cup of whipped cream. Do this slowly so it stays fluffy. After that, add 1 cup of diced strawberries. Fold them in gently to keep the mixture light and airy.
Fill the Bites and Chill
Take your muffin tin out of the refrigerator. Spoon the cheesecake mixture into each crust, filling them to the top. Once filled, return the tin to the fridge for at least 2 hours. This step makes sure the bites are set and ready to enjoy.
Tips & Tricks
Achieving the Perfect Texture
To get the best texture for your cheesecake bites, start with the cream cheese. Make sure it is fully softened before mixing. If it’s too cold, it won’t blend well and can be lumpy. Next, when you fold in the whipped cream, do so gently. This keeps the mixture light and fluffy. If you mix too hard, you lose the airy texture that makes these bites so delightful.
Presentation Tips
Presentation matters when serving dessert. Use decorative platters to show off your cheesecake bites. You can arrange them in a fun pattern to catch the eye. For an extra pop, garnish with fresh mint leaves and extra strawberries on top. This adds color and makes your bites look even more tempting.
Common Mistakes to Avoid
When making these cheesecake bites, avoid overmixing the filling. This can make your cheesecake too dense and heavy. Mix just until everything is combined. Also, press the crust firmly enough into the muffin tin. If it is too loose, it won't hold up when you take the bites out. A solid base is key for a great cheesecake experience.
Pro Tips
- Chill the Base: Ensure the crunch base is fully chilled before adding the cheesecake filling to achieve a firmer texture.
- Use Fresh Strawberries: Opt for ripe, fresh strawberries to enhance the flavor and texture of your cheesecake bites.
- Whipped Cream Technique: Fold the whipped cream gently to maintain its volume, ensuring a light and airy cheesecake filling.
- Decorative Presentation: For an appealing display, use a mix of whole and sliced strawberries along with mint leaves for garnish.
Variations
Flavor Variations
You can change the flavor of these bites by swapping strawberries for other berries. Blueberries and raspberries work great. They add a new taste while keeping the fun crunch.
Want a zesty twist? Add lemon or lime zest to the cheesecake mixture. This will brighten the flavor and give it a refreshing kick. Your bites will sing with citrus notes.
Dietary Considerations
If you need gluten-free options, use alternative crusts. Almond flour or crushed gluten-free cookies can work well. They create a tasty base without the gluten.
For those who prefer dairy-free options, try using vegan cream cheese. Coconut cream can replace whipped cream. Both options keep the bites creamy and delightful, while catering to your needs.
Serving Suggestions
Make your cheesecake bites even more special with a drizzle of chocolate. A fruit sauce also pairs well, adding a burst of flavor.
For a complete dessert, serve the bites with fresh fruit. A scoop of vanilla ice cream on the side makes it even better. These touches elevate the whole experience for everyone at the table.
Storage Info
How to Store Leftover Bites
To keep these cheesecake bites fresh, store them in the fridge. Use an airtight container to seal them. This helps keep them safe from air and moisture. They will stay good for up to 3 days. I recommend enjoying them within this time for the best taste.
Freezing Instructions
Yes, you can freeze these cheesecake bites! To freeze them properly, place each bite in a single layer on a baking sheet. Once they are solid, transfer them to an airtight freezer bag. This helps keep them from sticking together. They can stay frozen for about a month.
When you're ready to enjoy them, take them out of the freezer. Let them thaw in the fridge for a few hours before serving. This way, they return to their creamy texture. Enjoy the sweet taste of summer anytime!
FAQs
What can I use instead of cream cheese?
You can use several options if you need a cream cheese substitute. Here are some great choices:
- Greek Yogurt: This gives a creamy texture. It has a tangy flavor too.
- Mascarpone Cheese: This is richer and sweeter. It works well in desserts.
- Silken Tofu: A good plant-based option. Blend it until smooth for a creamy feel.
- Cottage Cheese: Blend it for smoothness. It has a mild taste and is lower in fat.
Each of these options will change the taste slightly. Test them to find your favorite.
Can I make these cheesecake bites in advance?
Yes! You can prepare these cheesecake bites ahead of time. Here are some tips:
- Make the Crunch Base: You can prepare this a day before. Store it in the fridge.
- Prepare the Filling: Make the cheesecake filling a few hours in advance. Keep it in the fridge until ready to use.
- Final Assembly: Fill the bites and chill them for at least two hours before serving. You can do this the night before.
This way, you save time on the day you serve them.
How do I know when the cheesecake bites are set?
Knowing when your cheesecake bites are ready is easy. Look for these signs:
- Firmness: They should feel firm to the touch. They should not jiggle.
- Chilled Texture: The bites should feel cool and firm. This means they are ready to serve.
- Time Check: Ensure they chill for at least two hours. Longer is even better.
Once set, these bites will be ready to enjoy.
You now have a simple and tasty recipe for cheesecake bites. We covered the needed ingredients, step-by-step instructions, tips for the best results, fun variations, and storage details. Making these bites is easy and perfect for any occasion. You can mix flavors or choose healthy options. Remember to store any leftovers well. Now, it's time to enjoy your delicious creations!