Are you ready to dive into a creamy, dreamy dessert that requires no ice cream maker? I’m excited to share my No Churn Oreo Ice Cream recipe with you! This irresistible homemade treat blends silky whipped cream with sweetened condensed milk and crunchy Oreo cookies. Whether you’re planning a summer gathering or just craving a delightful snack, this easy recipe is your answer. Let’s get started and make something delicious today!
Ingredients
Required Ingredients for No Churn Oreo Ice Cream
To make this easy No Churn Oreo Ice Cream, gather these essential items:
– 2 cups heavy whipping cream
– 1 can (14 oz) sweetened condensed milk
– 1 teaspoon vanilla extract
– 12 Oreo cookies, crushed
– 1/2 cup chocolate chips (optional)
– Extra Oreo cookies for garnish
Ingredient Substitutions
You can switch some ingredients if needed:
– For heavy cream, use coconut cream or whipped coconut milk.
– For dairy-free condensed milk, look for almond or soy versions.
– If you want gluten-free options, use gluten-free Oreo cookies.
These substitutions allow you to enjoy the ice cream while catering to different diets. Feel free to experiment and find flavors you love!
Step-by-Step Instructions
Preparation Process
1. Start by whipping the cream in a large bowl. Use an electric mixer for best results. Whip until you see stiff peaks. This usually takes about 3 to 5 minutes. Stiff peaks mean the cream holds its shape well. This step is key for a light and fluffy ice cream.
2. In another bowl, mix the sweetened condensed milk and vanilla extract. Stir until they blend well. This mixture will add sweetness and flavor to your ice cream.
Combining Ingredients
1. Now, it’s time to fold in the whipped cream. Take a small amount of whipped cream and add it to the condensed milk mix. This lightens the mixture. Then, slowly add the rest of the whipped cream. Be gentle to keep it fluffy.
2. Next, add in the crushed Oreos and chocolate chips if you want. Fold them in carefully until they are evenly mixed. The Oreos add crunch and that classic cookie taste.
Freezing the Mix
1. Pour the mixture into a loaf pan or any freezer-safe container. Spread it out evenly and smooth the top. This helps the ice cream freeze evenly.
2. For a nice touch, crush a few extra Oreos and sprinkle them on top. This adds a fun garnish. Cover the container with plastic wrap or a lid. Freeze it for at least 6 hours or until it is fully set.Enjoy making your No Churn Oreo Ice Cream!
Tips & Tricks
Achieving the Perfect Consistency
To make your No Churn Oreo Ice Cream just right, stiff peaks are key. Stiff peaks mean that the cream holds its shape when you lift the beaters. This step adds air and makes the ice cream light. Whip the cream until you see those peaks form. This takes about 3-5 minutes.
When folding in the whipped cream, do it gently. Start with a small scoop of whipped cream to lighten the mixture. Then, carefully add the rest. Use a spatula and turn the bowl as you fold. This keeps the air in and makes your ice cream fluffy.
Enhancing Flavor and Texture
You can boost flavors by adding a bit of coffee or mint extract. A dash of salt can make the sweet taste pop. You can also try mixing in different candies or nuts for extra crunch. If you want it sweeter, add a bit more sweetened condensed milk. Just taste as you go!
Serving Recommendations
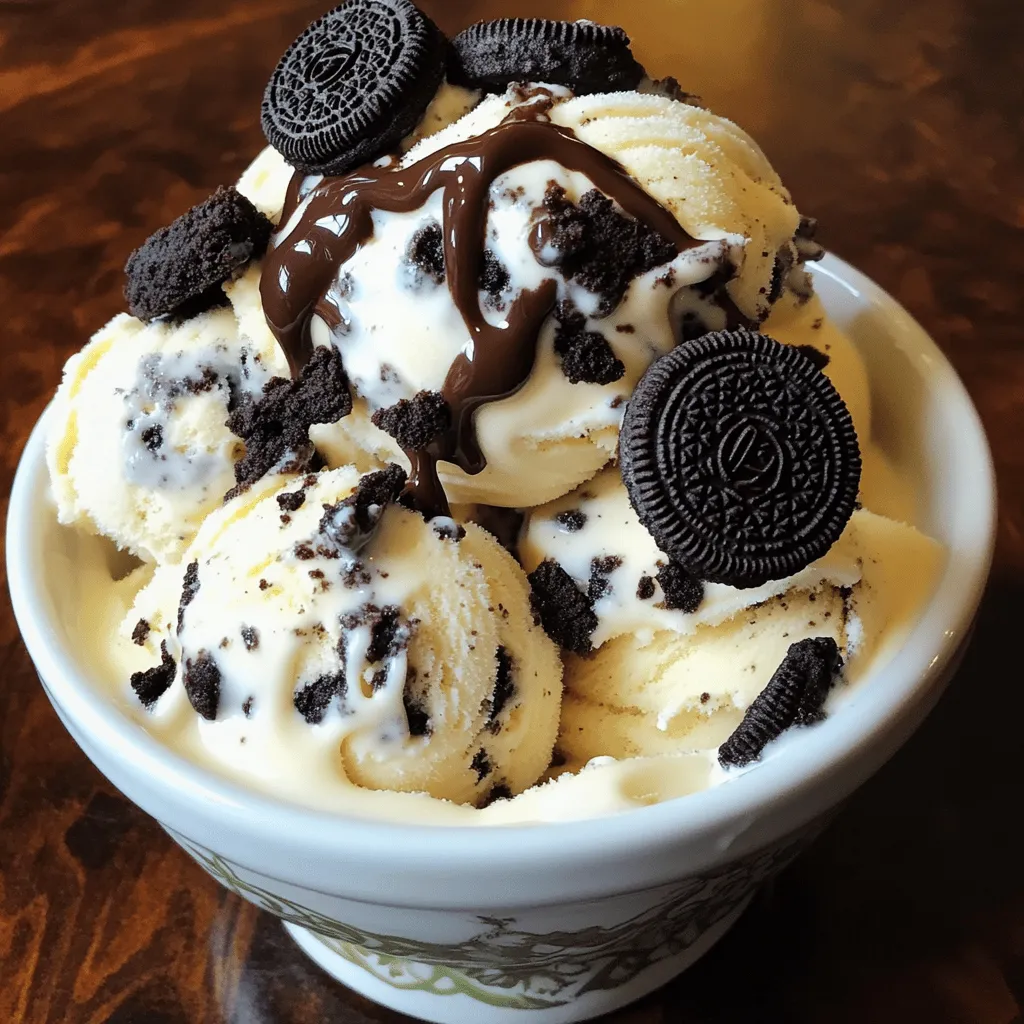
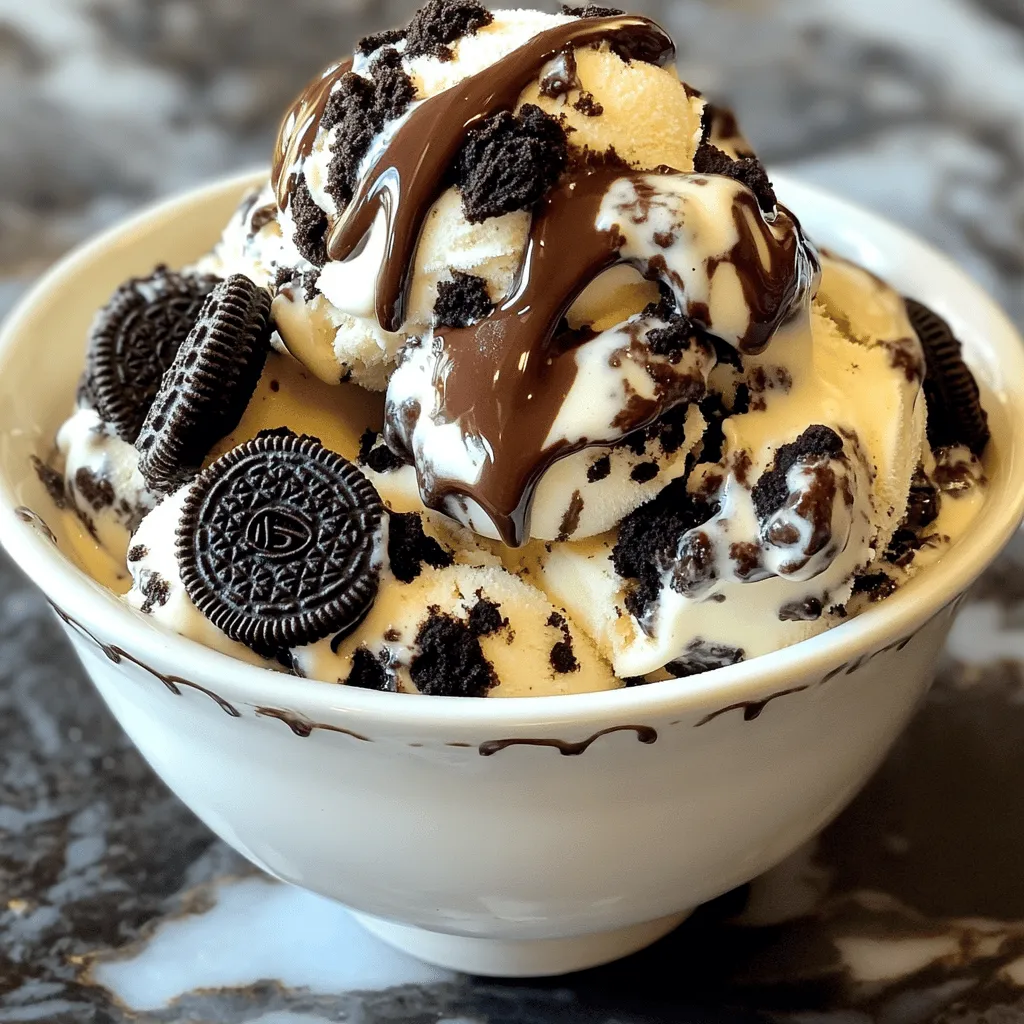
When serving, use nice bowls to show off your ice cream. Top it with more crushed Oreos and drizzle chocolate sauce on top. This makes it look fancy and tastes great.
You can also pair it with warm brownies or a slice of pie. The hot and cold mix adds a fun twist to your dessert. With these tips, your No Churn Oreo Ice Cream will impress everyone. Enjoy your delicious treat!
Variations
Oreo Ice Cream with a Twist
You can make your Oreo ice cream even more fun! Try adding fruit or other candies. Fresh strawberries or bananas work well. They add a nice touch of sweetness and color. You can also mix in candy bars like Reese’s or M&Ms for extra crunch and flavor.
Swirls of fudge or caramel can elevate the taste too. Just drizzle them into the mix before you freeze it. This makes each scoop a sweet surprise!
Different Diet-Friendly Versions
Want a vegan version? Use coconut cream instead of heavy cream. You can also swap the sweetened condensed milk for a dairy-free option. Almond milk or oat milk works great!
If you are on a low-carb or keto diet, try using sugar-free Oreos. Also, use a sugar substitute for the sweetened condensed milk. This way, you can enjoy your treat without the carbs!
Creative Serving Ideas
Get creative with how you serve your ice cream. You can make a delicious milkshake by blending the ice cream with milk. This makes a thick and creamy drink that is perfect for hot days.
Ice cream sandwiches are another fun idea! Use two cookies to hold a scoop of the ice cream. You can use any cookie, but Oreos are the best choice for this.
Try these variations for a new take on No Churn Oreo Ice Cream!
Storage Info
Best Practices for Freezing
When it comes to freezing No Churn Oreo Ice Cream, the container you use matters a lot. I recommend a loaf pan or any freezer-safe container. These types of containers help the ice cream freeze evenly. Make sure to cover the container tightly with plastic wrap or a lid. This keeps air out and helps prevent ice crystals from forming.
To keep the ice cream fresh longer, try to avoid opening the freezer door too often. Each time you open it, warm air enters. This can cause the ice cream to soften and refreeze, which affects texture.
Refreezing and Shelf Life
If you thaw your No Churn Oreo Ice Cream, you can refreeze it. Just make sure to do it as soon as possible. The texture may change slightly, but it will still taste great. Aim to eat it within a couple of weeks for the best flavor.
In the freezer, this delicious treat lasts about two to three months. Make sure to keep it in a well-sealed container. This way, it stays fresh and tasty for longer.
FAQs
Can I use a different type of cookie?
Yes, you can switch cookies! Try using chocolate chip cookies for a twist. You can also use peanut butter cookies. Just pick a cookie you like. The key is to have a crunchy texture. It adds a nice bite to the ice cream.
How long does it take to freeze?
Freezing takes about six hours. I recommend letting it freeze overnight for the best texture. The longer it freezes, the firmer it will be. Don’t rush this step. You want that creamy, smooth ice cream!
Can I make this without an electric mixer?
Sure! Use a whisk instead. It takes more effort but works well. Just whip the cream until it forms stiff peaks. You can also use a hand mixer if you have one. Both methods will give you great results!
You now know how to make No Churn Oreo Ice Cream. We covered the ingredients, prep steps, and freezing tips. You learned about fun variations and storage advice. With simple swaps, this treat can fit different diets. Whether you’re serving it as a sundae or a shake, it’s sure to impress. Enjoy making this creamy delight that brings joy to every scoop!