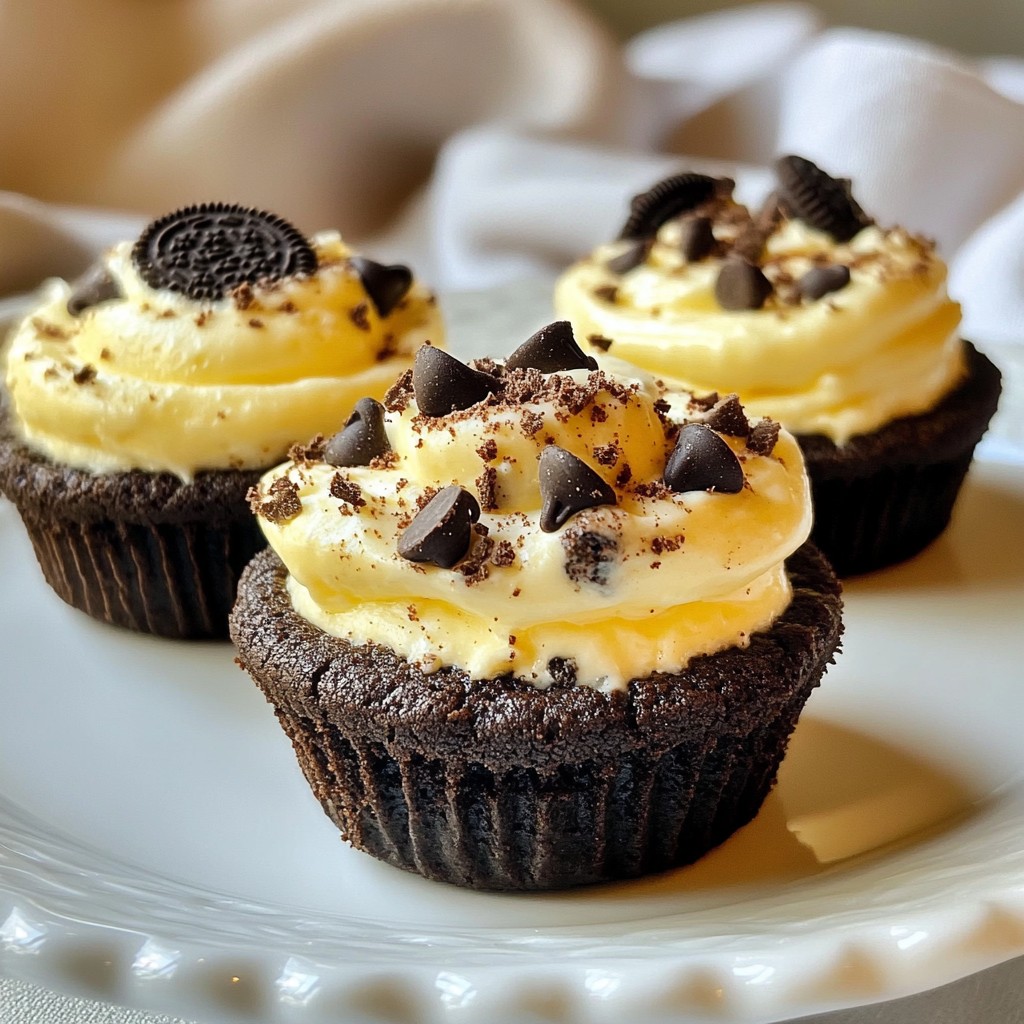
If you're craving a sweet treat that's both easy and delicious, you've hit the jackpot! These Oreo Cheesecake Cookie Cups combine the rich flavor of cheesecake with a crunchy cookie crust. Whether you’re a baking pro or a newbie, these cups are simple to make and fun to share. Ready to impress your friends and family? Let’s dive into this tasty dessert that’s sure to please everyone!
Why I Love This Recipe
- Deliciously Decadent: These cookie cups are a perfect blend of creamy cheesecake and crunchy Oreo goodness, making every bite a delightful treat.
- Easy to Make: With simple ingredients and straightforward steps, even novice bakers can whip these up with ease.
- Perfect for Parties: These bite-sized desserts are not only pleasing to the eye but also great for sharing at gatherings and parties.
- Chill Factor: The chilling time allows the flavors to meld beautifully, resulting in a refreshing dessert that’s best served cold.
Ingredients
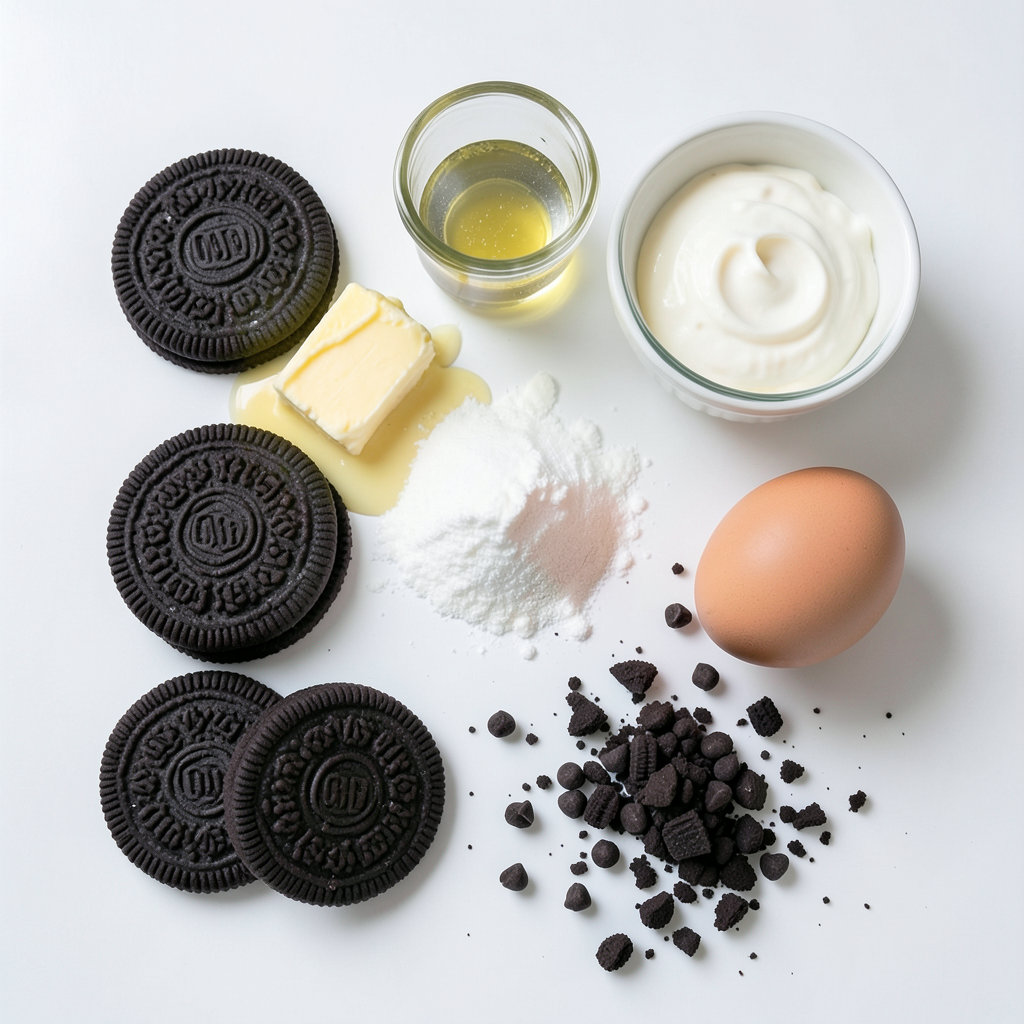
To make Oreo Cheesecake Cookie Cups, you need a few simple ingredients. Here’s the list:
- 1 package of Oreo cookies (about 36 cookies)
- 1/2 cup unsalted butter, melted
- 8 oz cream cheese, softened
- 1/2 cup granulated sugar
- 1 teaspoon vanilla extract
- 1/2 cup sour cream
- 1 large egg
- 1 cup mini chocolate chips
- Extra crushed Oreos for garnish
These ingredients work together to create a rich and creamy treat. The Oreo cookies form a tasty crust, while the cream cheese filling adds that cheesecake goodness. The mini chocolate chips give a sweet surprise in every bite. It’s a fun mix that everyone will love!
Step-by-Step Instructions
Preheat and Prepare Muffin Tin
First, set your oven to 350°F (175°C). While it heats up, line a muffin tin with cupcake liners or spray it with non-stick spray. This step helps the cookie cups come out easily later.
Create the Oreo Cookie Crust
Next, you'll need to crush the Oreos. Use a food processor to pulse the cookies until they are fine crumbs. This includes the creamy filling too. In a bowl, mix the crushed Oreos with the melted butter until it’s all combined. Spoon about 1 tablespoon of this mixture into each muffin cup. Press it down firmly to form a nice crust.
Make the Cheesecake Filling
Now, let’s prepare the cheesecake filling. In a large mixing bowl, beat the softened cream cheese with a hand mixer until it’s smooth. Add the granulated sugar, vanilla extract, and sour cream to the bowl. Mix until everything is well combined. Next, crack the egg in and beat it in gently. Don’t overmix! Finally, fold in the mini chocolate chips with a spatula.
Assemble and Bake the Cookie Cups
It’s time to fill the cups! Pour the cheesecake filling over the cookie crusts in the muffin tin. Fill each cup about 3/4 full. Place the tin in your preheated oven and bake for 15 to 18 minutes. You want the edges to set, but the centers should still jiggle a bit.
Cooling and Chilling Time
When the baking time is up, remove the cookie cups from the oven. Let them cool in the tin for about 10 minutes. After that, move them to a wire rack to cool completely. Once cooled, refrigerate the cookie cups for at least 2 hours before serving.
Final Presentation
Before serving, add a special touch! Top each cookie cup with extra crushed Oreos for garnish. You can also add a dollop of whipped cream for extra flavor. Serve these chilled on a nice plate for a delightful treat!
Tips & Tricks
How to Achieve the Perfect Cookie Crust
To make the best cookie crust, start with fresh Oreo cookies. Use a food processor to crush them well. You want them to be fine crumbs. This helps the crust stick together. Mix the crumbs with melted butter until it's all wet. Press the mixture firmly into each muffin cup. Make sure it's packed down tight. This gives you a strong base for your cheesecake filling. If you want extra flavor, you can mix in a bit of cocoa powder.
Mixing Techniques for Smooth Cheesecake Filling
For a creamy cheesecake filling, use softened cream cheese. It should be at room temperature. This makes it easy to beat. Mix it in a large bowl with a handheld mixer. Beat until it’s very smooth. Add sugar, vanilla, and sour cream next. Mix these until fully combined. Be careful when adding the egg. Beat it in just until blended. Overmixing can make your filling too airy. Finally, gently fold in mini chocolate chips with a spatula for an added treat.
Best Cooling Practices
Cooling your cookie cups is key. After baking, let them cool in the muffin tin for about 10 minutes. This helps them firm up. Then, move them to a wire rack to cool completely. For the best flavor and texture, chill them in the fridge for at least 2 hours. This allows the filling to set nicely. The cookie cups taste great when served cold, topped with extra crushed Oreos.
Pro Tips
- Chill for Best Texture: Make sure to refrigerate the cheesecake cookie cups for at least 2 hours. This helps the filling set properly and enhances the flavors.
- Don't Overmix: When adding the egg to the cheesecake filling, mix just until incorporated. Overmixing can lead to cracks in your cheesecake.
- Use Room Temperature Ingredients: Ensure your cream cheese and egg are at room temperature before mixing. This will create a smoother filling without lumps.
- Garnish Creatively: Besides crushed Oreos, consider adding a drizzle of chocolate sauce or a dollop of whipped cream for an extra touch of elegance.
Variations
Flavor Variations
You can play with flavors in your Oreo cheesecake cookie cups. Here are some ideas:
- Mint Oreo: Use mint-flavored Oreos for a fresh twist.
- Pumpkin Spice: Add pumpkin puree and spices for a fall treat.
- Peanut Butter: Mix in peanut butter into the cheesecake for added creaminess.
- Chocolate Hazelnut: Swap some cream cheese for Nutella to change the flavor.
These fun twists can make your treats unique and exciting!
Healthy Alternatives
Want a lighter version of these cookie cups? Here are some healthy swaps:
- Reduced Sugar: Use a sugar substitute like stevia or monk fruit to cut calories.
- Gluten-Free Options: Use gluten-free Oreos and almond flour for crusts.
- Low-Fat Cream Cheese: Choose low-fat cream cheese to lower fat content.
These options let you enjoy the deliciousness without the guilt!
Substitutes for Key Ingredients
Running low on ingredients? Here are some easy substitutes:
- Cream Cheese: Use Greek yogurt for a tangy flavor.
- Granulated Sugar: Try coconut sugar for a more natural sweetener.
- Butter: Replace with coconut oil for a dairy-free choice.
- Sour Cream: Use plain yogurt to keep that creamy texture.
These swaps can keep your recipe flexible while still tasting great!
Storage Info
Best Way to Store Oreo Cheesecake Cookie Cups
To keep your Oreo cheesecake cookie cups fresh, place them in an airtight container. Use layers of parchment paper to separate the cups. This helps prevent them from sticking together. Store the container in the fridge to maintain their creamy texture.
How Long Do They Last?
When stored properly, these treats can last up to five days in the fridge. After that, their quality may decline. If you notice any change in smell or texture, it’s best to toss them. Always check before enjoying!
Freezing Instructions
You can freeze these cookie cups too! Place them in a single layer on a baking sheet. Freeze for about an hour until solid. Then, transfer them to an airtight container or freezer bag. They can last up to three months in the freezer. To enjoy, just thaw them in the fridge overnight before serving.
FAQs
Can I use different types of cookies for the crust?
Yes, you can. You might try other sandwich cookies or vanilla wafers. Both options add great flavors. Just crush them well, just like the Oreos. Make sure they mix nicely with the melted butter.
What should I do if the cheesecake center is too jiggly?
If the center jiggles too much, it needs more baking. It should set around the edges but stay soft in the middle. You can bake it for a few more minutes. Keep an eye on it. Don't overbake, or it will get dry.
Can I make these cookie cups ahead of time?
Absolutely! You can prepare the cookie cups one day before. Just bake them and chill in the fridge. When you are ready to serve, add the crushed Oreos on top for that final touch.
How do I prevent the cookie cups from sticking to the tin?
Use cupcake liners for easy removal. If you prefer not to use liners, spray the tin with non-stick cooking spray. This helps the cookie cups slide out easily after baking. You want to enjoy every bite without a mess!
You learned how to make tasty Oreo Cheesecake Cookie Cups. We covered the needed ingredients, simple steps, and helpful tips. You saw cool variations and smart storage ideas too.
These cookie cups are fun and easy to enjoy. You can customize them to fit your taste. Give them a go, and let your imagination lead! Enjoy each bite as a special treat you made.