Looking for a tasty and simple snack? You’ve found it! Pepperoni cheese crisps are crunchy, cheesy, and incredibly easy to make. With just a few ingredients, you can whip up this delicious treat in no time. Whether you want a quick munch or something to impress your friends, these cheese crisps won't disappoint. Dive into this guide to create your perfect crispy snack!
Why I Love This Recipe
- Quick and Easy: This recipe takes only 20 minutes from start to finish, making it a perfect snack or appetizer for any occasion.
- Crunchy and Satisfying: The cheese crisps provide a delightful crunch that satisfies any craving for something salty and cheesy.
- Customizable: You can easily modify the recipe by adding your favorite toppings or spices to suit your taste.
- Low-Carb Delight: These cheese crisps are a great low-carb snack option, perfect for keto or low-carb diets.
Ingredients
Main Ingredients List
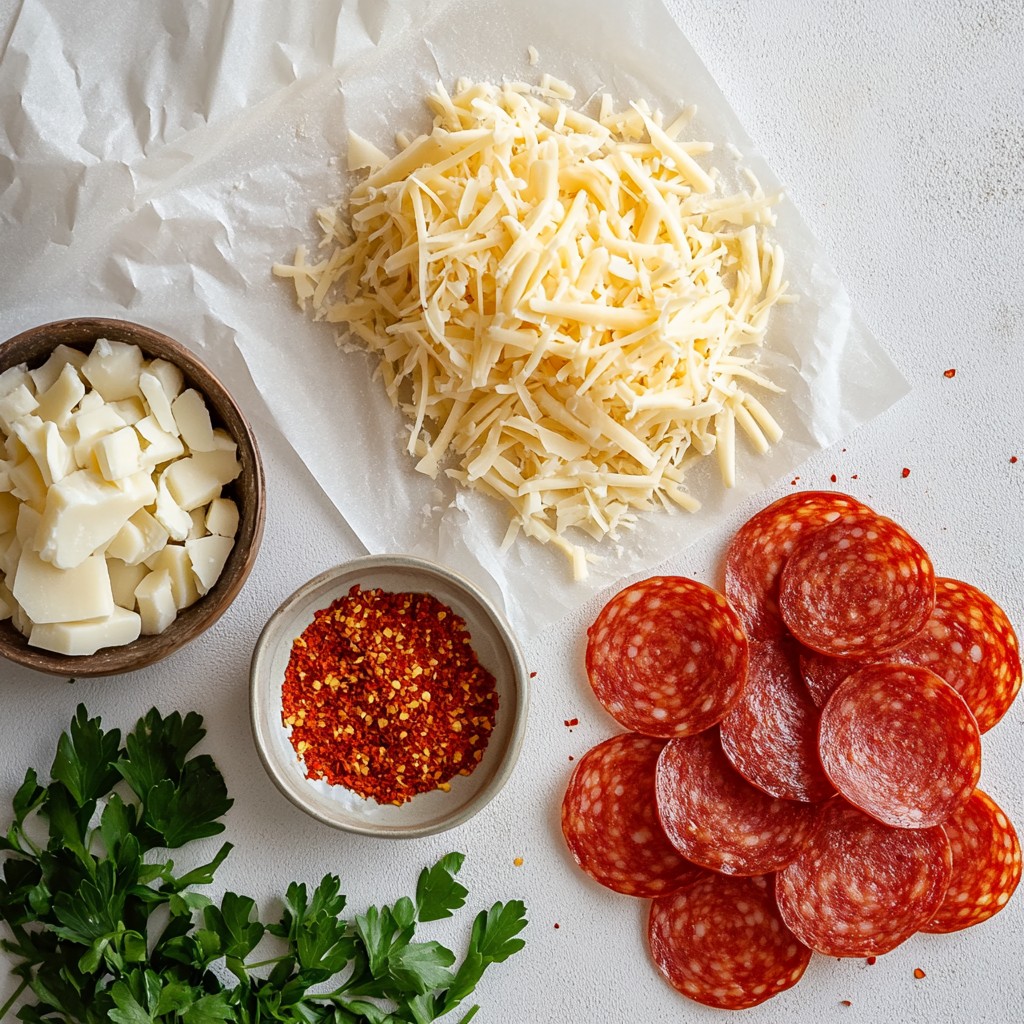
You need just a few simple ingredients to make pepperoni cheese crisps. Here’s what you will need:
- 1 cup shredded cheddar cheese
- 1/2 cup shredded mozzarella cheese
- 1/2 teaspoon garlic powder
- 1/4 cup sliced pepperoni
- Parchment paper
These ingredients blend well together. The cheddar adds a sharp taste, while mozzarella gives a nice stretch.
Optional Ingredients for Extra Flavor
If you want to kick up the flavor, consider these optional ingredients:
- 1/2 teaspoon chili flakes
These flakes add a little heat. You can adjust the amount based on your taste.
Suggested Garnishes
Garnishing can make your dish look nice and add freshness. I suggest:
- Fresh parsley, finely chopped
Sprinkling parsley on top adds color and a fresh taste. It makes the dish more appealing.
Feel free to experiment with these ingredients. Each choice can change the flavor!
Step-by-Step Instructions
Prepping the Oven and Baking Sheet
Start by preheating your oven to 400°F (200°C). This heat will make your cheese crisps nice and crunchy. Next, line your baking sheet with parchment paper. This helps the crisps not to stick. Make sure the paper covers the whole sheet for best results.
Mixing the Cheese and Seasonings
In a bowl, mix together 1 cup of shredded cheddar cheese and 1/2 cup of shredded mozzarella cheese. These two cheeses blend well for flavor and texture. Now, add 1/2 teaspoon of garlic powder and, if you like spice, 1/2 teaspoon of chili flakes. Stir the mix well. This step is key for even seasoning.
Forming and Baking the Cheese Mounds
Using a tablespoon, scoop small mounds of the cheese mix onto the baking sheet. Leave space between each mound. They will spread while baking. Press a slice of pepperoni on top of each mound. This gives a pop of flavor. Bake in the oven for 8-10 minutes. Keep an eye on them. You want the edges to turn golden brown. Once done, let the crisps cool for a few minutes. This helps them firm up. Then, move them to a plate and garnish with finely chopped parsley for a fresh touch. Enjoy your tasty snack!
Tips & Tricks
Ensuring Perfect Texture
To get the best texture, use fresh cheese. Fresh cheese melts better and gives a nice crisp. Mix equal parts cheddar and mozzarella for a perfect balance. Cheddar adds sharpness, while mozzarella offers stretch. Aim for little mounds, around 2 tablespoons each, to help them crisp evenly.
How to Avoid Sticking
To prevent sticking, always use parchment paper. It acts as a barrier between the cheese and the baking sheet. Make sure you space the mounds apart. This gives them room to expand while baking. If you see them merging, just separate them with a spatula after baking.
Best Serving Temperature
Let the cheese crisps cool for a few minutes after baking. They firm up as they cool and become crunchier. Serve them warm for the best taste. If you let them sit too long, they may lose their crunch. Enjoy them right away for a delightful snack!
Pro Tips
- Use Fresh Ingredients: Freshly shredded cheese will melt better and provide a creamier texture compared to pre-packaged shredded cheese.
- Customize Your Toppings: Feel free to experiment with different toppings like diced jalapeños or olives for a unique flavor twist.
- Watch the Baking Time: Keep an eye on the crisps while baking, as oven temperatures can vary; remove them as soon as the edges turn golden.
- Let Them Cool: Allow the cheese crisps to cool on the baking sheet for a few minutes before transferring to a plate to ensure they firm up properly.
Variations
Different Cheese Combinations
You can switch the cheese in your pepperoni cheese crisps. Cheddar and mozzarella work well, but try other cheeses too. Here are some great options:
- Parmesan: Adds a nutty flavor.
- Gouda: Gives a creamy texture.
- Pepper Jack: Adds a spicy kick.
Mixing different cheeses creates unique flavors. Experiment to find your favorite blend!
Alternative Toppings
While pepperoni is classic, you can try different toppings. Here are some ideas to get you started:
- Olives: Add a briny taste.
- Jalapeños: For heat and crunch.
- Cooked bacon: Brings a smoky flavor.
Feel free to get creative! Use whatever you have in your fridge.
Spicy vs. Mild Options
You can choose to make your crisps spicy or mild. If you like heat, add chili flakes to the cheese mix. You can adjust the amount based on your taste. If you prefer mild flavors, simply leave them out.
You can also use spicy toppings like hot sausage or jalapeños. For a milder option, stick with just cheese and pepperoni. The choice is yours!
Storage Info
How to Store Leftovers
Store leftover cheese crisps in an airtight container. Place a piece of parchment paper between layers. This keeps them crunchy. Keep them in the fridge for up to three days. They taste best fresh, but you can save some for later.
Reheating Tips
To reheat, use an oven or an air fryer. Preheat the oven to 350°F (175°C). Place crisps on a baking sheet for about 5 minutes. This brings back their crunch. An air fryer works well too. Set it to 350°F, and heat for 3 minutes.
Freezing Cheese Crisps
You can freeze cheese crisps for later use. First, let them cool completely. Then, place them in a single layer on a baking sheet. Freeze for 1-2 hours until solid. After that, transfer them to a freezer bag. They can stay frozen for up to two months. When you're ready, thaw in the fridge before reheating.
FAQs
Can I make pepperoni cheese crisps in advance?
Yes, you can make pepperoni cheese crisps ahead of time. Bake them, then cool completely. Store them in an airtight container. They stay fresh for about three days. If you want them crisp again, just reheat them in the oven for a few minutes.
What can I use instead of pepperoni?
If you want a change, you can use turkey pepperoni or salami. You can also try olives, diced ham, or even cooked bacon. These options add different flavors. You can even skip meat altogether and just enjoy the cheese!
Are there any healthy variations for this recipe?
Yes, you can make healthy swaps. Try using low-fat cheese to cut calories. You can also add veggies, like spinach or bell peppers, for more nutrients. Using herbs instead of garlic powder can add flavor too. Enjoy experimenting with these ideas!
This post covered how to make delicious cheese crisps. You learned about key ingredients, optional flavors, and garnishes. I shared easy steps for mixing and baking. Tips helped ensure the right texture and avoid sticking. You also discovered tasty variations and simple storage methods.
In the end, you can enjoy these crispy snacks any way you like. Creating your own cheese crisps is fun and rewarding. Enjoy experimenting with flavors and serving them to friends!