Get ready to elevate your snack game with my easy recipe for garlic knots! These fluffy, buttery bites are packed with irresistible flavor. In this post, I’ll share essential ingredients, step-by-step instructions, and some fun variations to try. Whether you’re a kitchen newbie or a seasoned pro, there’s something here for everyone. So grab your apron and let’s make garlic knots that will leave everyone asking for more!
Ingredients
Essential Ingredients for Garlic Knots
To make the best garlic knots, you need some key items. Here is what you should gather:
- 2 cups all-purpose flour
- 1 teaspoon active dry yeast
- 1 teaspoon sugar
- 3/4 cup warm water (about 110°F)
- 1/2 teaspoon salt
- 1 tablespoon olive oil
- 4 tablespoons unsalted butter, melted
- 4 cloves garlic, minced
- 1 teaspoon dried oregano
- Salt, to taste
These ingredients form the base of your garlic knots. The flour gives structure, while yeast helps them rise. Sugar fuels the yeast for a fluffy texture. Water activates the yeast and brings the dough together.
Optional Ingredients for Extra Flavor
Want to make your garlic knots even tastier? Add some of these optional ingredients:
- 1/2 teaspoon red pepper flakes
- Fresh parsley, finely chopped (for garnish)
Red pepper flakes give your knots a nice kick. Chopped parsley is great for a pop of color and freshness. You can mix and match these based on your taste.
Best Types of Flour to Use for Garlic Knots
For garlic knots, you have choices when it comes to flour. The best option is all-purpose flour. It gives a good rise and texture. You can also try bread flour if you want extra chewiness. Avoid using cake flour, as it is too soft for this recipe.
These choices help you create the perfect texture for your knots. Follow this recipe closely for great results.
Step-by-Step Instructions
How to Prepare the Dough
To make the dough, start with warm water. Use about 110°F water. In a small bowl, mix the water with sugar. Then, sprinkle the yeast on top. Let it sit for 5 to 10 minutes. When it bubbles, you know it’s ready.
In a big bowl, combine the flour and salt. After the yeast mixture is frothy, add it to the flour. Also, add the olive oil. Mix well until a dough forms. Then, knead the dough on a floured surface. Do this for 5 to 7 minutes. It should feel smooth and elastic.
Next, put the dough in a greased bowl. Cover it with a damp cloth. Let it rise in a warm spot for about an hour. It should double in size during this time.
Shaping Your Garlic Knots
After the dough rises, punch it down gently. Divide it into 12 equal pieces. Roll each piece into a rope about 6 inches long. Tie each rope into a knot. Make sure to tuck the ends underneath.
Place the knots on a baking sheet lined with parchment paper. Leave space between each knot. This helps them bake evenly.
Baking to Perfection
Now, preheat your oven to 375°F (190°C). In a small pan over medium heat, melt the butter. Add the minced garlic, oregano, and red pepper flakes. Cook for 1 to 2 minutes. The garlic should smell great but not brown.
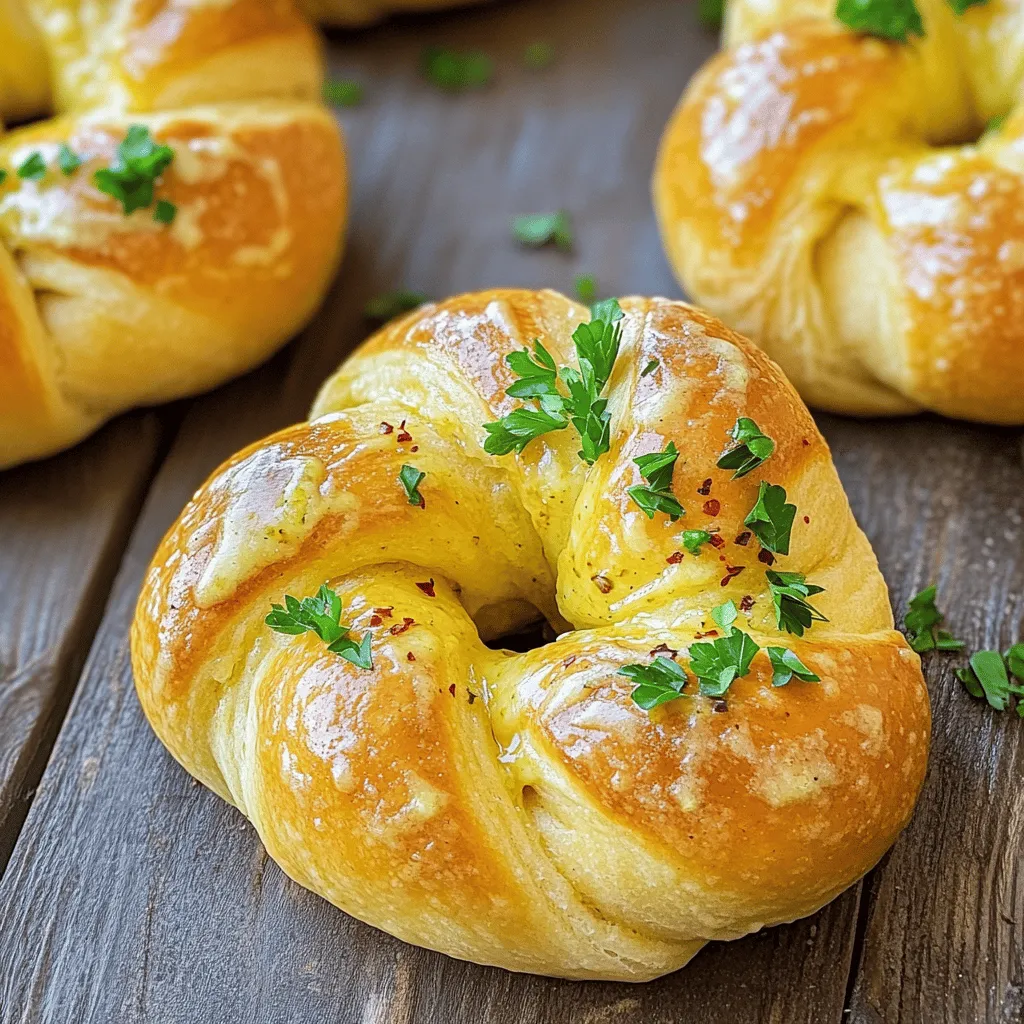
Generously brush the garlic butter over the knots. Then, sprinkle a little salt on top. Bake the knots for 15 to 20 minutes. They should turn golden brown when done.
Once baked, take them out and brush with any leftover garlic butter. You can garnish with chopped parsley if you’d like.Enjoy these tasty garlic knots!
Tips & Tricks
Achieving the Perfect Texture
To get soft and chewy garlic knots, knead the dough well. Knead for about 5-7 minutes. Your dough should feel smooth and elastic. If it feels too sticky, add a little more flour. Letting the dough rise in a warm spot helps it grow. This makes your knots light and airy.
Adjusting Flavor with Garlic Butter
Garlic butter is the star of these knots. Mix melted butter with minced garlic and herbs. Use oregano for a classic taste and add red pepper flakes for heat. Brush this flavorful mix on the knots before baking. For a stronger garlic taste, let the garlic sit in butter for a few minutes.
Making Ahead and Freezing
You can make garlic knots ahead of time. After shaping the knots, place them on a baking sheet. Freeze them for about 30 minutes, then transfer to a bag. You can bake them straight from the freezer. Just add a few extra minutes to the baking time. This way, you can enjoy warm garlic knots anytime!

Variations
Cheese-Stuffed Garlic Knots
You can take garlic knots to the next level with cheese. Choose your favorite cheese, like mozzarella or cheddar. As you shape the dough into ropes, place a small chunk of cheese inside. Tie the dough into a knot, sealing the cheese inside. When baked, the cheese melts and adds a creamy texture. You will love the gooey surprise when you bite into these knots!
Herbed Garlic Knots
Add fresh herbs for a burst of flavor. Mix chopped rosemary, thyme, or basil into the garlic butter. Brush this herbed butter over your knots before baking. The herbs will make your kitchen smell amazing. These knots offer a fresh twist, perfect for any meal.
Spicy Garlic Knots with Jalapeños
If you enjoy heat, try adding jalapeños. Chop fresh or pickled jalapeños and mix them into the garlic butter. Brush this spicy blend onto your knots before baking. The spice will enhance the garlic flavor and give your knots a kick. This variation is perfect for those who love bold flavors.Each of these variations adds a unique touch to your garlic knots. Enjoy experimenting with these ideas!
Storage Info
How to Store Leftover Garlic Knots
To keep your garlic knots fresh, let them cool first. Place them in a container with a lid. You can also wrap them in plastic wrap. Store them at room temperature for up to three days. If you want to keep them longer, the fridge will work too. They will stay fresh for about a week in the fridge.
Reheating Garlic Knots for Best Flavor
Reheating garlic knots can bring back their yummy taste. Preheat your oven to 350°F (175°C). Place the knots on a baking sheet. Cover them with foil to keep them soft. Heat for about 10-15 minutes. You can also microwave them for a quick fix. Heat for about 15-20 seconds, but they might get a bit chewy.
Freezing Garlic Knots for Future Enjoyment
Freezing is a great way to save garlic knots. After they cool, place them in a zip-top bag. Try to remove as much air as you can. They can last up to three months in the freezer. When you want to eat them, thaw in the fridge overnight. Reheat them in the oven for the best taste. Enjoy your garlic knots again without any hassle!
FAQs
Can I use whole wheat flour for garlic knots?
Yes, you can use whole wheat flour. It gives a nutty taste. The texture will be denser. You may need a bit more water. Start with the same amount and add more if needed.
How long do garlic knots last in the fridge?
Garlic knots last about 3 to 4 days in the fridge. Store them in an airtight container. They may lose some crispness. You can reheat them to bring back the warmth.
What can I serve with garlic knots?
Garlic knots pair well with many dishes. You can serve them with marinara sauce for dipping. They also go great with pasta, salads, or soups. Use them to soak up any delicious sauce.
Are garlic knots vegan-friendly?
Garlic knots can be vegan-friendly. Use vegan butter instead of regular butter. Check your yeast to ensure it’s vegan. The other ingredients are plant-based, making them a tasty option.
In this post, we explored how to make garlic knots. We covered key ingredients, step-by-step dough prep, and baking tips. You learned how to change up flavors with cheese or herbs. Proper storage and reheating methods keep them fresh. I hope these tips make your garlic knots a hit! Enjoy creating delicious treats that everyone loves. Happy baking!
- Garlic Knots
