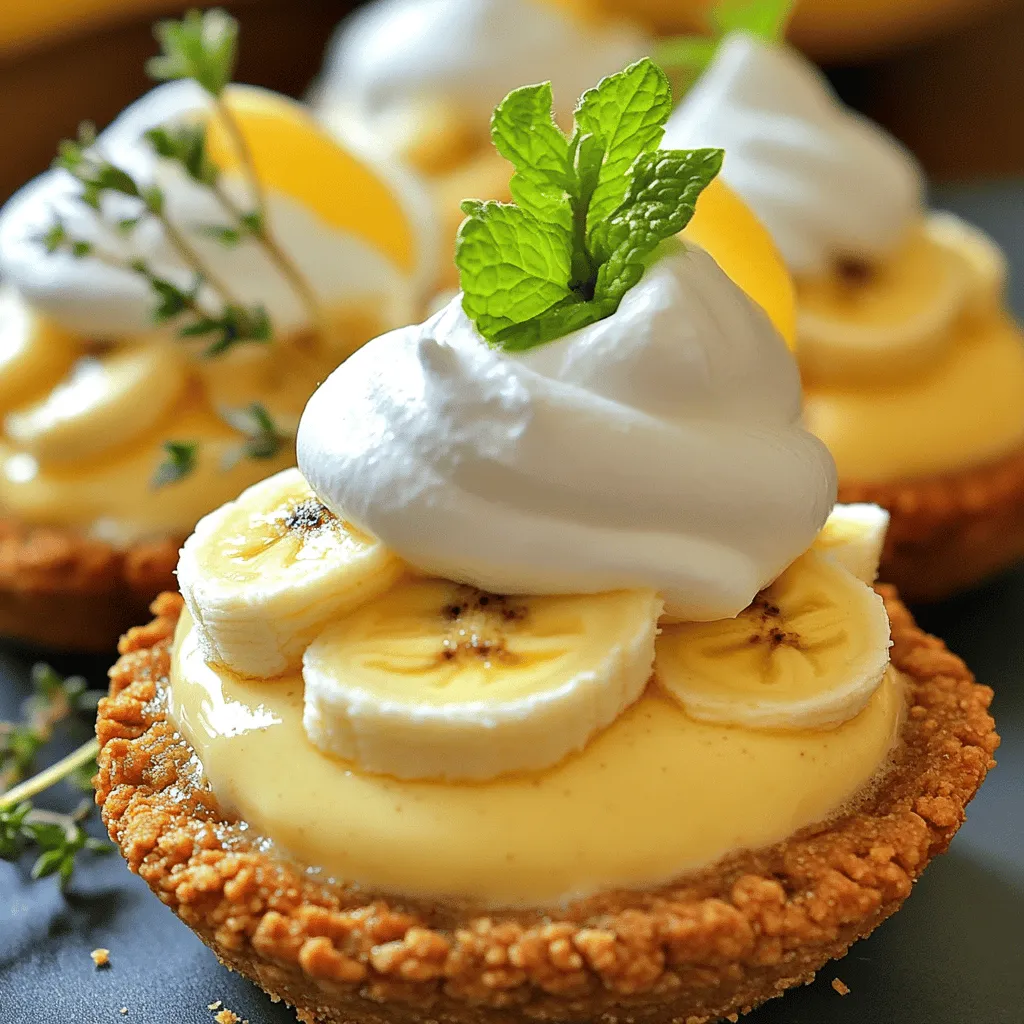
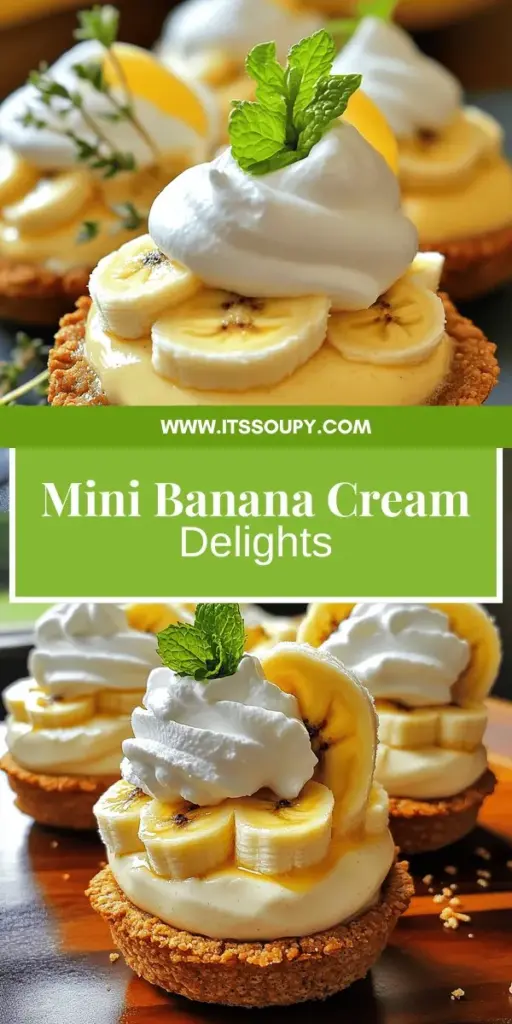
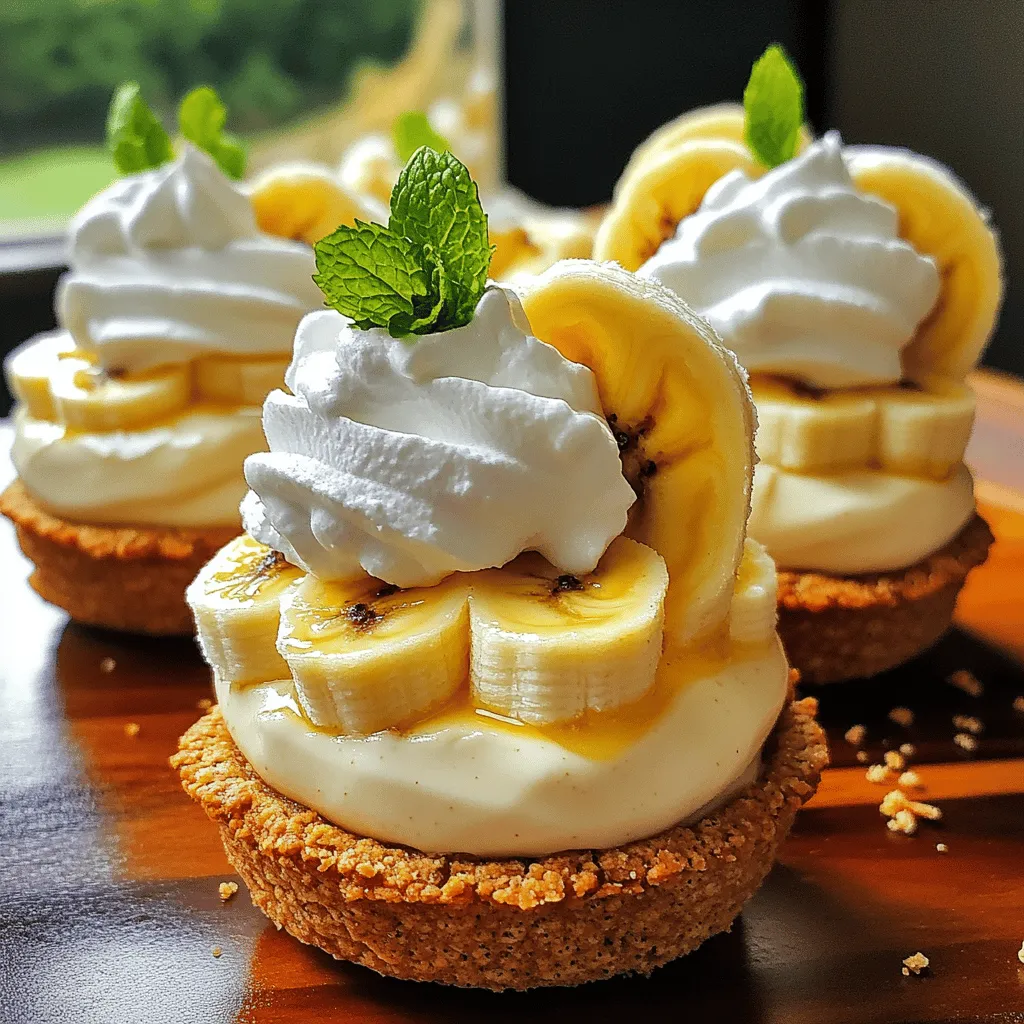
Craving a sweet treat that’s quick and easy? You’re in the right spot! These No Bake Mini Banana Cream Pies are a delicious way to satisfy your dessert dreams without turning on the oven. Grab your ingredients and join me as we create these delightful, creamy delights. They’re perfect for a snack, party, or anytime you’ve got a banana to spare. Let’s dive into this tasty adventure together!Each pie has a crunchy crust, creamy filling, and fluffy whipped topping. You will love how easy it is to make these pies without baking.
Detailed Ingredient List
Here is what you need to gather to make these mini pies:
- 1 cup vanilla wafer crumbs
- 3 tablespoons unsalted butter, melted
- 2 ripe bananas, sliced
- 2 cups vanilla pudding (store-bought or homemade)
- 1 cup heavy whipping cream
- 2 tablespoons powdered sugar
- 1 teaspoon vanilla extract
- Fresh mint leaves, for garnish (optional)
Substitutions and Alternatives
You can switch some ingredients if you like. Instead of vanilla wafer crumbs, you can use graham cracker crumbs. If you prefer, you can also use chocolate pudding in place of vanilla. For a dairy-free version, try coconut whipped cream instead of heavy cream. You can still enjoy these pies with your favorite flavors!
Step-by-Step Instructions
Preparing the Crust
First, gather your ingredients for the crust. You need 1 cup of vanilla wafer crumbs and 3 tablespoons of melted unsalted butter. In a medium bowl, mix the crumbs and butter together. Ensure the crumbs are well coated. This mixture will become your crust. Next, press the crumb mixture into mini pie tins or cupcake liners. Aim for a thickness of about 1/4 inch. This helps the crust hold its shape. Place the crusts in the fridge to set while you prepare the filling.
Layering with Bananas
Once the crusts are set, it’s time for the bananas. Take 2 ripe bananas and slice them into thin rounds. Remove the crusts from the fridge. Place a few banana slices at the bottom of each crust. This layer adds sweetness and a fresh taste. Make sure to distribute the banana slices evenly across all the mini pies. The bananas will add a nice texture and flavor.
Adding Pudding and Whipped Cream
Now, let’s add the pudding. You’ll need 2 cups of vanilla pudding, which can be store-bought or homemade. Divide the pudding evenly among the mini crusts. Pour it gently over the banana slices. Smooth it out with a spoon to create an even layer. Next, we will prepare the whipped cream. In a mixing bowl, whip 1 cup of heavy cream with 2 tablespoons of powdered sugar and 1 teaspoon of vanilla extract. Whip it until soft peaks form, which takes about 3-4 minutes.
Finally, top each mini pie with a generous dollop of whipped cream. You can use a spoon or pipe it for a fun look. To finish, add a few banana slices and a mint leaf on top for a pop of color. Now, place the mini pies in the fridge for at least 30 minutes. This helps them chill and set nicely before serving. Enjoy your delicious no bake mini banana cream pies!
Tips & Tricks
Achieving the Perfect Whipped Cream
Start with cold heavy cream for the best results. Use a clean bowl and beaters. Whip the cream until you see soft peaks. Add powdered sugar and vanilla extract for sweetness. Keep whipping until the cream is fluffy but not grainy. This whipped cream will crown your pies perfectly.
Best Practices for Layering
Layering is key to flavor and texture. Start with banana slices at the bottom. This keeps them moist and adds flavor. Pour the vanilla pudding next, covering the bananas well. Smooth it out to avoid air pockets. Finally, top with whipped cream. This creates a lovely height and makes the pies look stunning.
How to Avoid Soggy Crust
To keep your crust crisp, chill it before adding the filling. Use fresh, dry bananas. If bananas sit too long, they release moisture. For added crunch, consider toasting the vanilla wafer crumbs in the oven for a few minutes. This step enhances flavor and keeps them firm. Try these tips for a great pie every time!
Variations
Flavor Additions
You can mix things up with tasty flavors. Chocolate is a great choice. Just add cocoa powder to your vanilla pudding. This gives a rich twist to your mini pies. You can also try coconut. Use coconut cream instead of some of the heavy cream. It adds a tropical vibe that pairs well with bananas.
Alternative Crust Options
If you want a different crust, try graham cracker crumbs. They offer a nice sweet flavor. You can also use crushed almonds for a nutty taste. For a gluten-free option, use gluten-free cookies. Each crust adds its own unique touch to the mini pies.
Serving Suggestions
When it comes to serving, think about toppings. Fresh fruit is a great choice. Add more banana slices or berries on top. You can also drizzle chocolate sauce for extra sweetness. For a crunch, sprinkle some crushed nuts on the whipped cream. These small changes make each pie special and fun.
Storage Info
Best Practices for Refrigeration
To keep your No Bake Mini Banana Cream Pies fresh, store them in the fridge. Use an airtight container to prevent drying out. You can also cover them with plastic wrap. This helps maintain their creamy texture and flavor. Just make sure they are well-chilled before serving.
Freezing Tips for Leftovers
If you have leftover mini pies, you can freeze them. Wrap each pie tightly in plastic wrap. Then, place them in a freezer-safe bag or container. They can last up to two months in the freezer. When you are ready to eat them, thaw them overnight in the fridge. This helps keep the flavor and texture intact.
Shelf Life Details
These mini pies taste best when fresh, but they can last in the fridge for up to three days. Keep an eye on the bananas, as they may brown over time. The whipped cream can lose its fluffiness, so try to enjoy them within a day or two for the best taste.
FAQs
Can I use other fruits in No Bake Mini Cream Pies?
Yes, you can use other fruits. Strawberries, blueberries, and peaches work well. Each fruit adds a unique flavor. Just slice the fruit thinly and layer it like the bananas. You can also mix fruits for extra taste. Think about your favorite fruits and try them out!
How long do No Bake Mini Banana Cream Pies last?
These pies last about three days in the fridge. Keep them covered to stay fresh. After three days, the crust may get soggy. If you want to keep them longer, think about freezing. Just note that freezing may change the texture a bit.
What can I replace vanilla pudding with?
You can use chocolate pudding for a rich twist. Another option is banana pudding for a stronger banana flavor. If you want a lighter choice, try a custard made from scratch. Just make sure any replacement is thick enough for the mini pies.
In this post, we explored making delicious no-bake mini banana cream pies. We covered key ingredients, step-by-step instructions, and helpful tips to create the perfect pie. Additionally, you learned about tasty variations and proper storage methods.
Now, you can impress friends and family with your skills. Enjoy experimenting with flavors and serving styles to make this dessert your own. These pies are fun to make and even better to share. Happy baking!

