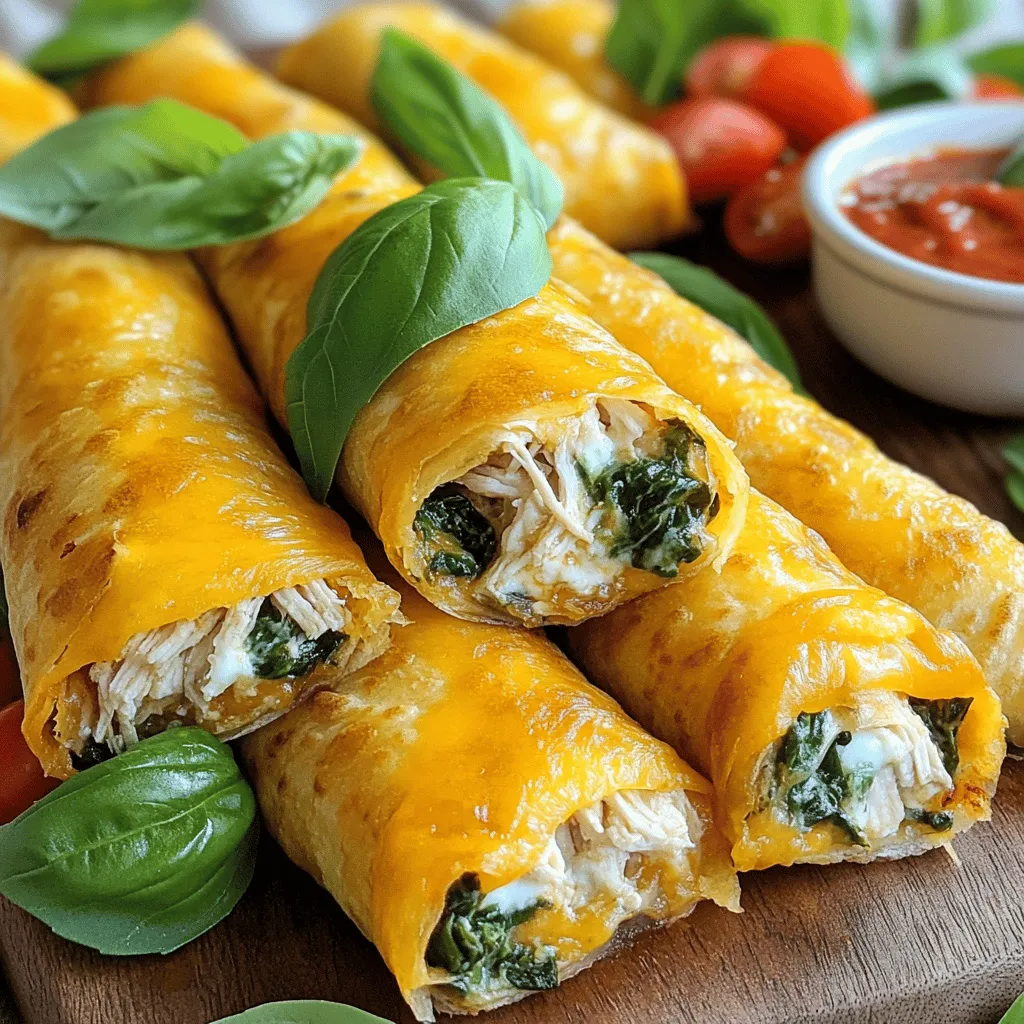
Are you craving a meal that bursts with flavor and is simple to make? Look no further! My Cheesy Garlic Chicken Wraps are perfect for any night. With tender chicken, oozy cheese, and a kick of garlic, these wraps are sure to please your taste buds. Plus, they’re easy to customize! Let’s dive into the ingredients and make your next dinner a delicious experience.
Ingredients
Main Ingredients for Cheesy Garlic Chicken Wraps
– 2 boneless, skinless chicken breasts
– 1 cup shredded mozzarella cheese
– 1/2 cup cream cheese, softened
– 3 cloves garlic, minced
Seasoning and Extras
– 1 teaspoon Italian seasoning
– 1/2 teaspoon red pepper flakes (optional)
– Salt and pepper to taste
Additional Components
– 4 large tortillas (flour or whole wheat)
– 1 cup fresh spinach leaves
– 1/2 cup diced tomatoes
– Olive oil for cooking
– Fresh basil leaves for garnish
The main ingredients set the stage for these cheesy garlic chicken wraps. The chicken gives protein and a hearty base. The blend of mozzarella and cream cheese creates a rich, creamy texture. Garlic adds a punch of flavor, making each bite delightful.
Adding Italian seasoning brings warmth, while red pepper flakes can spice things up. Salt and pepper balance the flavors, making each bite taste just right.
The tortillas act as a vessel, holding all the goodness inside. Fresh spinach gives a crunchy bite, while diced tomatoes add freshness. A bit of olive oil helps cook the wraps to crispy perfection.
Finally, fresh basil leaves not only add color but also enhance the flavor. This mix of ingredients creates a wrap that is loaded with flavor.
Step-by-Step Instructions
Cooking the Chicken
First, season the chicken breasts with salt, pepper, and Italian seasoning. Heat a tablespoon of olive oil in a skillet over medium heat. Place the chicken in the skillet and cook for about 6-7 minutes on each side. You want the chicken to be fully cooked and not pink inside. Once done, take it off the heat and let it rest for a few minutes. Then, shred the chicken into bite-sized pieces. This makes it easy to mix into your wraps.
Preparing the Cheesy Garlic Mixture
In a bowl, combine the shredded chicken with softened cream cheese and shredded mozzarella cheese. Add minced garlic and red pepper flakes if you want a little heat. Mix everything well until it’s fully blended. The cream cheese will help the mixture stick together and give it a creamy texture. This cheesy garlic mixture is packed with flavor and will be the star of your wraps.
Assembling the Wraps
Lay out the tortillas on a clean surface. Start by spreading a layer of fresh spinach leaves on each tortilla. Then, spoon an even amount of the cheesy garlic chicken mixture into the center of each wrap. Top off with diced tomatoes for a fresh crunch. Make sure not to overfill the wraps; this helps keep them neat and easy to handle.
Cooking the Wraps
Heat a bit more olive oil in the same skillet over medium-low heat. Place the wraps seam side down in the skillet. Cook for 2-3 minutes on each side until they turn golden brown and the cheese melts. This step gives the wraps a crispy finish. If you want the perfect golden color, keep an eye on them and flip when ready.Enjoy making your Cheesy Garlic Chicken Wraps!
Tips & Tricks
Perfecting the Wraps
To make your wraps shine, seasoning is key. Use salt, pepper, and Italian seasoning. This mix brings out the chicken’s flavor. Don’t be shy; taste it as you go. You want every bite to burst with flavor.
Texture matters too. Cook the chicken until it’s juicy, yet firm. Shred it into small, even pieces. This helps the wraps hold together. The cheesy filling should be creamy but not runny. If it’s too loose, it will spill out.
Serving Suggestions
When serving, think about sauces and sides. Marinara sauce or ranch dressing works great as dips. You can also try a garlic aioli for a nice twist. For sides, a fresh salad pairs well. It adds a crunch and balances the meal.
Garnishing can elevate your dish. Fresh basil leaves look great and add flavor. You can sprinkle some red pepper flakes on top for a pop of color and spice. Serve the wraps on a bright plate to make them stand out.
Cooking Equipment Recommendations
For cooking, a non-stick skillet is best. It helps the wraps brown nicely without sticking. If you have a cast-iron skillet, that can add great flavor too.
When assembling the wraps, keep it simple. Use a spatula to spread the filling evenly. A sharp knife helps cut the chicken and veggies. Having a clean surface makes it easy to roll the wraps tightly. This way, they stay intact while you cook them.
Variations
Ingredient Swaps
Feel free to mix up the cheese. You can try cheddar, gouda, or pepper jack. Each adds its own twist to the flavor. If you prefer a leaner option, use turkey instead of chicken. You can also swap in tofu for a plant-based choice. Tofu works great when marinated and cooked well.
Flavor Enhancements
Herbs can change the taste of your wraps. Try adding fresh parsley or cilantro for fresh notes. You can also mix in basil for a hint of sweetness. Want more crunch? Add bell peppers or onions. They bring color and a tasty bite to your wraps.
Dietary Adjustments
If you need gluten-free wraps, use corn tortillas instead. They hold the filling well and taste great. For a vegan option, skip the cheese and chicken. Use mushrooms and cashew cream instead. These provide a rich texture and flavor while keeping your wraps delicious.
Storage Info
Refrigeration Tips
Store your Cheesy Garlic Chicken Wraps in an airtight container. This keeps them fresh. You can enjoy them for up to three days in the fridge. If you do not finish them, do not worry! Just make sure to cool the wraps before putting them in the fridge.
Freezing Instructions
To freeze unassembled wraps, lay out your tortillas. Then, fill them with the cheesy chicken mixture. Roll them up but do not cook them yet. Wrap each one tightly in plastic wrap. Then, place them in a freezer bag. They can last up to three months in the freezer.
When you are ready to eat, take out a wrap and let it thaw in the fridge overnight. To reheat, heat a skillet over medium heat. Cook the wraps for about 3-4 minutes on each side. They will get crispy and warm. Enjoy your delicious wraps at any time!
FAQs
Can I make Cheesy Garlic Chicken Wraps ahead of time?
Yes, you can prepare the wraps ahead of time. After assembling, place them in the fridge. Wrap them in plastic wrap or foil to keep them fresh. When you are ready to eat, just heat them in a skillet. This will make them warm and crispy.
What can I use instead of chicken in the recipe?
You can use turkey, tofu, or even beans. If you want a veggie option, consider mushrooms or zucchini. These will still bring great taste and texture to your wraps.
How do I make these wraps spicier?
To add heat, sprinkle more red pepper flakes into the cheesy mixture. You can also add diced jalapeños or use hot sauce. Adjust the spice to match your taste.
Can I use pre-cooked chicken for this recipe?
Yes, using pre-cooked chicken saves time. Just shred the chicken and mix it with the cheesy mixture. This makes the recipe quick and still delicious.
What is the best dipping sauce for these wraps?
I recommend marinara sauce or ranch dressing for dipping. Both add a nice flavor and complement the cheesy garlic deliciousness. You can even try a spicy aioli for extra kick.
How do I reheat leftover Cheesy Garlic Chicken Wraps?
To reheat, place the wraps in a skillet over medium heat. Cook each side for about 2-3 minutes until they are hot and crispy. You can also use a microwave, but the skillet keeps them crispy. Enjoy your meal!
These Cheesy Garlic Chicken Wraps are easy to make and packed with flavor. You learned about the key ingredients and how to assemble this tasty dish. Plus, I shared tips for perfecting your wraps and fun variations to try.
With many options to cater to different tastes and diets, these wraps can become a favorite in your home. Enjoy your cooking and the delicious results!