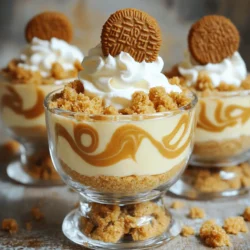
No-Bake Biscoff Cheesecake Cups
Indulge in a delightful treat with these No-Bake Biscoff Cheesecake Cups! Perfectly balanced with a creamy cheesecake filling and a crunchy Biscoff cookie base, these cups are an easy and delicious dessert option. Learn how to whip up this no-bake dessert in just 20 minutes and let it chill for a perfect finish. Click through to discover the full recipe and impress your friends and family with this sweet sensation!